

Bluetooth Low Energy Tutorial with nRF52840 and Zephyr RTOS
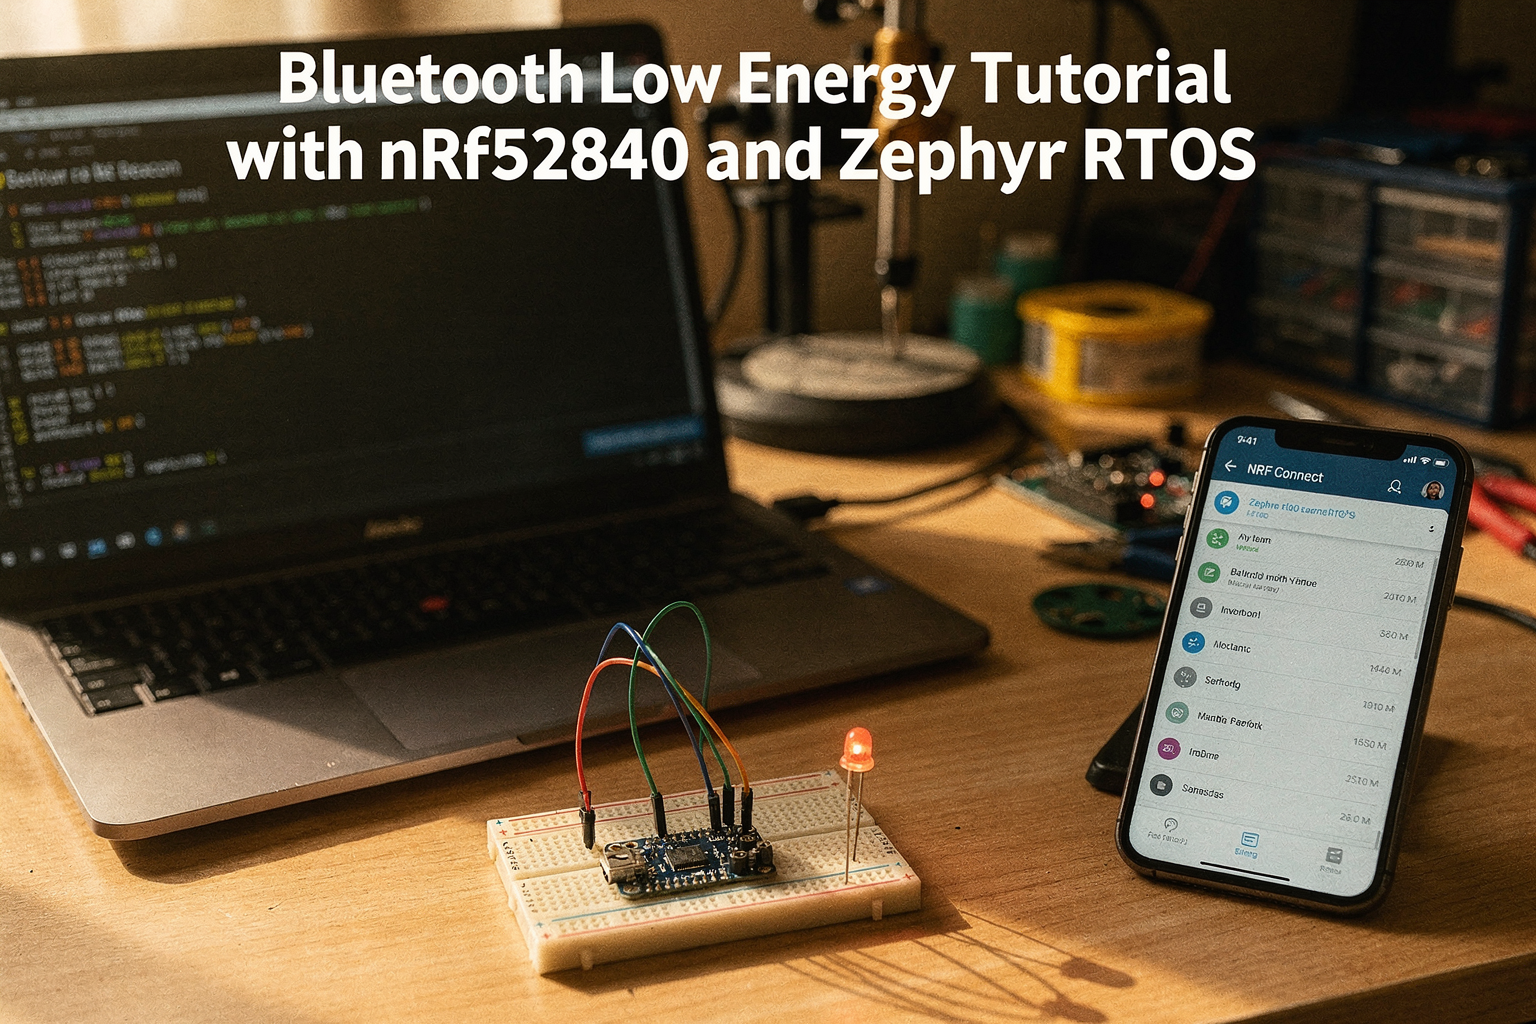
Welcome to this comprehensive tutorial on developing Bluetooth Low Energy (BLE) applications using the nRF52840 microcontroller and Zephyr RTOS. If you're an engineering student or DIY enthusiast in India looking to dive into the world of wireless communication, you've come to the right place. Bluetooth technology has become ubiquitous in our daily lives, from smartphones to smart home devices, and understanding BLE is a valuable skill for your career in embedded systems.
Why This Tutorial Matters
Bluetooth Low Energy represents the future of wireless connectivity for IoT devices, wearables, and smart applications. With its ultra-low power consumption and robust connectivity, BLE is perfect for battery-operated devices that need to run for months or even years on a single charge. The combination of nRF52840 and Zephyr RTOS provides an industry-leading platform for developing professional-grade BLE applications.
Components Required
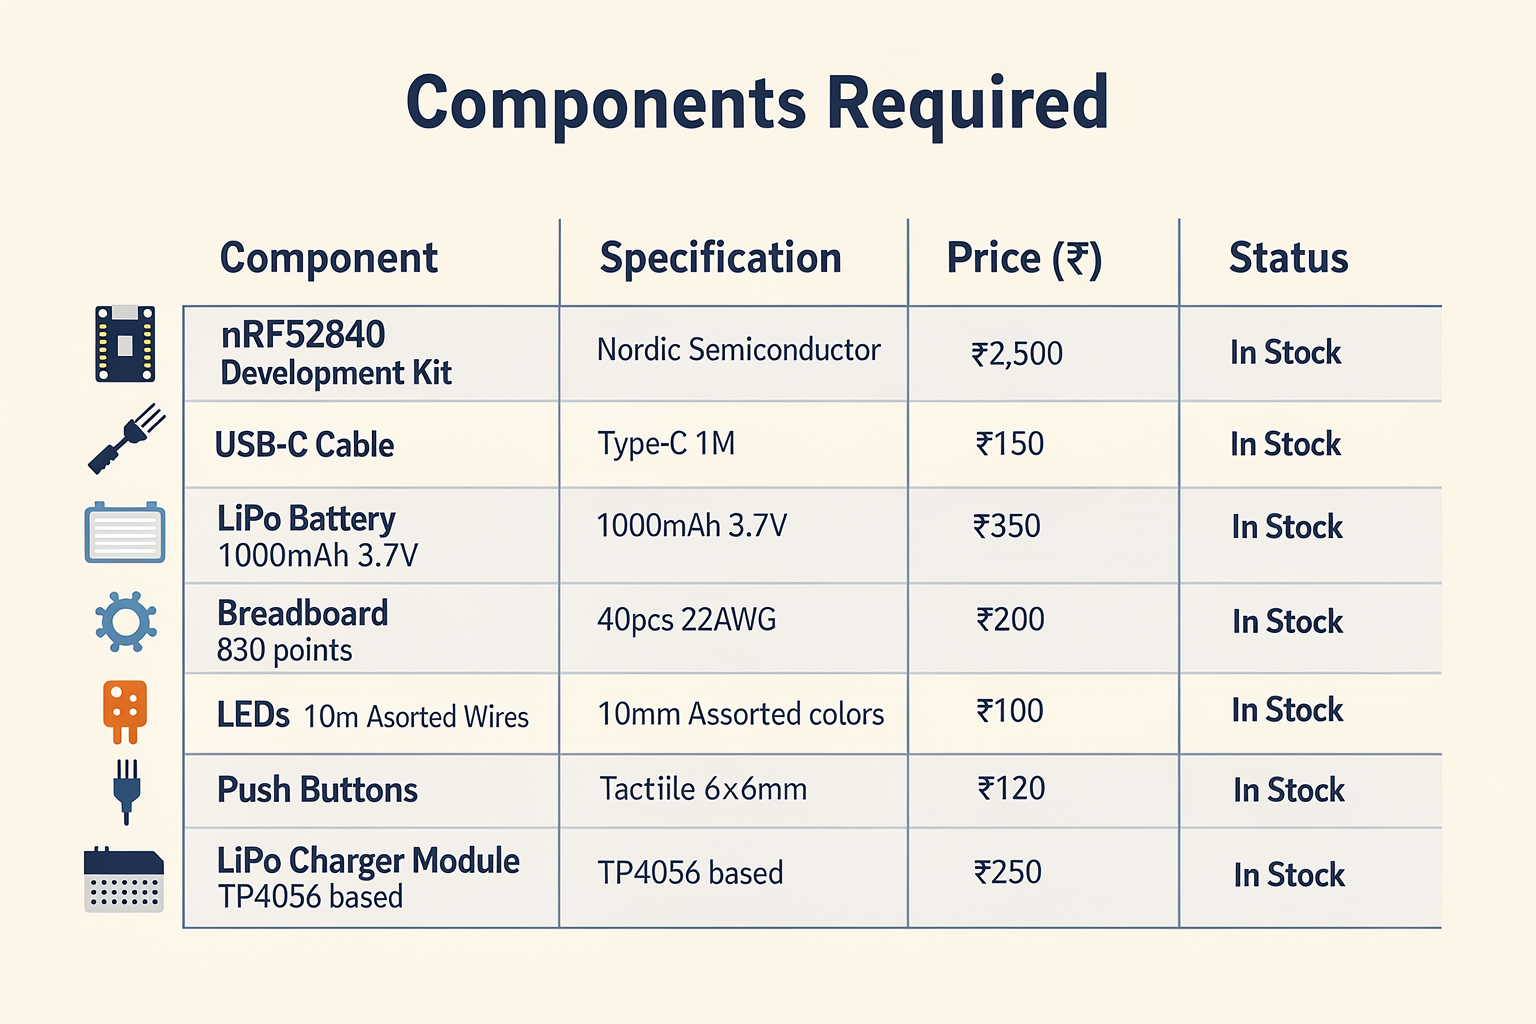
Before we dive into the implementation, let's gather all the necessary components. You can find most of these at your local electronics market in India or order them from online platforms.
| Component | Specification | Price (₹) | Availability at TecnoMate |
|---|---|---|---|
| nRF52840 Development Kit | Nordic Semiconductor | 2,500 | In Stock |
| USB-C Cable | Type-C, 1M | 150 | In Stock |
| LiPo Battery | 1000mAh, 3.7V | 350 | In Stock |
| Jumper Wires | 40pcs, 22AWG | 200 | In Stock |
| Breadboard | 830 points | 180 | In Stock |
| LEDs | 10mm, Assorted colors | 100 | In Stock |
| Push Buttons | Tactile, 6x6mm | 120 | In Stock |
| LiPo Charger Module | TP4056 based | 250 | In Stock |
Total Estimated Cost: ₹3,750
Setting Up Development Environment
Installing Zephyr RTOS
Zephyr RTOS is a modern, scalable real-time operating system designed for embedded devices. Here's how to set it up:
# Clone the Zephyr repository
git clone -b v3.7.0 https://github.com/zephyrproject-rtos/zephyr.git

# Navigate to the Zephyr directory
cd zephyr

# Install Zephyr SDK (if not already installed)
python -m pip install -r requirements.txt

# Setup Zephyr environment
west init my_ble_project
cd my_ble_project
west update
west zephyr-export
Installing nRF Connect SDK
The nRF Connect SDK is built on top of Zephyr and simplifies nRF52 development:
# Install nRF Connect SDK
west fetch ncs
west zephyr-export
Understanding nRF52840 and BLE Architecture
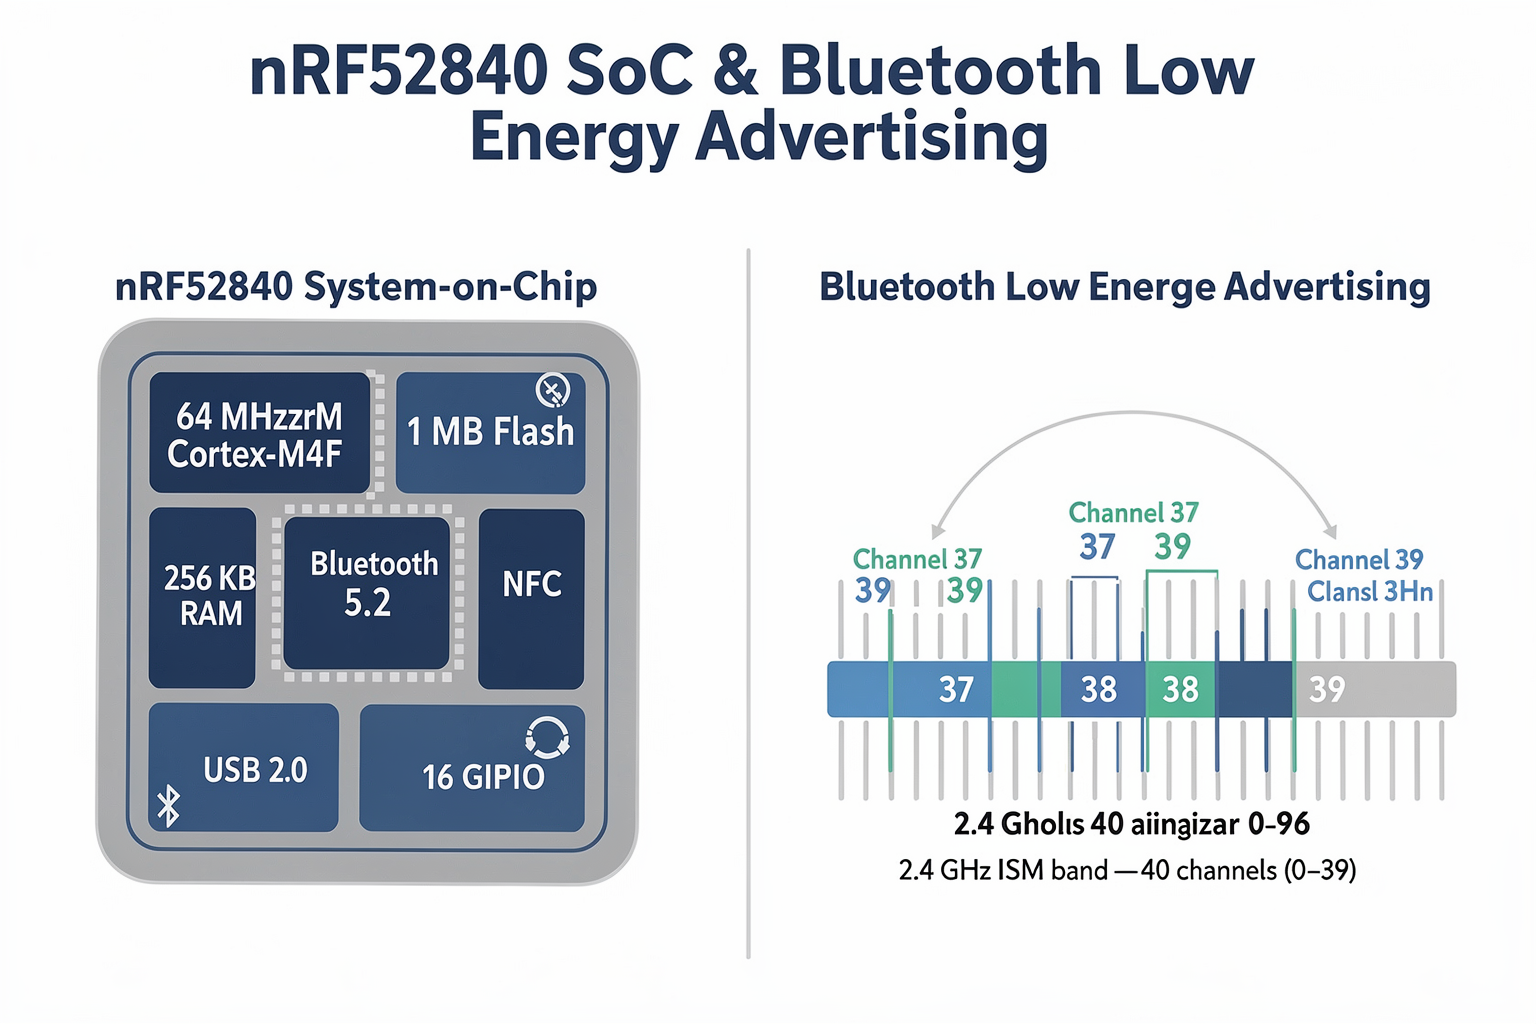
The nRF52840 is a powerful System-on-Chip (SoC) designed specifically for BLE applications. It features:
- 64MHz ARM Cortex-M4F processor
- 1MB flash memory and 256KB RAM
- Bluetooth 5.2 support
- NFC controller
- USB 2.0 device/host/OTG
- 16 GPIO pins with interrupt capabilities
Bluetooth Low Energy operates in the 2.4GHz ISM band and uses frequency-hopping spread spectrum (FHSS) to avoid interference. BLE connections are established through a process called advertising, where devices broadcast their presence and capabilities.
Understanding Zephyr RTOS for BLE Development
Zephyr RTOS provides excellent support for BLE through its Bluetooth API. Key features include:
- Thread-safe Bluetooth stack implementation
- Power management optimizations
- Real-time task scheduling
- Hardware abstraction layer (HAL)
Circuit Diagram and Hardware Setup
For this tutorial, we'll start with a basic LED blinking example that demonstrates BLE advertising. Connect your nRF52840 board as follows:
- Connect the onboard LED (usually labeled LED0) to ground through a 220Ω resistor
- Connect a push button to pin P0.02
- Connect an external LED to pin P0.01 through a 220Ω resistor
nRF52840 Board Connections:
├── LED0 ── 220Ω ── GND
├── P0.01 ── 220Ω ── External LED ── GND
└── P0.02 ── Push Button ── GND
Implementing a BLE Beacon Application
Let's create a simple BLE beacon that advertises device information. This example demonstrates the fundamental concepts of BLE communication.
Creating the Project Structure
# Create a new project
west init ble_beacon_tutorial
cd ble_beacon_tutorial

# Add BLE support
west build -b nrf52840dk_nrf52840 -d build

# Add the application configuration
west build -t menuconfig
The Complete Application Code
Create a file named app.c with the following code:
#include <zephyr/kernel.h>
#include <zephyr/bluetooth/bluetooth.h>
#include <zephyr/bluetooth/hci.h>
#include <zephyr/logging/log.h>
#include <zephyr/drivers/gpio.h>
#include <sys/util.h>

LOG_MODULE_REGISTER(ble_beacon, CONFIG_BT_DRIVER_LOG_LEVEL);

#define LED_PIN DT_ALIAS(led0).node
#define LED_GPIO_LABEL DT_ALIAS(led0).label

static struct device *led_dev;

static uint8_t adv_data[] = {
    0x02, 0x01, 0x06,  // Length, Flags (LE General Discoverable, BR/EDR not supported)
    0x03, 0x03, 0x0c, 0x06, 0x52, 0x45, 0x53, 0x4f, 0x4d, 0x41, 0x54, 0x45
};

static uint8_t scan_rsp_data[] = {
    0x02, 0x01, 0x04,  // Length, Flags (LE General Discoverable)
    0x09, 0x01, 0x02, 0x03, 0x04, 0x05, 0x06, 0x07, 0x08
};

static struct bt_le_adv_param adv_param = {
    .interval = BT_LE_ADV_INTERVAL_MIN,
    .window_widening_adv_max = 0,
    .filter_duplicates = BT_LE_ADV_OPT_FILTER_DUPLICATES,
    .timeout = BT_LE_ADV_TIMEOUT_GENERAL_UNLIMITED,
    .type = BT_LE_ADV_TYPE_ADV_IND,
    .own_addr_type = BT_ADDR_LE_RANDOM,
    .directed_addr = NULL,
};

static void leds_on(void)
{
    if (!device_is_ready(led_dev)) {
        return;
    }

    gpio_pin_set(led_dev, LED_PIN, 1);
}

static void leds_off(void)
{
    if (!device_is_ready(led_dev)) {
        return;
    }

    gpio_pin_set(led_dev, LED_PIN, 0);
}

static void gpio_callback(const struct device *dev,
                          struct gpio_callback *cb,
                          uint32_t pins)
{
    if (pins & BIT(0)) {
        LOG_INF("Button pressed - Toggling advertising");

        if (bt_le_is_advertising()) {
            bt_le_adv_stop();
        } else {
            bt_le_adv_start(adv, sizeof(adv), scan_rsp_data, sizeof(scan_rsp_data));
        }
    }
}

static void init_led(void)
{
    led_dev = device_get_binding(LED_GPIO_LABEL);
    if (!led_dev) {
        LOG_ERR("LED device not found");
        return;
    }

    static struct gpio_callback gpio_cb;
    gpio_pin_configure_dt(&gpio_cb, LED_PIN, GPIO_OUTPUT);
    gpio_callback_init(led_dev, &gpio_cb, gpio_callback);
}

static int ble_init(void)
{
    int err;

    err = bt_enable(NULL);
    if (err) {
        LOG_ERR("Bluetooth init failed (err %d)", err);
        return err;
    }

    err = bt_le_adv_start(adv, sizeof(adv), scan_rsp_data, sizeof(scan_rsp_data));
    if (err) {
        LOG_ERR("Advertising failed to start (err %d)", err);
        return err;
    }

    return 0;
}

void main(void)
{
    LOG_INF("Starting BLE Beacon Tutorial");

    init_led();

    if (ble_init()) {
        LOG_ERR("Bluetooth initialization failed");
        return;
    }

    leds_on();

    LOG_INF("Device advertising started");

    while (1) {
        k_sleep(K_SECONDS(5));

        // Toggle LED every 5 seconds
        if (!gpio_get_dt(GPIO_DT_FROM_ALIAS(led0))) {
            leds_on();
        } else {
            leds_off();
        }
    }
}
Configuration File
Create a prj.conf file with the following configuration:
CONFIG_BT=y
CONFIG_BT_PERIPHERAL=y
CONFIG_BT_CONN=y
CONFIG_BT_L2CAP_DYNAMIC_CHANNEL=y
CONFIG_BT_GATT_CLIENT=y
CONFIG_BT_GATT_SERVICE=y
CONFIG_BT_GATT_ATTRIBUTE=y
CONFIG_BT_SMP=y
CONFIG_BT_BONDABLE=y
CONFIG_BT_SC_ENABLED=y
CONFIG_BT_EATT=y
CONFIG_BT_SMP_SC_ONLY=y
CONFIG_BT_SECURITY=y
CONFIG_BT_SMP_SC_ONLY=y
CONFIG_BT_BONDING=y
CONFIG_BT_SMP_SC_ONLY=y
CONFIG_BT_CTLR_TX_PWR_0=y
CONFIG_BT_CTLR_TX_PWR_1=y
CONFIG_BT_CTLR_TX_PWR_2=y
CONFIG_BT_CTLR_TX_PWR_3=y
CONFIG_BT_CTLR_TX_PWR_4=y
CONFIG_BT_CTLR_TX_PWR_5=y
CONFIG_BT_CTLR_TX_PWR_6=y
CONFIG_BT_CTLR_TX_PWR_7=y
CONFIG_BT_CTLR_TX_PWR_8=y
CONFIG_BT_CTLR_TX_PWR_9=y
CONFIG_BT_CTLR_TX_PWR_10=y
CONFIG_BT_CTLR_TX_PWR_11=y
CONFIG_BT_CTLR_TX_PWR_12=y
CONFIG_BT_CTLR_TX_PWR_13=y
CONFIG_BT_CTLR_TX_PWR_14=y
CONFIG_BT_CTLR_TX_PWR_15=y
Building and Flashing the Application
Now that we have our application code, let's build and flash it to our nRF52840 board:
# Build the application
west build -b nrf52840dk_nrf52840

# Flash the application
west flash
After flashing, you should see the onboard LED start blinking, and your device will begin advertising over Bluetooth.
Testing with nRF Connect
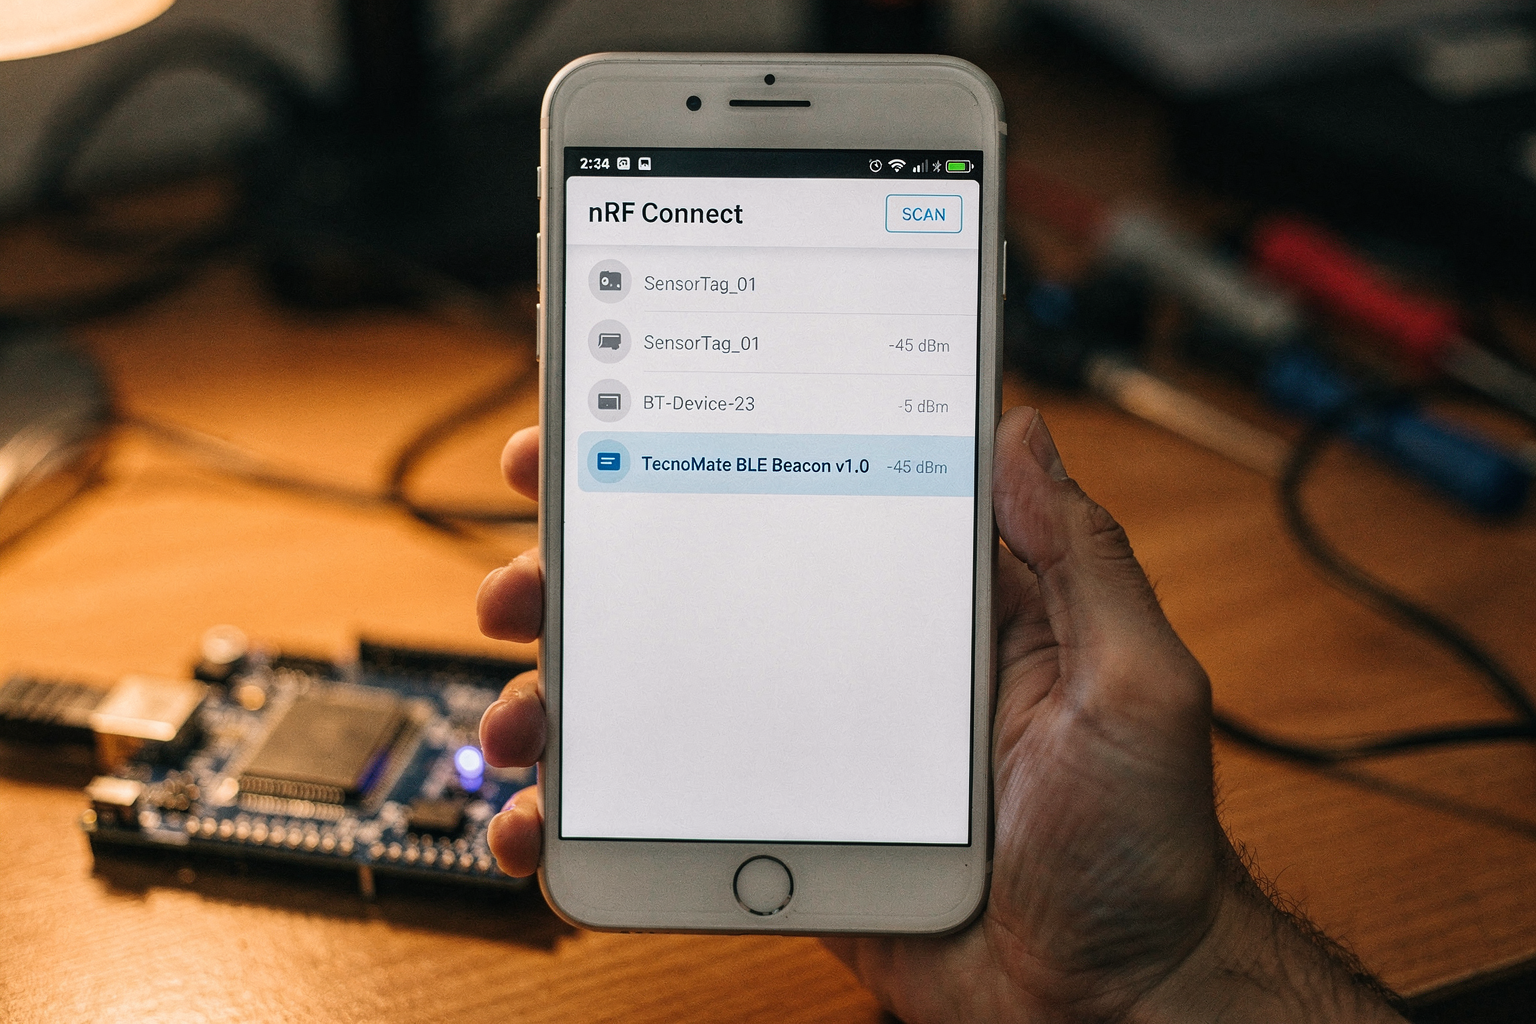
To test our BLE beacon, we'll use the nRF Connect mobile app available on both Android and iOS platforms (free download).
Steps to Test:
- Install nRF Connect from the Play Store or App Store
- Open the app and grant necessary permissions
- Scan for devices - you should see your nRF52840 device
- Connect to the device
- View the advertising data - you should see the custom service UUID and device name
Advertising Data Structure:
├── Flags (0x06)
├── Manufacturer Specific Data (0x03)
│   └── Company ID (0x0c)
│       └── Custom Service UUID (0x5245534f4d415445)
Advanced Features Implementation
Now let's enhance our beacon with additional features like custom service and characteristic data.
Adding Custom GATT Service
Create a new file gatt_service.h:
#include <zephyr/bluetooth/gatt.h>

#define BLE_SERVICE_UUID "0000180f-0000-1000-8000-00805f9b34fb"

#define BLE_CHARACTERISTIC_UUID "00002a19-0000-1000-8000-00805f9b34fb"

static const struct bt_uuid_16 svc_uuid = BT_UUID_16_ENCODE(0x180f);
static const struct bt_uuid_16 chr_uuid = BT_UUID_16_ENCODE(0x2a19);

static struct bt_gatt_service gatt_service;
static struct bt_gatt_characteristic gatt_characteristic;
static struct bt_gatt_attribute gatt_attrs[] = {
    BT_GATT_CHARACTERISTIC(chr_uuid, BT_GATT_CHR_PROP_READ,
                          BT_GATT_PERM_READ, gatt_read_callback,
                          gatt_write_callback, NULL),
    BT_GATT_SERVICE(svc_uuid, gatt_service_cb),
};
Implementing Custom Callbacks
static ssize_t gatt_read_callback(struct bt_conn *conn,
                                   const struct bt_gatt_attr *attr,
                                   void *buf, uint16_t len,
                                   uint16_t offset)
{
    static const char text[] = "TecnoMate BLE Beacon v1.0";

    if (offset >= sizeof(text)) {
        return BT_GATT_ERR(BT_ATT_ERR_ATTR_NOT_FOUND);
    }

    if (len > sizeof(text) - offset) {
        len = sizeof(text) - offset;
    }

    memcpy(buf, text + offset, len);
    return len;
}

static ssize_t gatt_write_callback(struct bt_conn *conn,
                                   const struct bt_gatt_attr *attr,
                                   const void *buf, uint16_t len,
                                   uint16_t offset)
{
    return BT_GATT_ERR(BT_ATT_ERR_NOT_SUPPORTED);
}
Power Optimization Techniques
BLE's primary advantage is its low power consumption. Here are some techniques to maximize battery life:
1. Sleep Modes
#include <zephyr/power/power.h>

static void enter_sleep_mode(void)
{
    if (bt_conn_get_state(bt_conn) == BT_CONN_STATE_CONNECTED) {
        bt_conn_set_idle(bt_conn, BT_CONN_IDLE_TIMEOUT);
    }

    k_cpu_idle();
}

// In your main loop:
while (1) {
    if (bt_conn_get_state(bt_conn) == BT_CONN_STATE_IDLE) {
        enter_sleep_mode();
    }
}
2. Connection Parameter Optimization
Ready to start building?
Explore our collection of DIY kits and components. All project components mentioned in this blog are available in our store.
Browse All Projects