

Introduction
Welcome to this comprehensive tutorial on building an AI-powered smart camera using ESP32 and TinyML technology! In today's world of IoT and edge computing, the ability to process images locally on a microcontroller opens up a world of possibilities for smart applications. This project is perfect for engineering students and DIY enthusiasts in India who want to get hands-on experience with artificial intelligence at the edge.
Imagine a camera that can detect motion, count objects, recognize faces, or identify specific items - all running on a low-cost microcontroller without needing cloud connectivity. That's exactly what we're going to build today! This project combines the power of ESP32's processing capabilities with the efficiency of TensorFlow Lite for Microcontrollers, making it an excellent learning experience for understanding the fundamentals of AI in embedded systems.
The best part? All components are readily available in the Indian market, and the total cost is under ₹2,000, making this an affordable yet powerful project for students and hobbyists alike.
Components Required
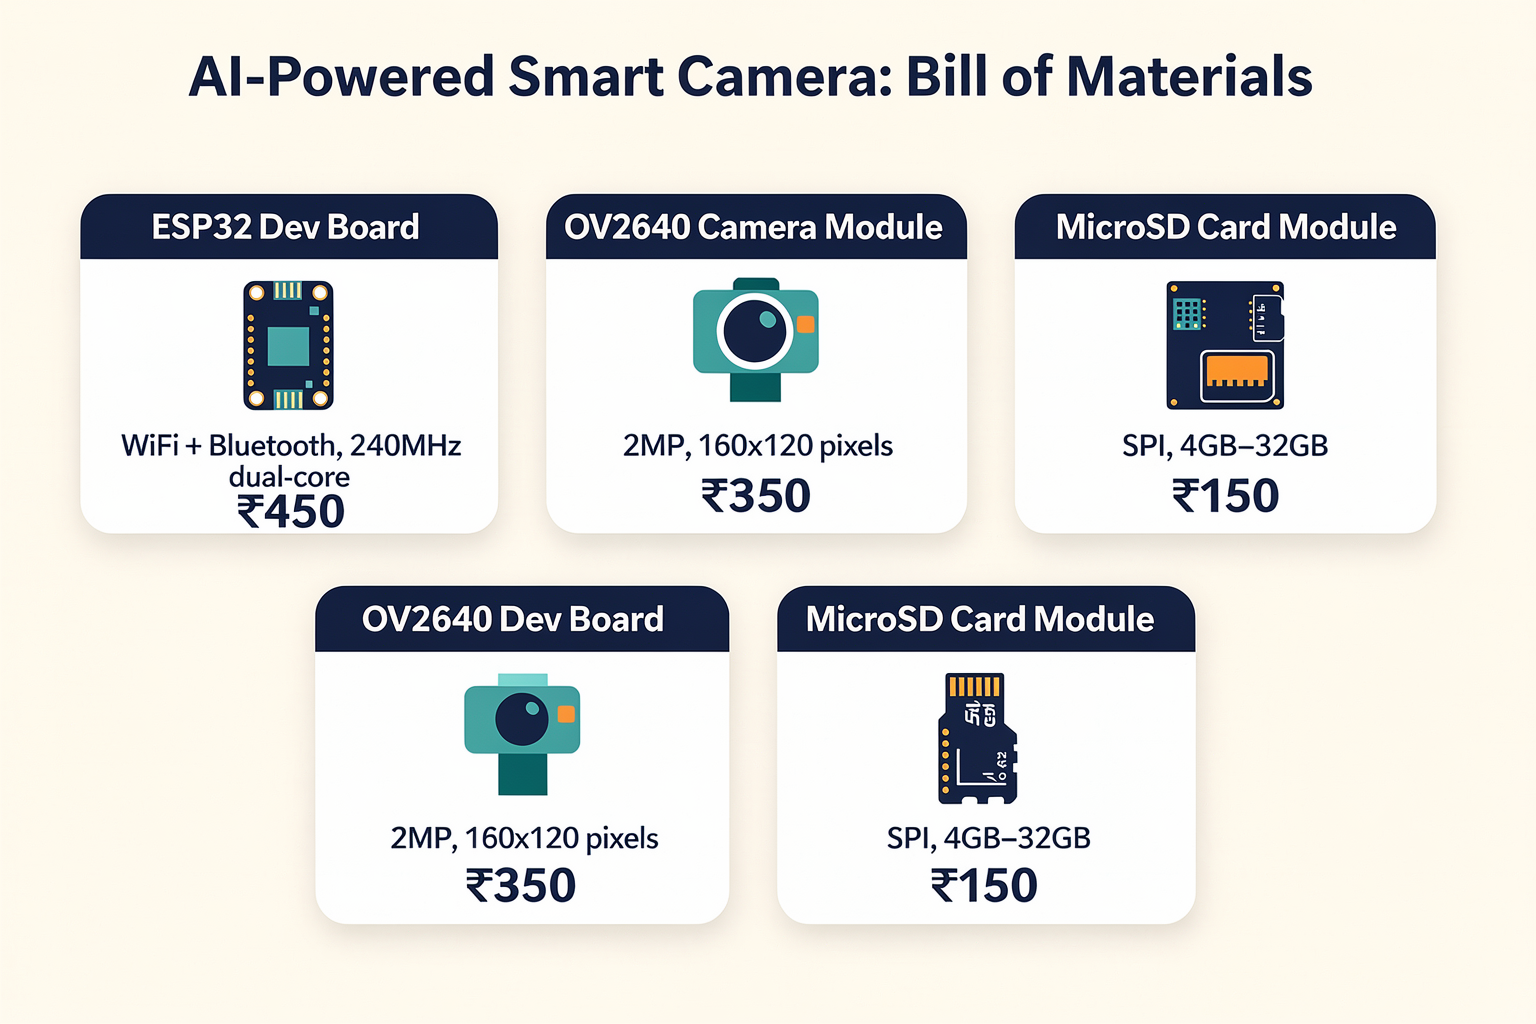
Before we dive into the technical details, let's gather all the necessary components. You can find these at your local electronics market or order them from TecnoMate's online store.
| Component | Specification | Price (₹) | Availability |
|---|---|---|---|
| ESP32 Dev Board | WiFi + Bluetooth, 240MHz dual-core | 450 | Widely available |
| OV2640 Camera Module | 2MP resolution, 160x120 pixels | 350 | Common in Indian markets |
| MicroSD Card Module | 4GB-32GB support, SPI interface | 150 | Easily available |
| Breadboard | 830 tie points, solderless | 100 | Hardware stores |
| Jumper Wires | Male-to-female and male-to-male | 50 | Electronics shops |
| 2000mAh Power Bank | USB powered, stable output | 200 | Mobile accessories |
| 5V Voltage Regulator | Adjustable, heat sink included | 80 | Electronics markets |
| ESP-CAM Adapter | ESP32 + Camera connector board | 300 | Specialized stores |
| USB Cable | Type-A to Micro-USB | 30 | Available everywhere |
Total Estimated Cost: ₹1,760
Understanding the Architecture
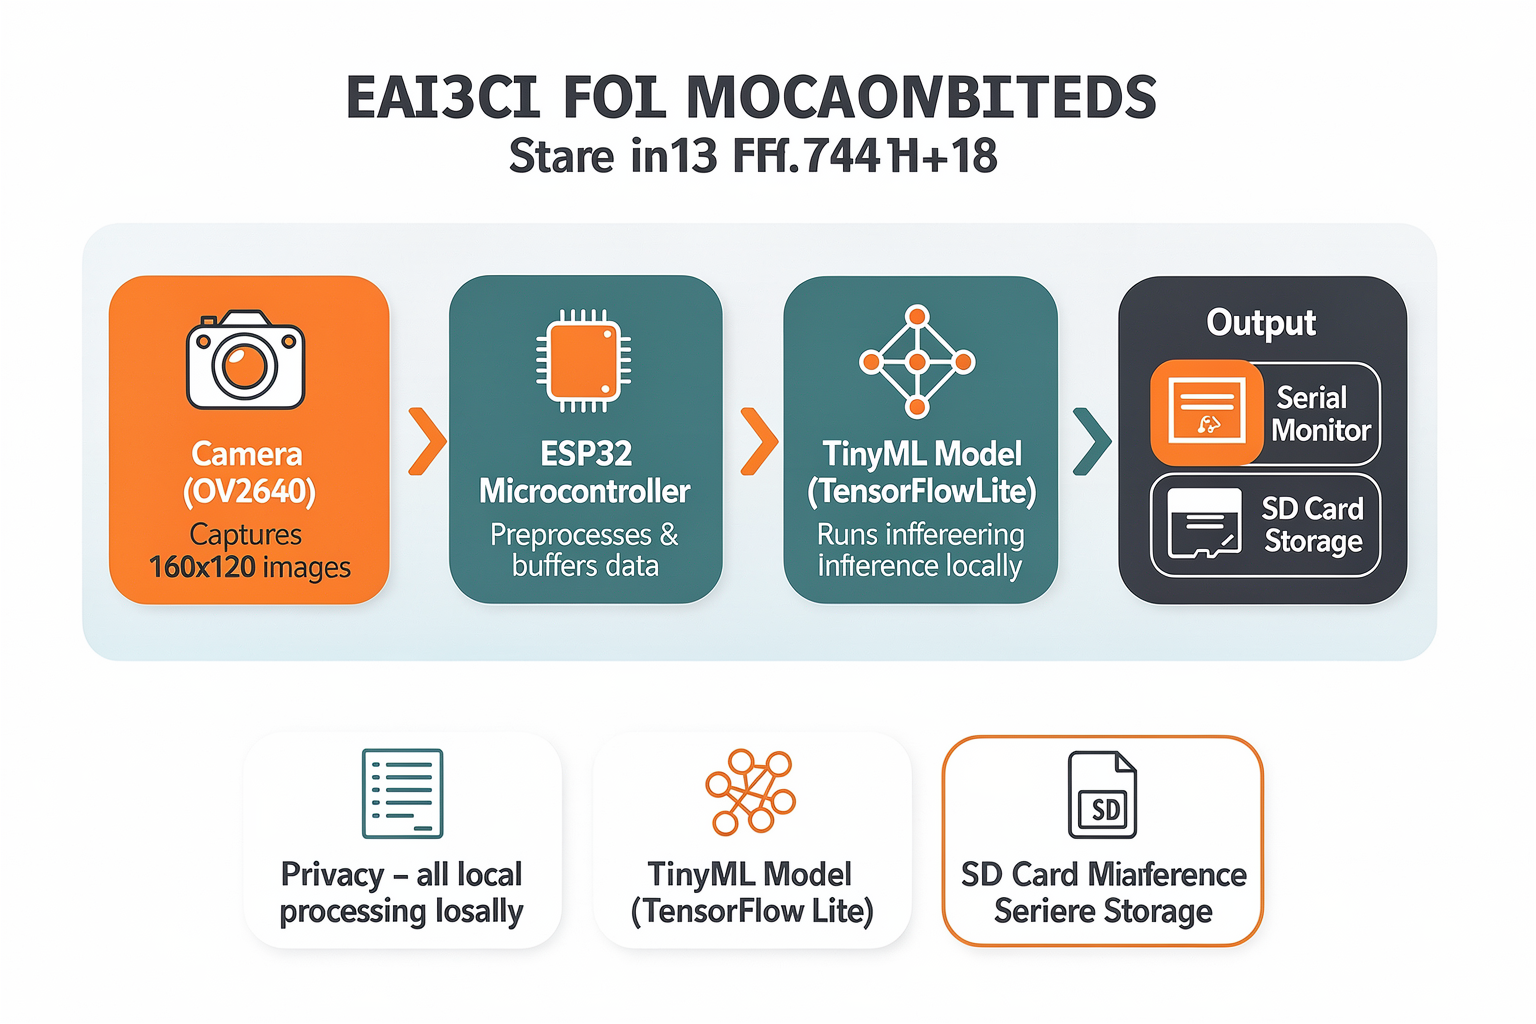
Our smart camera will follow a modular architecture where:
- The OV2640 camera captures images
- ESP32 processes the image data
- TinyML models perform inference locally
- Results are displayed via serial monitor or stored on SD card
This architecture offers several advantages:
- Privacy: All processing happens locally
- Speed: No cloud latency
- Cost-effective: No API charges
- Offline operation: Works without internet
Circuit Diagram and Hardware Setup
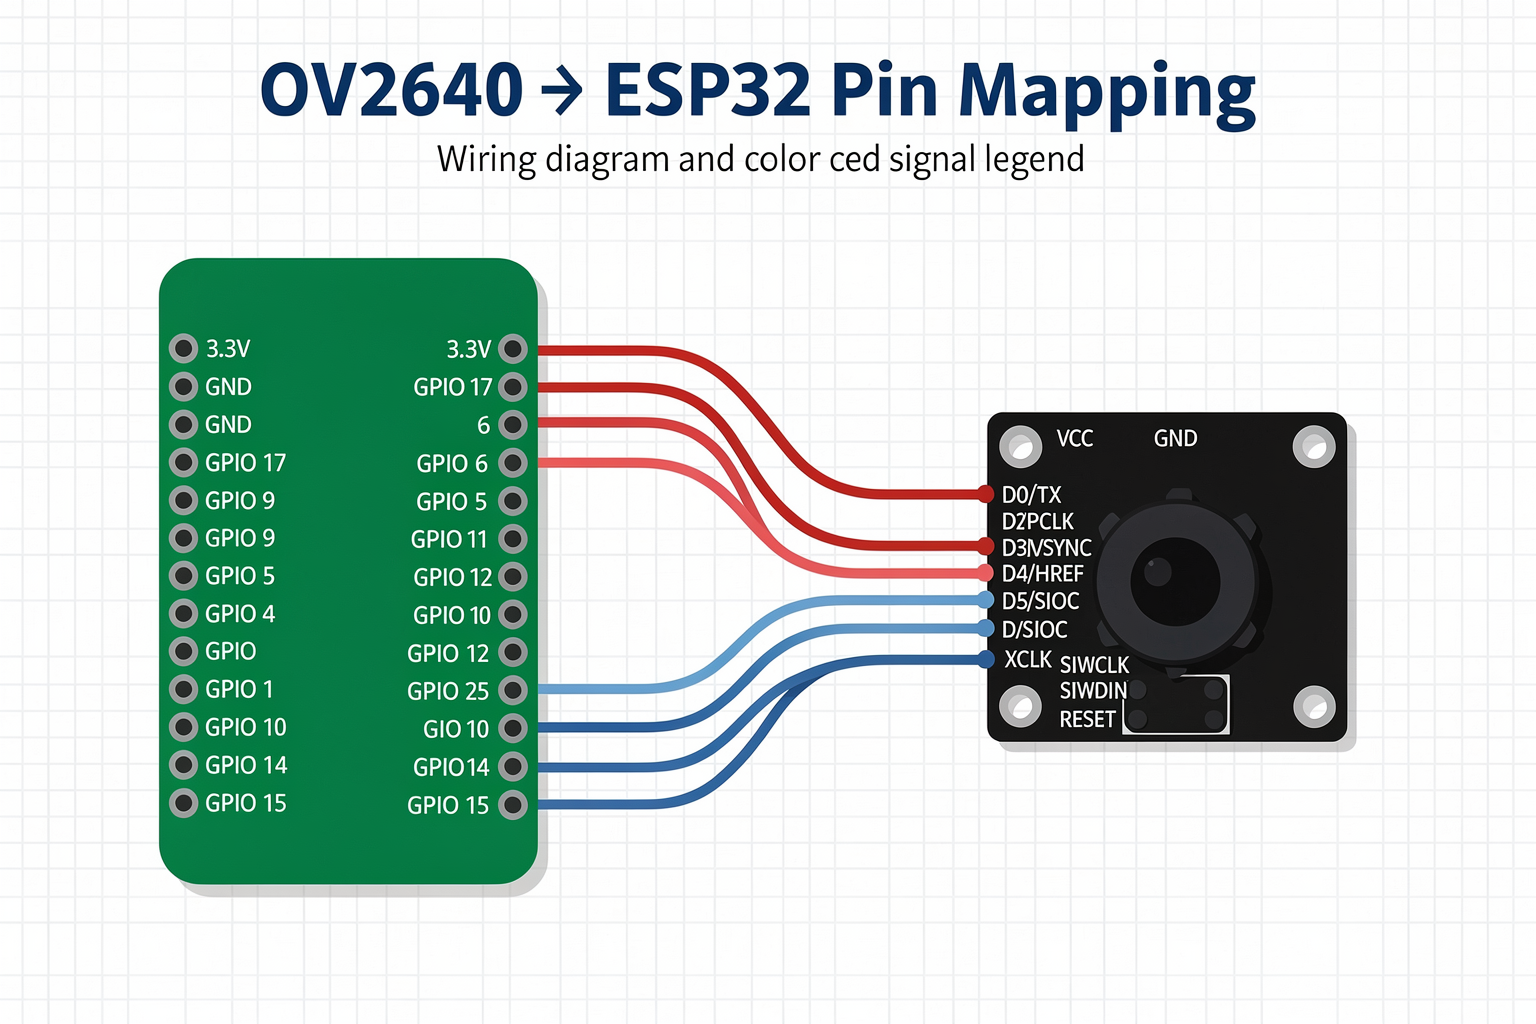
Circuit Connections
OV2640 Camera Module → ESP32
- VCC → 3.3V
- GND → GND
- D0/TX → GPIO 17 (RX)
- D1/RX → GPIO 16 (TX)
- D2/PCLK → GPIO 9
- D3/VSYNC → GPIO 4
- D4/HREF → GPIO 5
- D5/SIOD → GPIO 11
- D6/SIOC → GPIO 12
- XCLK → GPIO 25
- SIWCLK → GPIO 10
- SIWDIN → GPIO 14
- RESET → GPIO 15
Step-by-Step Hardware Assembly
-
Mounting the Camera: Secure the OV2640 camera module to your breadboard using double-sided tape or small screws.
-
Connecting Power: Connect the camera's VCC and GND pins to the ESP32's 3.3V and GND rails. Use the 3.3V pin on ESP32, not the 5V pin, as the camera is 3.3V compatible.
-
Data Line Connections: Carefully connect the data pins according to the table above. Using jumper wires with female connectors makes this process much easier.
-
Power Regulation: If using a power bank, connect it to the ESP32's VIN pin through a 5V regulator module. The ESP32 can handle 5V input, but its voltage regulator will convert it to 3.3V for the camera.
-
SD Card Setup: Connect the SD card module to SPI pins (MOSI, MISO, SCK, CS) and interface pins.
Software Requirements and Setup
Installing Arduino IDE
First, ensure you have the latest version of Arduino IDE installed. If you don't have it:
- Download from arduino.cc
- Install and launch the IDE
- Add ESP32 board support:
// Add these URLs in File > Preferences > Additional Board Manager URLs
http://dl.espressif.com/dl/package_esp32_index.json
Installing Required Libraries
You'll need several libraries for this project. Install them through the Library Manager (Tools > Manage Libraries):
- ESP32 by Espressif Systems - Latest version
- Arduino_OV2640 by Oleg Mazurov - Version 1.0.5 or later
- SD by Arduino - Latest version
- TensorFlowLite by TensorFlow - Latest version
- ArduinoJson by Benoit Blanchon - Version 6.21.3
Code Implementation
Basic Camera Initialization
Let's start with the core camera code that will capture images:
#include <Arduino.h>
#include <Camera.h>
#include <Arduino_OV2640.h>
#include <SD.h>
#include "esp_camera.h"

// Camera pins configuration
#define PWDN_GPIO_NUM     32  // Power down is not connected to Camera module
#define RESET_GPIO_NUM    9   // Reset camera
#define XCLK_GPIO_NUM     25
#define SIOD_GPIO_NUM     11
#define SIOC_GPIO_NUM     12
#define Y9_GPIO_NUM       3
#define Y8_GPIO_NUM       4
#define Y7_GPIO_NUM       5
#define Y6_GPIO_NUM       6
#define Y5_GPIO_NUM       7
#define Y4_GPIO_NUM       8
#define Y3_GPIO_NUM       9
#define Y2_GPIO_NUM       10
#define VSYNC_GPIO_NUM    17
#define HREF_GPIO_NUM     18
#define SIOD_GPIO_NUM     11
#define SIOC_GPIO_NUM     12

// Camera model selection (OMOTEK 32MP is common)
#define CAMERA_MODEL_AI_THINKER

#ifdef CAMERA_MODEL_AI_THINKER
    static const camera_pin_name_t pin_list[] = {
        PWDN_GPIO_NUM, RESET_GPIO_NUM, XCLK_GPIO_NUM, SIOD_GPIO_NUM,
        SIOC_GPIO_NUM, Y9_GPIO_NUM, Y8_GPIO_NUM, Y7_GPIO_NUM, Y6_GPIO_NUM,
        Y5_GPIO_NUM, Y4_GPIO_NUM, Y3_GPIO_NUM, Y2_GPIO_NUM, VSYNC_GPIO_NUM,
        HREF_GPIO_NUM, SIOD_GPIO_NUM, SIOC_GPIO_NUM
    };
#else
    static const camera_pin_name_t pin_list[] = {
        PWDN_GPIO_NUM, RESET_GPIO_NUM, XCLK_GPIO_NUM, SIOD_GPIO_NUM,
        SIOC_GPIO_NUM, Y9_GPIO_NUM, Y8_GPIO_NUM, Y7_GPIO_NUM, Y6_GPIO_NUM,
        Y5_GPIO_NUM, Y4_GPIO_NUM, Y3_GPIO_NUM, Y2_GPIO_NUM, VSYNC_GPIO_NUM,
        HREF_GPIO_NUM, SIOD_GPIO_NUM, SIOC_GPIO_NUM
    };
#endif

Camera_OV2640 cam;

void setupCamera() {
    Serial.begin(115200);
    Serial.println("Initializing camera...");

    // Initialize pins
    pinMode(PWDN_GPIO_NUM, OUTPUT);
    pinMode(RESET_GPIO_NUM, OUTPUT);
    digitalWrite(PWDN_GPIO_NUM, HIGH);
    digitalWrite(RESET_GPIO_NUM, HIGH);

    // Initialize camera
    if (!cam.begin(SIOD_GPIO_NUM, SIOC_GPIO_NUM)) {
        Serial.println("Camera initialization failed!");
        while (1);
    }

    // Configure camera settings
    cam.setImageFormat(CAM_SIZE_QQVGA);
    cam.setJPEGQuality(12);
    cam.setPixelFormat(PIXFORMAT_JPEG);

    Serial.println("Camera initialized successfully!");
}

void captureImage(const char* filename) {
    Serial.printf("Capturing image: %s\n", filename);

    // Capture image
    File file = SD.open(filename, O_CREAT | O_WRITE);
    if (!file) {
        Serial.println("Error creating file!");
        return;
    }

    cam.capture_start();

    // Wait for capture to complete
    while (!cam.capture_is_done()) {
        delay(10);
    }

    // Save to SD card
    unsigned int img_size = cam.capture_savetofile(&file);
    file.close();

    Serial.printf("Image captured and saved! Size: %u bytes\n", img_size);
}
TinyML Model Integration
Now, let's add the AI capabilities using a pre-trained model for object detection:
#include <TensorFlowLite_ESP32.h>
#include <tensorflow/lite/micro/micro_interpreter.h>
#include <tensorflow/lite/micro/micro_mutable_op_resolver.h>
#include <tensorflow/lite/schema/schema_generated.h>

// Load the model into program memory
extern const unsigned char tflite_model[] = {
  #include "model.h"  // You'll need to convert your model to C array
};

// Define input and output tensors
constexpr int kTensorPoolSize = 131072;  // 128KB
alignas(16) static uint8_t tensor_pool[kTensorPoolSize];
tflite::MicroInterpreter* interpreter = nullptr;
TfLiteTensor* input_tensor = nullptr;
TfLiteTensor* output_tensor = nullptr;

void setupML() {
    Serial.println("Setting up TinyML interpreter...");

    // Initialize TensorFlow Lite
    static tflite::MicroMutableOpResolver<6> resolver;
    resolver.AddConv2D();
    resolver.AddMaxPool2D();
    resolver.AddReshape();
    resolver.AddSoftmax();
    resolver.AddDequantize();
    resolver.AddDequantizeLinear();

    // Create interpreter
    static tflite::MicroInterpreter static_interpreter(
        tflite_model, resolver, tensor_pool, kTensorPoolSize, nullptr);
    interpreter = &static_interpreter;

    // Allocate tensor buffers
    TfLiteStatus allocate_status = interpreter->AllocateTensors();
    if (allocate_status != kTfLiteOk) {
        Serial.println("Failed to allocate tensors!");
        return;
    }

    // Get input and output tensors
    input_tensor = interpreter->input(0);
    output_tensor = interpreter->output(0);

    Serial.println("ML model loaded successfully!");
}

// Function to preprocess image for ML model
void preprocessImage() {
    // Convert camera image to model input format
    // This involves resizing, normalization, etc.
    // Implement based on your specific model requirements

    // Example for quantized model:
    // Convert image buffer to int8 array
    for (int i = 0; i < input_tensor->bytes / input_tensor->bytes_per_element; i++) {
        // Your preprocessing logic here
        // Normalize pixel values (0-255 to -1 to 1 or 0 to 255)
    }
}

// Function to run inference
void runInference() {
    // Preprocess the image
    preprocessImage();

    // Set input tensor
    TfLiteStatus invoke_status = interpreter->Invoke();

    if (invoke_status != kTfLiteOk) {
        Serial.println("Failed to invoke interpreter!");
        return;
    }

    // Get output predictions
    TfLiteStatus output_status = interpreter->output(0, output_tensor);

    // Process results
    processPredictions(output_tensor);
}

void processPredictions(TfLiteTensor* output) {
    // Extract class probabilities from output
    // This depends on your model's output format

    Serial.println("Running object detection...");

    // Example: Print top 3 predictions
    for (int i = 0; i < 3; i++) {
        float confidence = output->data.f[i];
        Serial.printf("Prediction %d: %.2f%%\n", i, confidence * 100);
    }
}
Main Program with Motion Detection
Let's combine everything into a complete program with motion detection:
#include <Arduino.h>
#include <Camera.h>
#include <Arduino_OV2640.h>
#include <SD.h>
#include "esp_camera.h"
#include <TensorFlowLite_ESP32.h>

// Include the earlier camera and ML code here...

// Motion detection variables
#define MOTION_THRESHOLD 2000  // Number of changed pixels to trigger motion
#define FRAME_SKIP 10          // Skip frames for performance

unsigned long lastCaptureTime = 0;
unsigned long motionDetectedTime = 0;
bool motionActive = false;

void setup() {
    Serial.begin(115200);
    delay(1000);

    // Initialize SD card
    if (!SD.begin()) {
        Serial.println("SD card initialization failed!");
        return;
    }
    Serial.println("SD card ready!");

    // Initialize components
    setupCamera();
    setupML();

    // Create directory for images
    if (!SD.mkdir("cam_photos")) {
        Serial.println("Warning: Directory already exists");
    }

    Serial.println("Setup complete!");
}

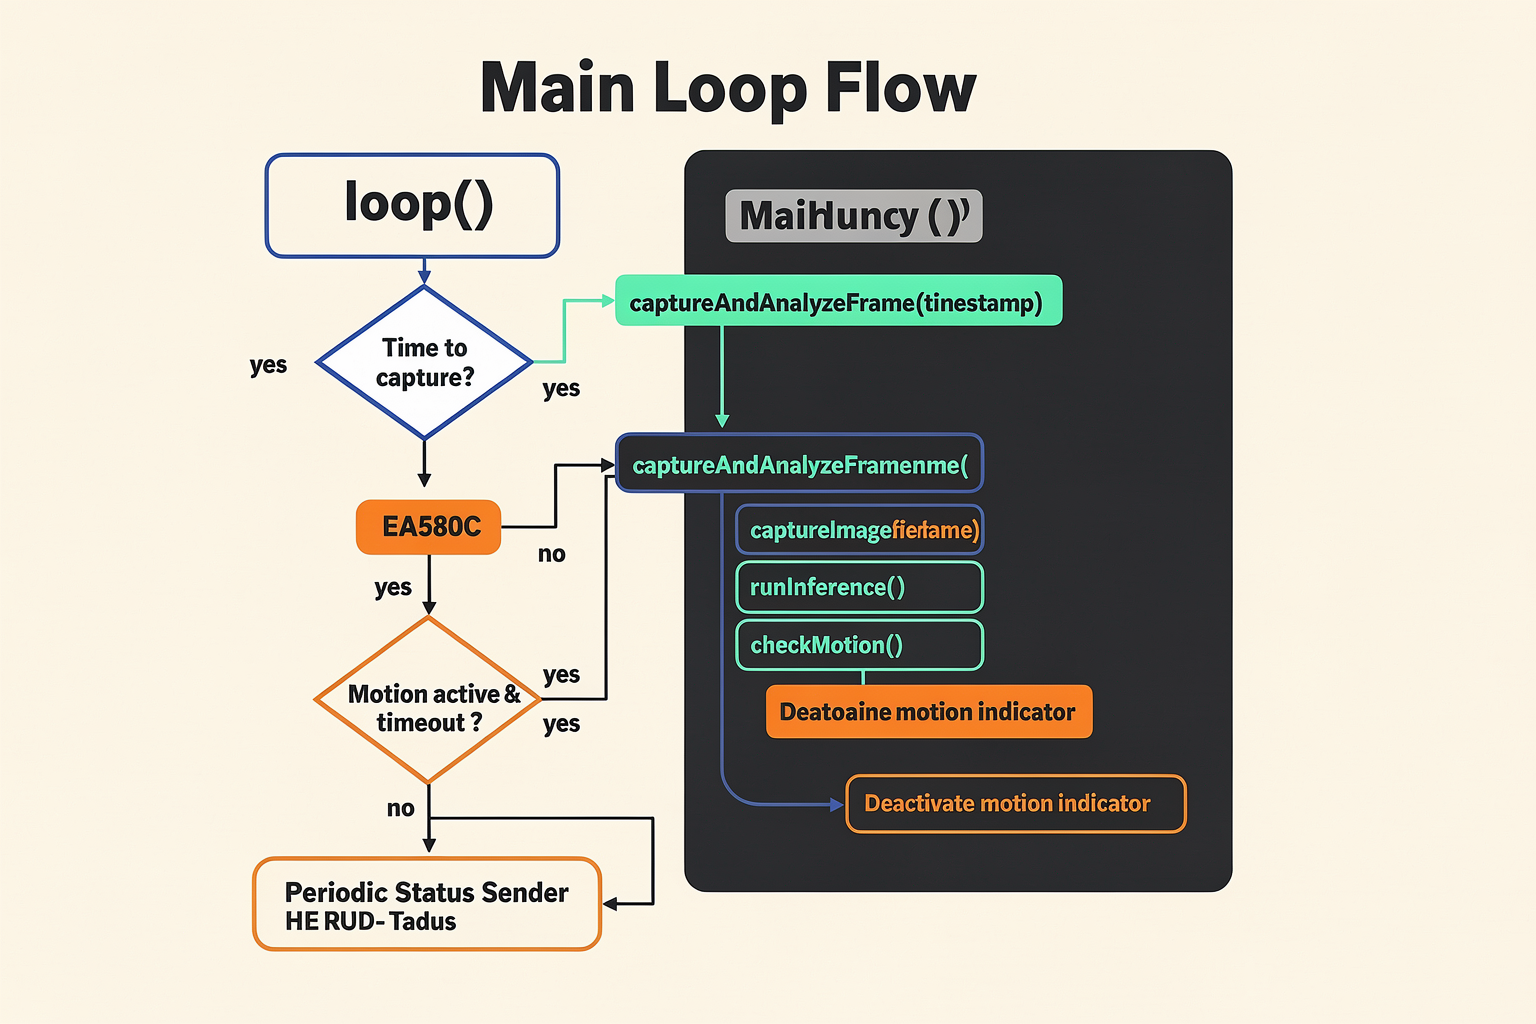
void loop() {
    unsigned long currentTime = millis();

    // Check if it's time to capture a new frame
    if (currentTime - lastCaptureTime > FRAME_SKIP * 1000) {

        // Capture frame for motion detection
        captureAndAnalyzeFrame(currentTime);

        lastCaptureTime = currentTime;
    }

    // Handle motion detection actions
    if (motionActive && (currentTime - motionDetectedTime > 5000)) {
        // Turn off motion indicator after 5 seconds
        motionActive = false;
        Serial.println("Motion stopped");
    }

    // Send status every second
    if (currentTime % 1000 == 0) {
        Serial.printf("Status: Motion=%s, Time=%lu\n",
                     motionActive ? "Active" : "Inactive", currentTime);
    }
}

void captureAndAnalyzeFrame(unsigned long timestamp) {
    char filename[32];
    sprintf(filename, "cam_photos/%06lu.jpg", timestamp);

    // Capture image
    captureImage(filename);

    // Run ML analysis
    runInference();

    // Check for motion (simplified - in real implementation, compare frames)
    checkMotion();
}

void checkMotion() {
    // Implement frame differencing for motion detection
    // This is a simplified version
    static unsigned long frameCount = 0;

    frameCount++;

    // Simulate motion detection based on frame count
    // In reality, you'd
Ready to start building?
Explore our collection of DIY kits and components. All project components mentioned in this blog are available in our store.
Browse All Projects