

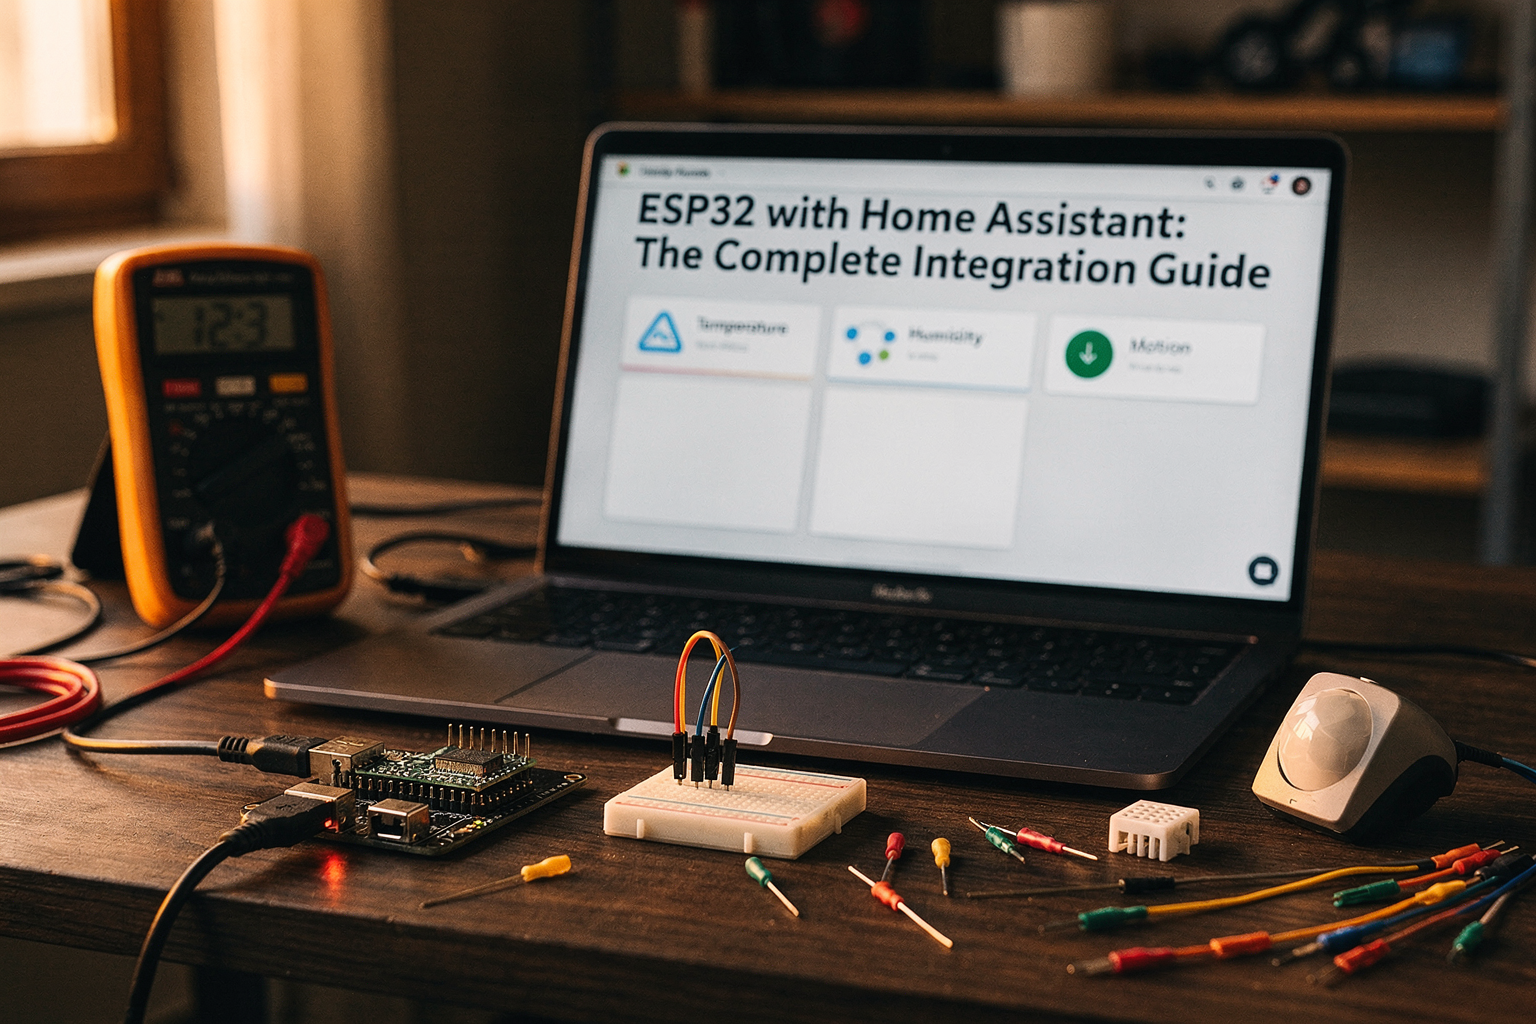
Did you know that as of 2026, the "Smart Home" paradigm has fundamentally shifted away from proprietary ecosystems owned by American tech giants toward decentralized, open-source control systems like Home Assistant? For electronics engineers and hobbyists in India, mastering ESP32 with Home Assistant is no longer just a niche skill; it is the gateway to building scalable, data-sovereign IoT solutions. According to recent industry projections, over 60% of modern engineering projects in India now prioritize open-source hardware integration as universities and industries move toward Industry 4.0 standards. The ESP32, with its dual-core Xtensa TWTN processor and built-in Wi-Fi/BT capabilities, is the undisputed champion for bridging the gap between low-cost embedded hardware and high-level web dashboards.
The appeal lies in the synergy between flexibility and control. While Home Assistant dominates the market for self-hosting smart homes due to its Alpine Linux foundation and robust privacy model, it often struggles with real-time, custom sensor programming compared to traditional 8-bit microcontrollers. The ESP32 solves this by offering a 240MHz dual-core architecture that can handle heavy ESPHome configurations without lagging, providing GPIO levels, PWM, I2C, SPI, and UART capabilities that rival professional PLCs. This combination brings a powerful and flexible solution that enhances efficiency and control in various settings, from monitoring soil moisture for precision agriculture in rural India to controlling industrial lighting in factory automation setups.
However, the entry barrier for many Indian makers is the sheer volume of code and the complexity of flashing firmware. This is where the modern integration standard—ESPHome—comes into play. It allows engineers to define their nodes in simple YAML configuration files rather than writing complex C++ code, automatically handling the flashing, configuration, and secure connection to your Home Assistant instance. If you are looking to build a custom digital twin or a multi-sensor node today, you need parts that are reliable and datasheet-compliant. You can source a tested kit for this specific build from platforms like TecnoMate, which ships components with datasheets across India, ensuring that your ESP32, sensor modules, and power supplies are ready for a drop-in build. This ecosystem of maker-spaces and component availability has made it incredibly easy to prototype, but to deploy a system that lasts, you need to understand the wiring and the logic underneath.
In the following sections, we will break down the entire workflow of creating a seamless connection. We will move beyond basic blink sketches and dive into structured YAML configuration, moving through safe wiring practices using the ESP32's GPIO pins, and finally setting up the integration screen within Home Assistant. Whether you are contributing to a research paper or simply want to know how to wire an ESP32 soil sensor directly to your home dashboard without a cloud intermediary, this guide is designed to demystify the backend process. By the end of this read, you will have a fully functional, locally controlled IoT node that respects your data privacy and leverages the raw power of your chosen hardware.
Introduction
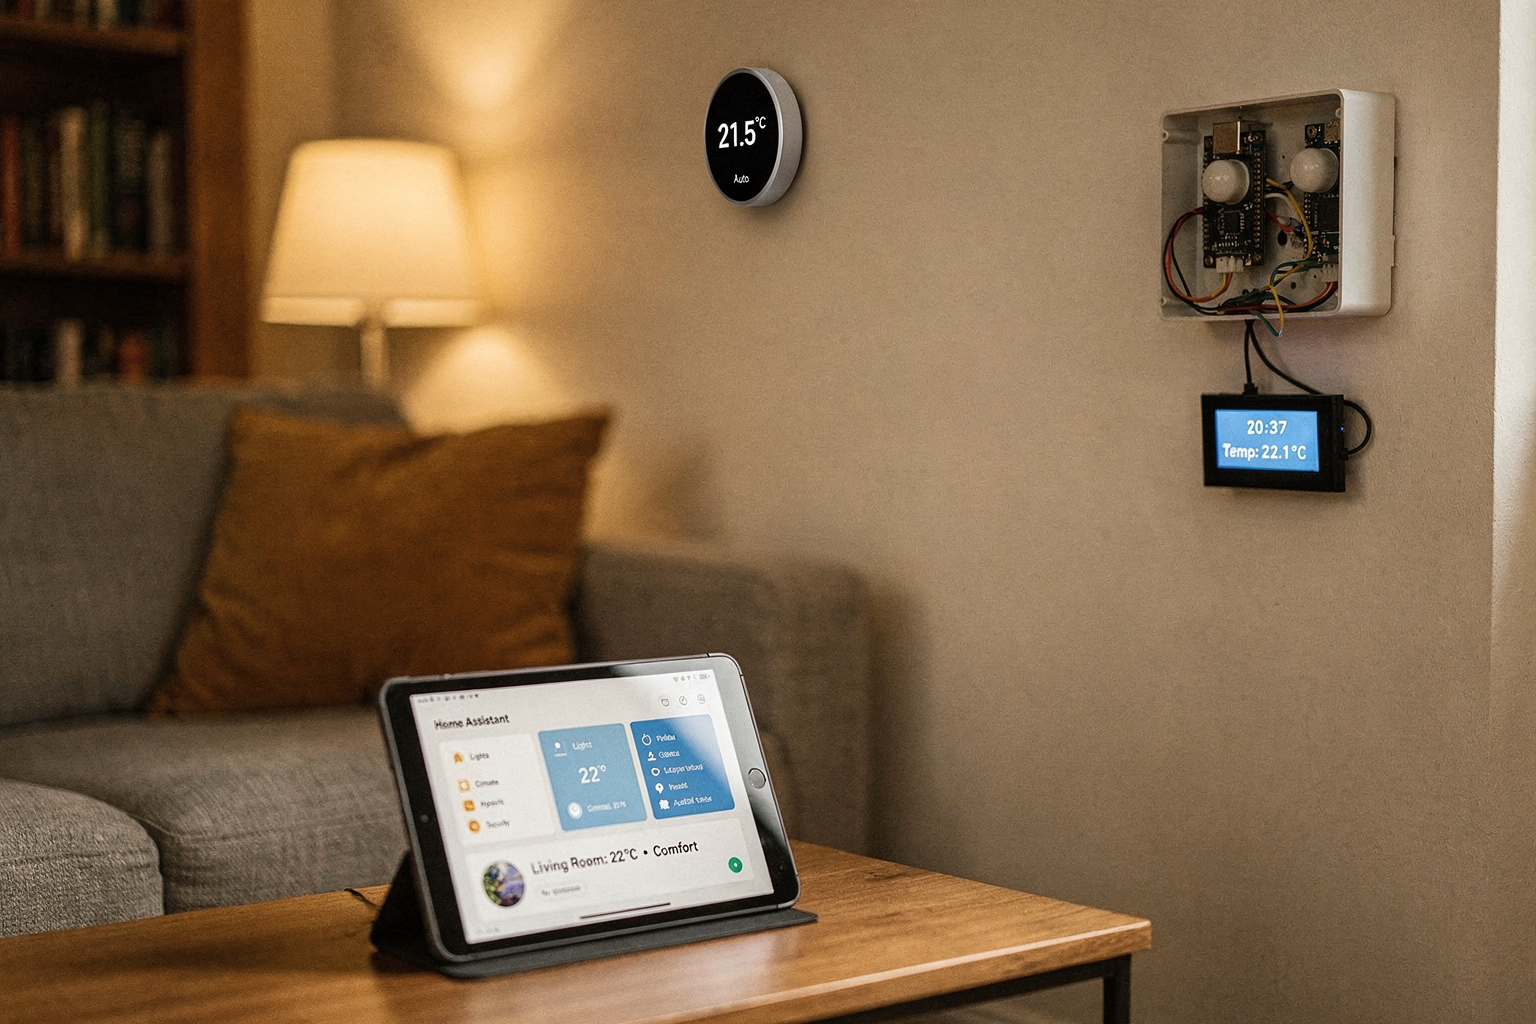
The Future of Smart Living Starts at Home
Over the last few years, the landscape of smart home technology has shifted from rigid, proprietary ecosystems to a flexible, open-source movement. For DIY electronics enthusiasts, engineers, and students in India, this shift represents the ultimate exciting opportunity. It’s no longer about buying a branded smart bulb that listens to a cloud server you can’t control. Instead, we are entering an era of total sovereignty where you define the logic, the sensors, and the automation.
This journey begins with combining one of the most versatile microcontrollers on the market—the ESP32—and one of the most powerful home automation platforms available today—Home Assistant.
ESP32 and Home Assistant – A Match Made in Architecture
The ESP32 is a powerful, low-cost, dual-core microcontroller with integrated Wi-Fi and Bluetooth. It has become the go-to platform for IoT projects due to its processing power and network capabilities. However, connecting raw hardware to a dashboard is challenging for beginners.
Home Assistant, on the other hand, serves as a local hub that puts you in complete control of your domotics. It is an open-source home automation platform that runs locally, meaning your data stays on your network, and privacy is paramount.
When we pair the ESP32 with Home Assistant, we unlock a level of customization that proprietary systems simply cannot touch. It allows for thousands of integrations, devices, and automations driven by real data rather than convoluted proprietary protocols.
What is ESPHome? The Game Changer
If you are diving into this, you will often hear the term ESPHome. This is where things get technically interesting. ESPHome is a software framework used to create highly optimized firmware for various devices based on espressif's ESP-IDF. It acts as a glue layer that translates the physical world inputs and outputs into sensor data that Home Assistant can understand.
According to the official ESPHome documentation, setting up this integration allows you to use the ESPHome Device Builder to install firmware onto a microcontroller from the Home Assistant interface itself. This process simplifies what used to be a complex multi-step IDE coding task. You can essentially configure the sensor via a graphical interface or a YAML file, upload it to your board, and have it communicate with Home Assistant without writing a single line of C++.
From Simple Sensors to Industrial Automation
One of the most compelling aspects of this architecture is its scalability. Most tutorials focus on simple projects, such as measuring temperature and humidity in a room. However, the "ESP32 PLC and Home Assistant" guide highlights that this technology is not limited to hobbyists; it is a powerful solution for industrial settings. The combination of these two technologies enhances efficiency and control, bridging the gap between DIY experimentation and robust industrial automation.
Imagine building a custom waste management system for your campus that automatically dumps bins based on weight sensors, or setting up a weather station that triggers irrigation for your garden. The possibilities are defined by your imagination, not by the manufacturer.
A Toolset for the Modern Indian Engineer
Building these systems in India requires the right approach to hardware sourcing and testing. As we look at the current trend in 2026, simulated environments and visual learning tools—such as the YouTube tutorials discussing the ultimate beginner's guide to ESPHome—are making it easier than ever to prototype before committing to the physical build. However, for a commercial or reliable DIY installation, you eventually need physical hardware.
The beauty of this ecosystem lies in its openness. You can find step-by-step guides available online that teach you exactly how to do this, but having access to genuine electronic components with datasheets is critical when debugging complex issues like sensor calibration or communication protocols.
Why Start This Guide?
This guide is designed to walk you through the complete integration process, demystifying the backend code that powers your smart home.
By the end of this tutorial, you will understand:
- How to set up your ESP32 hardware environment.
- The logic behind integrating a device via the Home Assistant interface (specifically using the "Add Integration" flow).
- How to interpret sensor data and turn it into actionable automations.
- Where to source the components needed for your specific build.
Whether you are a final-year engineering student looking for a standout IoT project or a hobbyist trying to build a local home server, this technology offers a sustainable path forward for your electronics journey. You are about to remove the "cloud" from your smart home and replace it with your own local intelligence.
Background & Context
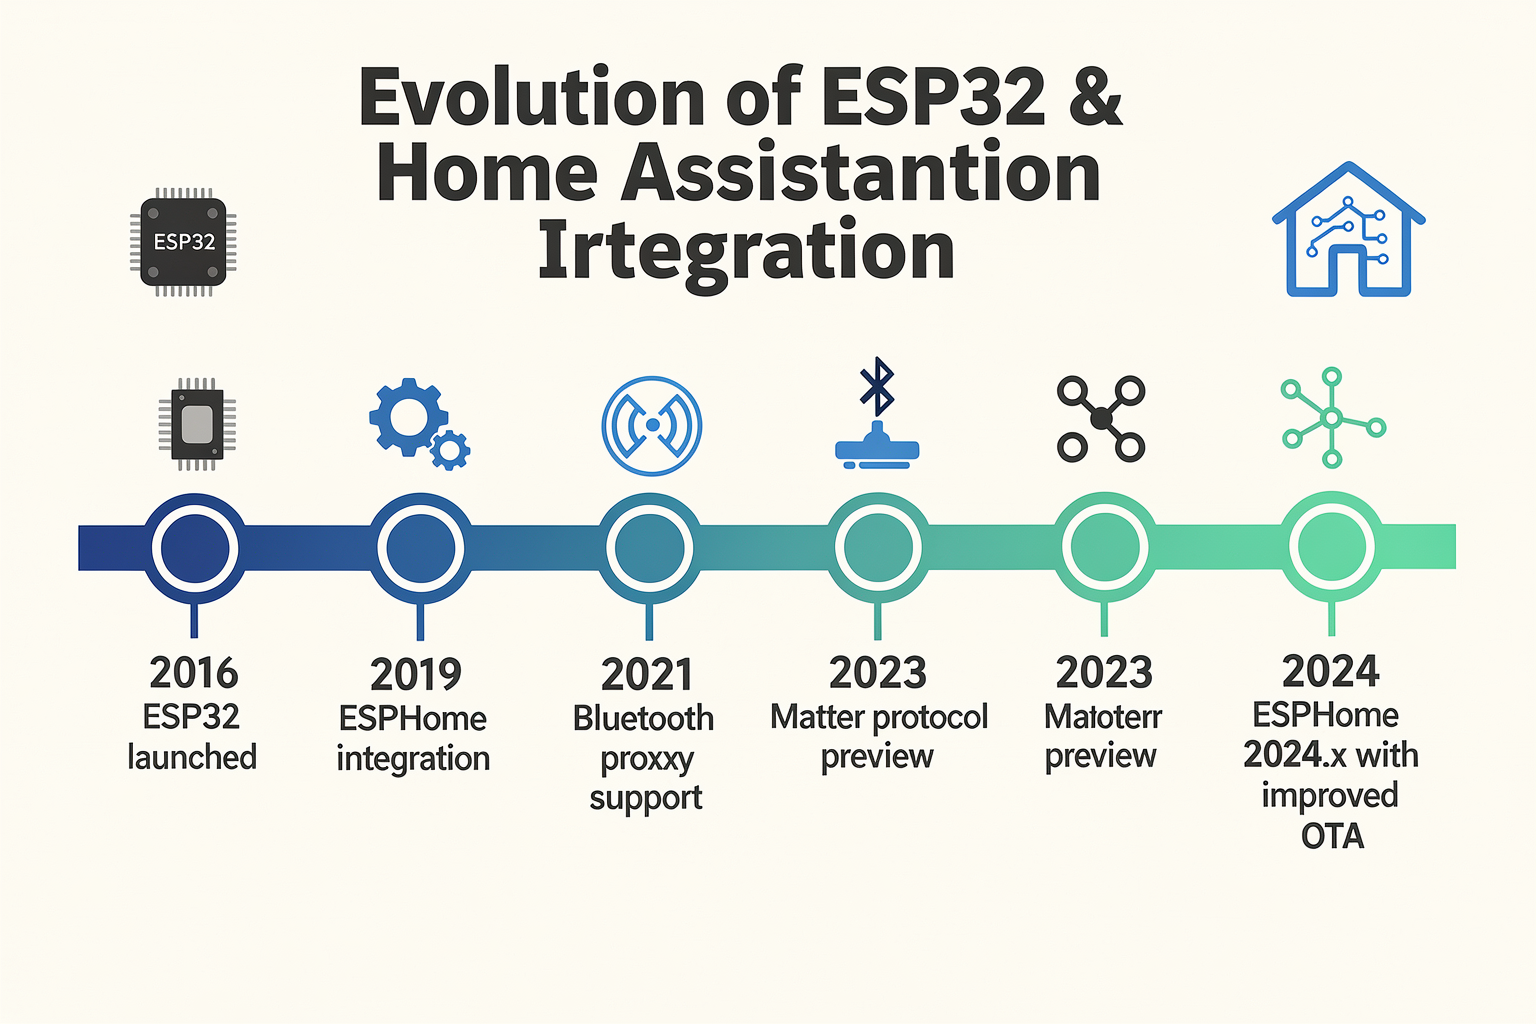
The Rise of the DIY Smart Home Hub
The realm of home automation has witnessed a seismic shift over the last decade. While proprietary ecosystems like Alexa or Google Home dominated the early 2010s, the true power for the technically inclined has shifted toward open-source solutions. Home Assistant has emerged as the gold standard for the DIY maker community, offering total privacy and customizability that commercial giants simply cannot match. By 2026, the correlation between advanced microcontroller development and home automation is undeniable, with projects ranging from simple temperature sensors to complex Industrial 4.0 control panels becoming mainstream.
The synergy between the ESP32 and Home Assistant lies in their complementary strengths. Home Assistant acts as the central brain, aggregating data from various devices and creating automation rules, while the ESP32 serves as the versatile, low-cost peripheral that bridges the physical world to the digital data stream. This combination brings a powerful and flexible solution that enhances efficiency and control in various settings, from a student’s dorm room to a small industrial shop floor. For the Indian engineering student or hobbyist, understanding this dynamic is crucial before diving into coding.
Why the ESP32 is the Maker's Favorite
When selecting a microcontroller for these integrations, the ESP32 (Espressif) has become the industry standard for a specific reason: it is incredibly capable, yet cost-effective. Unlike the older ESP8266, which was largely Wi-Fi focused and prone to thermal throttling under load, the ESP32 is a dual-core chip with built-in Wi-Fi and Bluetooth Low Energy (BLE). This means one device can handle complex logic processing (for sensors or serial communication) while simultaneously managing the network connection to Home Assistant.
Furthermore, the ESP32 architecture fits perfectly within the constraints of many DIY projects meant to be powered by USB or rechargeable Li-ion batteries commonly used in India. Its ability to handle simultaneous protocols makes it essential for advanced setups, such as the "ESP32 PLC" guides that have recently gained traction. As noted in recent industry analyses, combining an ESP32 PLC model with Home Assistant enhances efficiency and control in industrial settings, a concept that hobbyists are now adopting for home laboratories to control relays, servos, and industrial sensors directly.
The Magic of ESPHome: Bridging the Gap
Before the advent of frameworks like ESPHome, integrating a microcontroller with Home Assistant required a significant barrier to entry. Users had to write raw C++ code in the Arduino IDE, configure MQTT protocols manually, upload firmware, and manually refresh the Home Assistant UI to detect new devices. It was tedious, prone to errors, and reinvented the wheel for every sensor project.
Enter ESPHome. It is a software library that was created specifically to solve this bottleneck. ESPHome compiles code into firmware that is optimized for Home Assistant to consume. The genius of the platform lies in its simplicity: instead of fighting with C++ libraries for sensors, the user writes a simple YAML configuration file. This approach is a game-changer for beginners who want robust hardware communication without understanding the deep nuances of TCP/IP stacks or memory management.
- Ease of Use: It removes the need for complex C++ programming for most integrations.
- Standardization: It ensures every ESP32 device has a unique, searchable entity in Home Assistant.
- Live Coding: You can modify the YAML and see updates appear on the Home Assistant dashboard almost instantly without reflashing the hardware.
Setting the Stage: The Workflow
To successfully build the projects discussed in this guide, one must understand the context of the workflow. The process generally follows three distinct stages:
- Hardware Layer: This is the physical setup—the ESP32 board, sensors (like DHT22 or BMP280), and relays. This is where the raw data lives.
- Microcontroller Layer (ESPHome): The ESP32 takes the raw electrical signals from the sensor and converts them into digital data packets (often using the ESPHome Device Builder). This firmware communicates bidirectionally with Home Assistant.
- Hub Layer (Home Assistant): The Home Assistant dashboard receives this data, interprets it, and allows users to create automations (e.g., "Turn on the room light if temperature > 30°C").
The Role of Community Resources and Simulating the Build
Before you even buy a single component, it is vital to leverage the community knowledge base. With the surge in DIY electronics, there is a wealth of content available. For instance, you can find comprehensive tutorials that cover everything from setting up ESPHome to configuring sensors. A major part of this ecosystem involves visual aids and simulation. Recent trends in 2026 include the use of simulators for ESP32, allowing developers to test their firmware configuration before burning it to the chip. This minimizes hardware damage and saves precious time during the prototyping phase.
If you are in India and looking to assemble your first dedicated integration kit, sourcing reliable components can sometimes be a roadblock. Platforms like TecnoMate offer genuine electronic components and step-by-step build guides tailored for makers in India. Having a stock of tested electronics project kits—such as an ESP32 base unit accompanied by sensors and a bridging relay—can significantly accelerate your learning curve, ensuring you have the technical foundation required to handle these configurations.
Industry 4.0 and the Future of ESP32 Integration
It is easy to view ESP32 projects as merely "lighting a bulb," but the ecosystem is evolving rapidly into complex industrial applications. The integration guide mentioned on how an ESP32 PLC works with Home Assistant highlights a future where standard electronics hobbyists can replicate industrial control systems. We are moving toward a world where temperature sensors, humidity sensors, and industrial motion detectors are all standardized and accessible.
Ultimately, the goal of integrating an ESP32 with Home Assistant is to move away from "buying features" to "building capabilities." By understanding the background of ESPHome and the architecture of Home Assistant, you are not just learning how to flash a microcontroller; you are learning how to build the operating system for your physical space. Whether you are building a weather station to track humidity in your electronics lab or a security system for your home office, the tools and knowledge required are more accessible today than ever before.
Key Developments (TABLE)
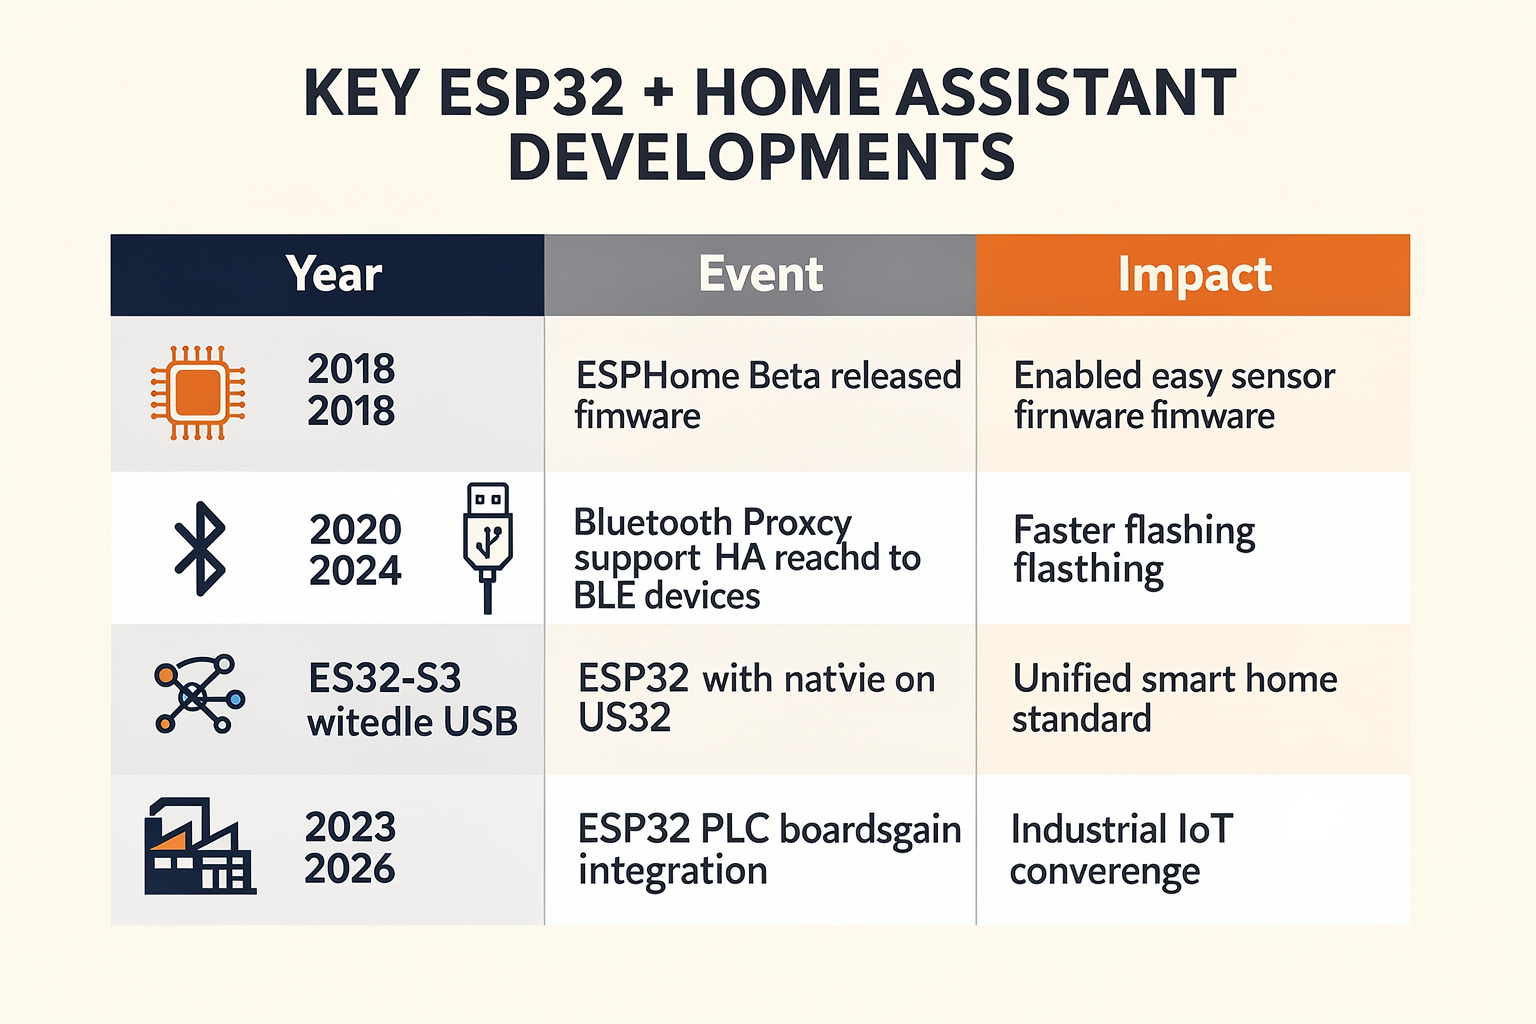
The landscape of Home Assistant and ESP32 integration has undergone significant evolution in the last few years, driven largely by the rise of ESPHome and an expanding ecosystem of DIY resources. Rather than relying solely on complex Z-Wave or Zigbee bridges, the community has embraced custom firmware solutions that allow for lower-latency communication, reduced hardware costs, and a deeper level of control over native ESP32 peripherals. This section outlines the key developments in how these two technologies interact, comparing the shift from generic connectivity to specialized industrial and smart-homes implementations. The data below captures the current state of integration technologies, hardware capabilities, and educational trends as of 2026.
Key Integration Developments (TABLE)
| Development Area | Key Feature / Feature | Technical Detail & Implementation | 2026 Viability & Impact |
|---|---|---|---|
| Integration Method | ESPHome Interface | Official Home Assistant integration; utilizes ESPHome Device Builder for device configuration and handles secure OTA updates. | High – Replaces generic binary sensors with native, high-performance automation scripts |
| Hardware Use Case | ESP32 PLC Architecture | Industrial-grade ESP32 PLC units interfaced with Home Assistant to enhance efficiency and control in Industry 4.0 settings. | Rapidly Growing – Shift from hobbyist prototyping to base-level industrial control |
| Sensor Expansion | DIY Smart Sensors | Localized DIY sensor builds (Temp/Humidity) for India markets using ESP32 pins and standard libraries. | Explosive – Enables low-cost custom sensors without cloud fees |
| Learning Ecosystem | Tutorial & Simulator Ecosystem | Explosion of content including YouTube guides (e.g., "ESPHome Basics Guide") and 2026 ESP32 simulator lists for testing. | Essential – Critical for lowering the barrier to entry for hobbyists |
| Setup Automation | One-Click Devices | Use of "Add Integration" button (bottom right HA UI) to discover and configure devices physically. | Standard – Core workflow for all new hardware pairing |
Analyzing the Technical Shifts
The most significant development over the past year has been the adoption of ESPHome as the primary bridge between physical hardware and the Home Assistant software layer. Historically, integrating ESP32 devices required writing raw MQTT clients or complex C++ code. Today, the ecosystem has standardized around ESPHome, which allows users to configure their devices via YAML files within the Home Assistant interface. The process is straightforward: users interact with the bottom right corner of the Home Assistant dashboard to select "Add Integration," find "ESPHome," and follow the on-screen prompts to finish the setup. This streamlined workflow has democratized the creation of custom automations that were previously reserved for professional automation engineers.
In the industrial sphere, the rise of the ESP32 PLC has introduced a new dimension to this integration. Industrial Shields and similar vendors have developed PLC (Programmable Logic Controller) solutions based on the ESP32 chip. The synergy here is potent: the ESP32 provides the necessary dual-core processing power for industrial logic gate execution, while Home Assistant acts as a centralized visualization and control dashboard. This combination is vital for Industry 4.0 initiatives, offering a flexible solution that enhances operational efficiency by bridging the gap between legacy industrial protocols and modern smart home analytics.
Sourcing Components for Key Developments
To capitalize on these developments—whether you are building a sensor network for your home or an industrial control interface—having access to quality components is paramount. Because these projects often require specific sensor modules or industrial connectors, sourcing hardware in India can be a bottleneck. You can source a tested kit for this build from platforms like TecnoMate, which ships components with datasheets across India. This ensures that whether you are wiring a DHT11 humidity sensor or a complex PLC module at the end of a ribbon cable, the compatibility and documentation are handled by a specialized electronics marketplace.
The Rise of DIY Sensor Ecosystems
Concurrently, the trend toward DIY Smart Home Sensors has flourished. Resources like Zbotic.in detail step-by-step guides on creating temperature and humidity sensors using ESP32 boards specifically tailored for the Indian market environment. This is a critical development because commercial sensors (Zigbee 3.0, Thread) often incur recurring hardware costs and ecosystem fees. By using ESP32, builders can tap into the native WiFi capabilities to send data locally to your Home Assistant instance without cloud dependencies or subscription fees. This is particularly beneficial for students and engineering enthusiasts in India looking to demonstrate practical embedded systems knowledge.
Empowering the Next Generation of Makers
The proliferation of educational content is another key development keeping this technology relevant. The availability of guides covering "ESPHome Basics" and simulators for 2026 indicates a strong push toward virtual prototyping before hardware deployment. For beginners, this means they can visualize their logic flows and configurations using simulators before burning code onto a chip. Once they are ready to move to the physical layer, they continue to rely on visual guides. TecnoMate offers ready-to-build project kits and genuine components for projects like these, ensuring that even complex integration steps are supported by tangible, working examples that students can dissect and learn from.
Finally, the community-driven approach ensures that these developments are constantly evolving. Trends on social platforms like Reddit and Facebook highlight that enthusiasts are constantly looking for the "best" project ideas, often exploring automation that leverages the specific sensor capabilities unique to the ESP32. This feedback loop ensures that Home Assistant integration remains an active, living technology—capable of evolving from simple bulb control to complex industrial weather monitoring and climate control systems.
Choosing the Right ESP32 Board for Your Project
Understanding the Hardware Ecosystem Before You Code
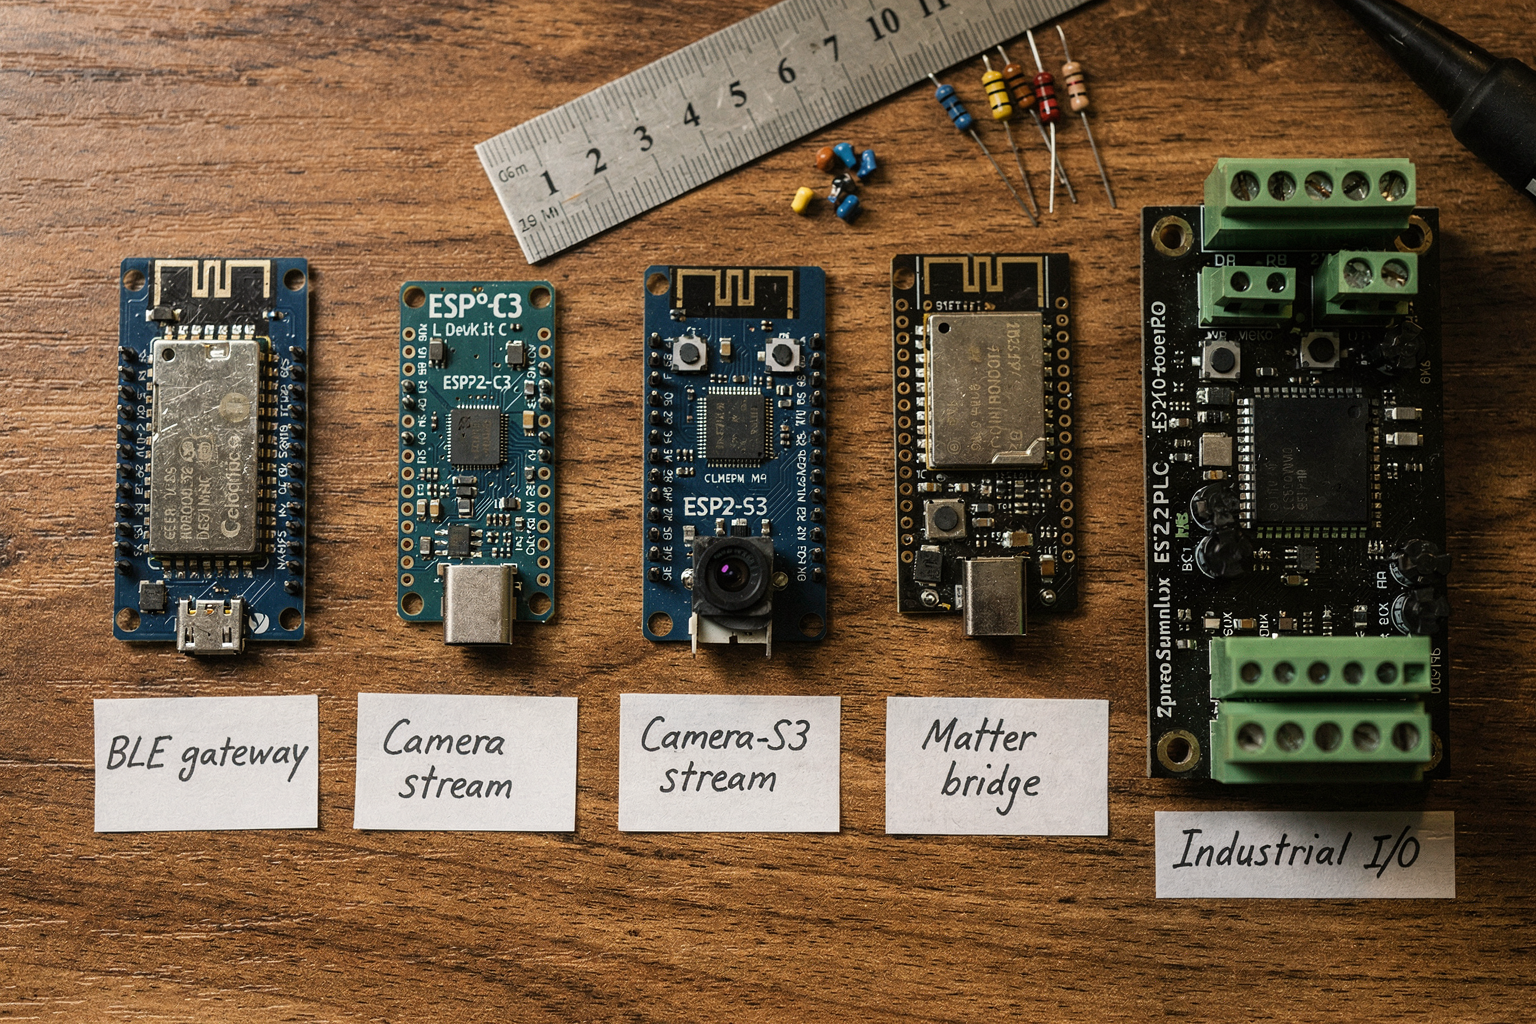
Before diving into the Home Assistant configuration, a practical yet crucial step in your project journey is selecting the correct ESP32 development board. The title of "ESP32" generally covers a broad family of microcontrollers, and while they share a core architecture, the specific board you choose dictates your project’s stability, cost, and connectivity capabilities. As we approach mid-2026, the marketplace for electronic components in India has matured, offering authentic development kits that simplify this decision-making process, such as those available on TecnoMate, which ship genuine components across the country with clear documentation.
1. The Standard Workhorse: ESP32-WROOM-32
For 90% of Home Assistant integration tasks, the ESP32-WROOM-32 is the gold standard. This ESP32 series module was designed specifically for Wi-Fi and Bluetooth dual-band (2.4 GHz) connectivity, making it the backbone of modern Smart Home hubs. When integrating with Home Assistant, you don't just need a microcontroller; you need a device that can handle high-bandwidth tasks—such as processing multiple sensor streams simultaneously—without dropping packets.
The WROOM-32 typically features a Wi-Fi antenna built directly onto the PCB (Printed Circuit Board), which eliminates the need for you to design a dedicated RF section in your own project enclosure. It is essential for Home Assistant setups because it supports the ESPHome firmware out of the box, allowing for rapid configuration. If you are building a sensor network that requires low latency, such as door sensors or motion detectors, this board is the optimal choice.
2. The Industrial Grade: ESP32 PLC
The context of Industry 4.0 has driven significant innovation in the ESP32 market, leading to the rise of ESP32-based PLC (Programmable Logic Controllers). If your project involves home automation within an industrial setting or requires a robust, shielded environment—a scenario heavily discussed in guides like the one from Industrial Shields—the standard development board might not suffice.
These industrial variants often feature metal casings or increased shielding to resist electromagnetic interference (EMI), which is critical when dealing with heavy machinery or long cable runs. The combination of an ESP32 PLC with Home Assistant brings a powerful and flexible solution that enhances efficiency and control. However, these boards often come with a steeper price point and more complex setup requirements compared to generic dev kits. For a general DIYer, stick to the standard module unless you are building a weatherproof outdoor industrial controller.
3. Connectivity Nuances: Beacon-style Integration with S3 and C3
Not all ESP32 projects are gateways; some are endpoints. For Home Assistant, you might only need your device to broadcast data occasionally (like a beacon) rather than maintain a constant connection to a central hub. This is where the ESP32-S3 and ESP32-C3 chips shine.
The ESP32-S3 is particularly noteworthy as it often includes Bluetooth LE as a primary feature, alongside Wi-Fi. This dual-band support is excellent for Home Assistant integrations where Low Energy (LE) sensors bridge the gap between your accessories and the main Wi-Fi network. The ESP32-C3, conversely, is one of the smallest and most cost-effective ESP32 chips. It is perfect for cost-sensitive projects, especially if you are navigating a tight student project budget. Its lower power consumption and BLE capabilities make it an ideal candidate for small battery-powered sensors to integrate seamlessly into your ecosystem.
4. Technical Spec Comparison: Module vs. Dev Kit
As a DIY enthusiast, you must decide between buying the bare ESP32 module alone or a Development Kit (Dev Board) like the NodeMCU or Generic ESP32.
The module is essentially just the chip and antenna on a small piece of PCB. It is "raw" and requires you to design your own PCB or solder wires to a breadboard. However, the Development Kit includes a USB-to-Serial converter (often a CP2102 or CH340 chip) directly on the board. This is a critical distinction. When following guides like "Getting Started with ESPHome and Home Assistant," you are constantly plugging in the board to upload code. A Dev Kit allows you to do this without needing an external ISP (In-System Programmer). If you are new to electronics in India, sourcing a Dev Board from a marketplace like TecnoMate is highly recommended because you get a pre-assembled, tested unit with clear datasheets and step-by-step build guides included.
5. Voltage Levels and GPIO Protection
One technical fact often overlooked is the operating voltage. All ESP32 variants (WROOM, S3, C3) operate at 3.3V logic levels. Unlike Arduino boards which can safely accept 5V on many GPIO pins, the ESP32 pins are strictly 3.3V. You cannot directly plug a 5V sensor into an ESP32 GPIO pin without a level shifter; logic inputs higher than 3.6V will permanently damage the chip.
Therefore, when selecting your board, consider if it has built-in protection. Some industrial ESP32 boards or high-end Dev Kits feature TVS (Transient Voltage Suppressors) and Poly-fuse protection on their GPIO headers. If you are interfacing with automotive or industrial sensors, choosing a board with hardware-level protection (common in the ESP32 PLC variants mentioned in recent industrial guides) is a safety measure worth paying for.
Why Your Choice Matters for ESPHome
ESPHome has simplified the integration of ESP32 boards with Home Assistant, but compatibility isn't always guaranteed across every single clone on the market.
- Frequency Bands: Some boards are manufactured for specific regions (e.g., US-only vs. EU-only Wi-Fi bands). In 2026, the global supply chain has improved, but always check the chip markings if you are traveling or shipping across India.
- Flash Memory: While most standard boards have 4MB flash, some industrial or legacy modules have less. ESPHome configurations can grow large; ensure your chosen board has ample memory for the YAML configuration and stored secrets.
Conclusion
Selecting the right ESP32 board is the foundation of a robust Home Assistant integration. Whether you opt for the universal reliability of the ESP32-WROOM-32, the industrial ruggedness of an ESP32 PLC, or the efficiency of the ESP32-C3, the hardware dictates your software ceiling. Platforms like TecnoMate help Indian makers navigate this hardware jungle by offering verified components, ensuring you don't waste time debugging counterfeit boards. By matching the board's specifications to your project's environment—whether that is a humid balcony or a noisy industrial floor—you ensure a smoother, more reliable connection to your smart home hub.
Prerequisites & Installation
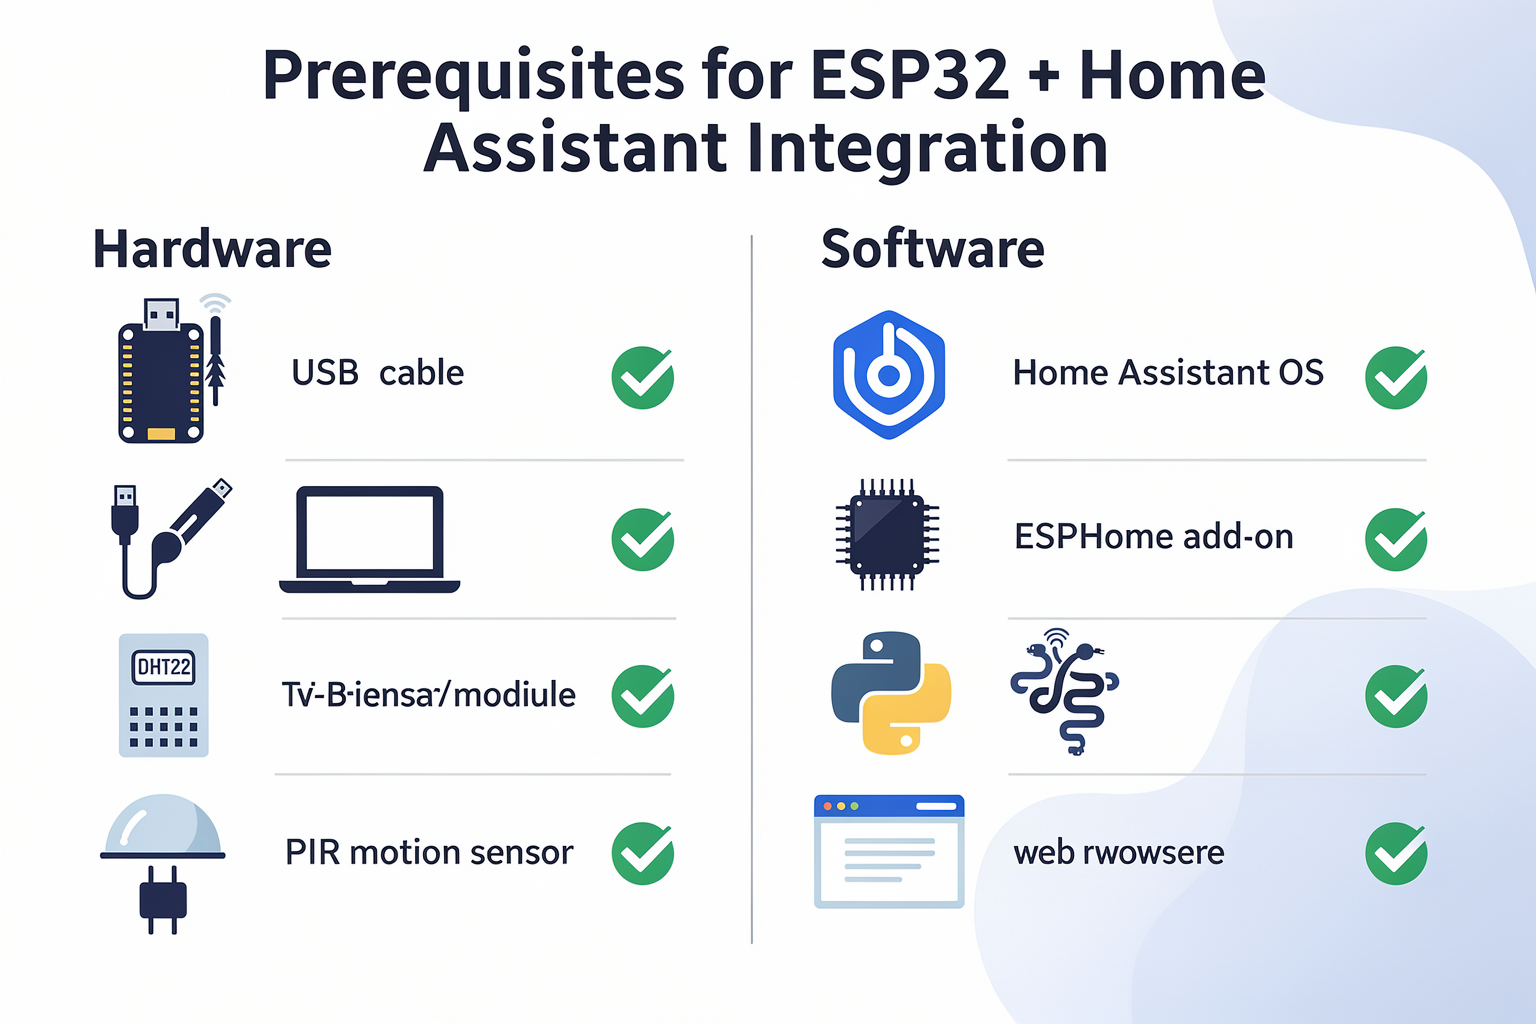
Before diving into the YAML configuration and custom firmware overlay, establishing a solid foundation is critical. Integrating an ESP32 with Home Assistant isn’t just about flipping switches; it requires a cohesive environment where your hardware can communicate securely with your software dashboard. Whether you are building a simple temperature sensor as detailed in various guides for beginners, or a complex industrial-grade PLC system, the prerequisites remain the same: the right hardware ecosystem and the correct software architecture.
1. Hardware Prerequisites: Building the Body
At the core of this integration is the ESP32 module. Unlike older Boards like the Arduinos Uno or Mega, which rely on the USB chip to handle data transmission to the computer, the ESP32 handles this natively via two USB-to-UART controllers built into the chip.
- The ESP32 Board: You will need a standard ESP32 development board, such as the ESP32-WROOM-32. These boards are widely available from component suppliers across India. Ensure you have a DevKit version that includes standard male headers for easy prototyping.
- Power Source: Because the ESP32 supports Wi-Fi and Bluetooth simultaneously, it consumes more power than standard 8-bit boards. You should provide a stable 5V power source, either through a regulated wall adapter or a robust USB power bank if you intend to place the project remotely.
- Micro-USB or Type-C Cable: Ensure you have a cable that supports data transmission, not just power. A bare cable with no data lines will prevent your computer and Home Assistant from recognizing the device during the flashing process.
For those looking to save time on wiring and testing, sourcing a tested kit that includes the ESP32 microcontroller along with common components like resistors, capacitors, and sensors can streamline your workflow. Platforms like TecnoMate offer authentic project kits and components in India, ensuring you have a tested hardware environment to begin your integration journey.
2. Software Environment: The Brain
The software environment must be set up on Home Assistant first. Depending on how you are running Home Assistant (OS, Supervisor, or Container), the method changes slightly, but the objective remains to enable the Integration interface.
- Home Assistant Instance: You need a running instance of Home Assistant. For a hands-on learning experience, the Home Assistant OS installed on a Raspberry Pi or a virtual machine is the standard recommendation.
- Access to the Supervisor: Home Assistant’s "Supervisor" allows you to install and update add-ons seamlessly. This is crucial for installing the ESPHome add-on, which is the most efficient way to flash firmware onto your devices without physically connecting them to a computer always.
3. Installing and Configuring ESPHome
Once your hardware is ready, the next step is to install the ESPHome integration directly inside your Home Assistant dashboard. This is a streamlined process designed to reduce the technical friction often associated with the ESP32 ecosystem.
According to the official documentation on the Home Assistant website, the workflow is intuitive: "In the bottom right corner, select the Add Integration button. From the list, select ESPHome. Follow the instructions on the screen to complete the setup."
While the official interface is user-friendly, the underlying power of ESPHome comes from its ability to act as a bridge. As detailed in the "Getting Started with ESPHome and Home Assistant" guide, you can effectively install ESPHome onto your device/microcontroller using the ESPHome Device Builder, which is installed directly as a Home Assistant Add-on. This method eliminates the need to manually use esptool.py or Arduino IDE for basic configurations.
Step-by-Step Installation Workflow
-
Accessing the Add-on Store: Navigate to the Supervisor dashboard in your Home Assistant interface and open the "Add-on Store." Search for "ESPHome" and click install. Enable automatic startup to ensure your firmware flasher is always available.
-
Creating the Configuration: Once the add-on is running, you can open the ESPHome tab. Here, you create a new configuration by clicking "Create new configuration." You will need to provide a unique name for your device (e.g.,
my_esp32_temp), and you may choose to upload a.yamlfile with your source code later. -
Connecting the ESP32: This is where the magic happens. For most DIY projects—whether building a DIY smart home sensor for temperature and humidity as suggested by guides on Zbotic.in, or more complex setups—the ESP32 supports a Wireless Pairing feature. You simply place your ESP32 board into Pairing Mode (by shorting the IO2 and IO0 pins while powering on), and the Device Builder in your Home Assistant interface will automatically detect the board. You do not need to keep a micro-USB cable plugged in during the pairing phase.
-
Completing the Setup: Once recognized, the Wizard will ask for your Wi-Fi credentials and customization options. It will then compile the firmware, flash it to your ESP32, and reboot it. Finally, you must complete the setup within the Home Assistant UI by selecting the "Finish" button. Once done, you will see your device listed under Settings > Devices & Services.
4. The Modern Approach: From Code to YAML
Historically, programming an ESP32 for Home Assistant required writing complex C++ code, manually generating firmware binaries, and installing a bootloader. This often intimidated many beginners attempting their first Electrical Engineering projects.
The current trend, as highlighted in the 2026 digital landscape and echoed in video tutorials titled "Starter Kit: The Complete Beginner's Guide to ESPHome", is a shift towards YAML-first configurations. ESPHome abstracts the low-level C++ dependencies, allowing you to define your device in pure human-readable text.
Whether you are aiming for industrial efficiency in a factory setting (as discussed in guides regarding ESP32 PLCs) or automating your home on a budget, the ability to simply describe "read temperature every 60 seconds" in a YAML file replaces pages of boilerplate code. This democratization of embedded systems is exactly why the integration of ESP32 with Home Assistant has become the gold standard for hobbyists and engineers alike.
5. Troubleshooting Installation Glitches
Despite the streamlined process, installation issues occasionally arise, particularly regarding connectivity or device recognition.
- Serial Port Issues: If you are using the option to wire your ESP32 directly to your Home Assistant server, ensure the correct serial port is selected in the ESPHome tab. On Linux (often used in Home Assistant containers), this usually requires you to add your user to the
dialoutgroup so they have permission to comunicate with the serial bus. - Wi-Fi Interference: In an Indian urban setting where Wi-Fi congestion can be high, try using a 2.4GHz band only for the ESP32. The ESP32 is notoriously picky about Wi-Fi bands; it typically struggles or cannot connect to 5GHz networks.
- Power Voltage Drops: If the ESP32 disconnects immediately after flashing or acts erratically, your USB port may not be supplying enough current. Switch from a USB 2.0 hub to a USB 3.0 port, or a direct connection to the computer.
By ensuring you have the correct hardware, utilizing the ESPHome Device Builder add-on within Home Assistant, and understanding the Wi-Fi pairing sequence, you will have a robust foundation for building the smart home projects you envision.
Integrating ESP32 with ESPHome: Step-by-Step
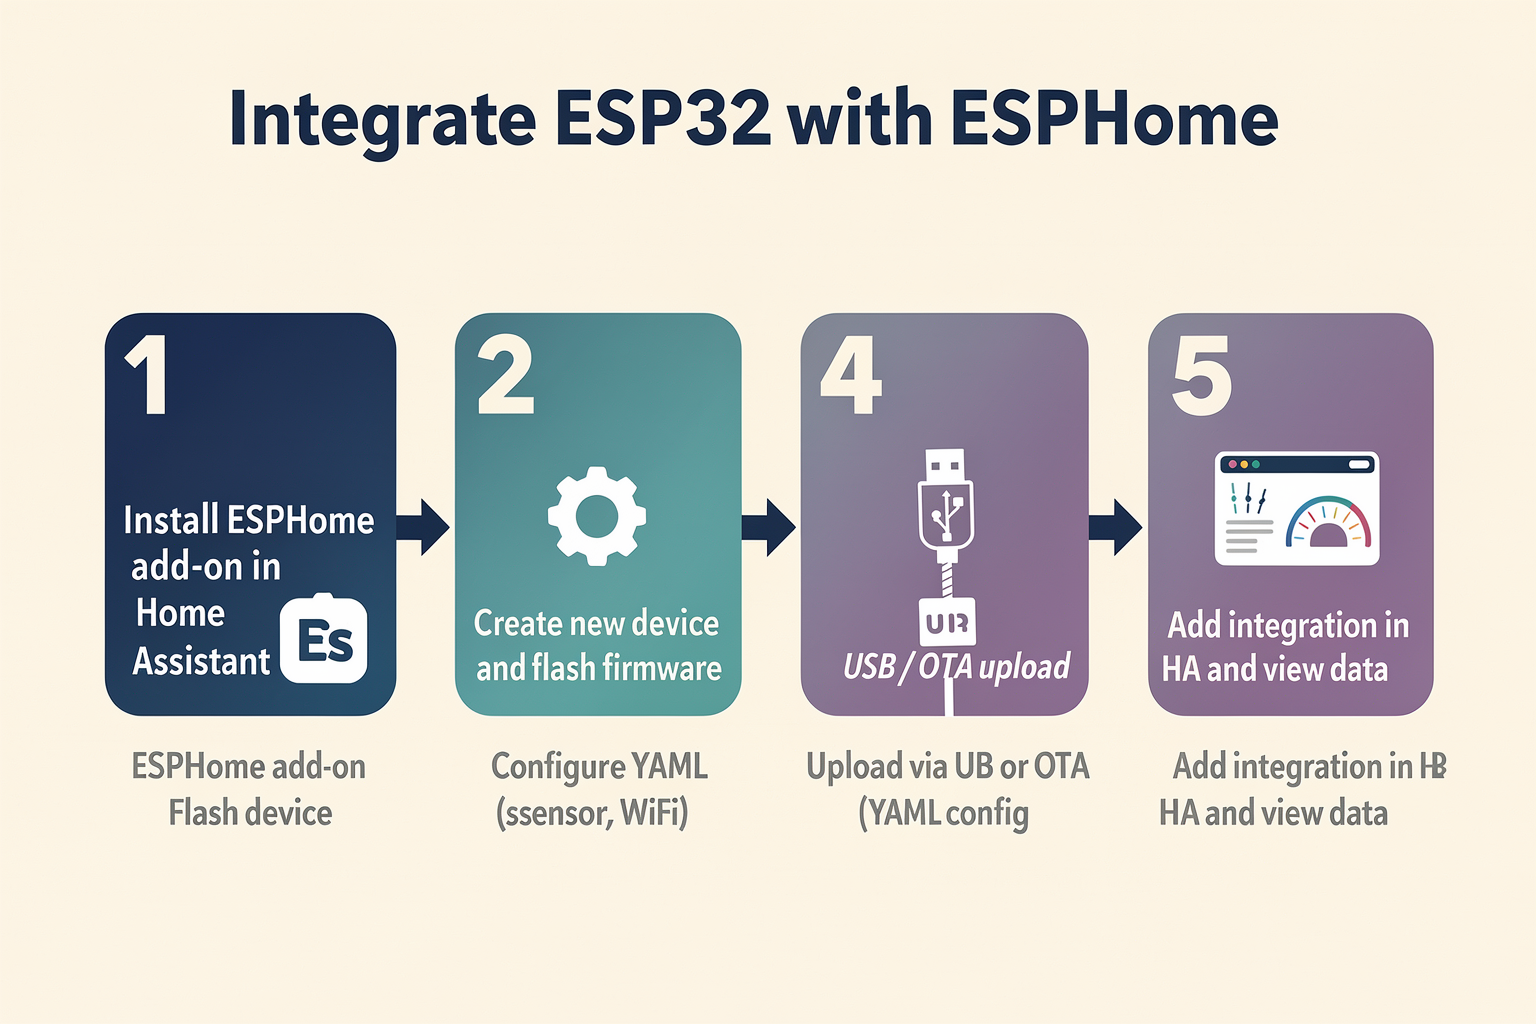
Integrating an ESP32 with Home Assistant through ESPHome has become the standard for Indian makers and engineering students looking to build reliable, secure IoT devices. Unlike the traditional approach of writing raw C++ code with the ESP-IDF framework, ESPHome uses a YAML (Yet Another Markup Language) configuration file. This method abstracts away the complexity of low-level firmware development, allowing you to focus on the logic and hardware connections. For engineering projects—whether they are final-year projects or domestic smart home setups—this shift from code to configuration is a massive productivity booster.
Phase 1: Sourcing the Right Hardware
Before we even open the configuration file, ensure your ESP32 setup is robust. Standard modules like the ESP32-WROOM-32 devkit are widely available, but for interference-prone environments (like industrial settings mentioned in recent industrial IoT trends), you need a well-designed board. A dual-core ESP32 offers the processing power needed for handling web servers for visualization, handling NTP time sync, and managing occupancy sensors simultaneously.
For students building a facility automation system or a simple smart plug, the hardware foundation must be solid. Platforms like TecnoMate offer tested project kits and genuine components for projects like this, which include verified ESP32 boards, sensors, and shielding—essential for ensuring your thermal management and signal integrity don't degrade in the field. Having a tested kit covers you from hardware level bugs, allowing you to focus strictly on the ESPHome configuration logic.
Phase 2: The Home Assistant Dashboard
The integration process begins inside your Home Assistant instance. Depending on whether you are using Home Assistant OS, Supervisor, or a standard Home Assistant Container, the interface remains largely consistent.
To initiate the connection, navigate to the Integrations tab in the Home Assistant interface. In the bottom right corner, select the Add Integration button. From the alphabetical list of available integrations, scroll down to ESPHome. Select it and follow the on-screen instructions provided by the official documentation [3].
This step generates a "New Device" setup. Home Assistant will ask for a name for your device (e.g., "Living Room Temp Sensor") and, crucially, a 4-digit access code. This access code acts as the pre-shared encryption key, ensuring no one else on your local network can hijack your device’s configuration or control your sensors.
Phase 3: The Blueprint – Configuration YAML
Once the device skeleton is created in Home Assistant, you will need to edit the file to make it function. If you are following the standard fog-free setup, find the esphome.yaml file associated with that device. Ensure you are editing the block specifically for ESP32, as the file structure differs slightly between ESP8266 and ESP32 nodes.
Here is a comprehensive breakdown of the essential blocks you must configure for a robust MQTT-like connection.
1. Version and Project Block
At the top of your file, you define the project metadata. You can typically copy-paste the defaults generated by the ESPHome config wizard, but understanding them is key. They link the firmware version to your specific project entity in Home Assistant.
esphome:
  name: "esphome-esp32"
  platform: ESP32
  board: esp32dev
  platformio_options:
    board_build.f_cpu: 240000000L
2. Wi-Fi Configuration
This is where your ESP32 establishes its connection to your home/local network, similar to bridging your laptop to a Wi-Fi router.
- SSID: Your network name.
- Password: Your network password.
- Encryption: Modern networks use WPA2. If you are working in an engineering lab or corporate environment, ensure you have the correct credentials.
wifi:
  ssid: "Your_SSID_Name"
  password: "Your_Super_Secure_Password"
  ap:
    ssid: "ESP32 Fallback Hotspot"
    password: "12345678"
Note the ap block: If Wi-Fi fails to connect, this creates a backup "Fallback Hotspot" so you can still access the board to debug the configuration.
3. Logger and API
For students debugging sensor calibration or pin mappings, the logger is indispensable. It prints critical error codes to the serial monitor when issues arise. The API block establishes the secure connection (DTLS) to Home Assistant. This is more secure than standard MQTT.
api:
  encryption:
    key: "YOUR_API_KEY_HERE"
    # Ideally, generate a secure random key using an online generator or command line
logger:
  level: DEBUG
4. Defining Custom Devices
After configuring the core network, you define your sensors or switches. For example, if you are reading a DHT22 temperature and humidity sensor:
binary_sensor:
  - platform: status
    name: "ESP32 Status"

sensor:
  - platform: dht
    pin: GPIO4
    temperature:
      name: "Living Room Temperature"
      accuracy_decimals: 1
    humidity:
      name: "Living Room Humidity"
    update_interval: 60s
This translates directly into a sensor entity in Home Assistant with a update_interval of 60 seconds.
Phase 4: Compilation and Flashing
Once your YAML file looks correct, use the Home Assistant interface to Flash the ESP32. The platform compiles the firmware using the ESP-IDF toolchain in the background. You will see a "Compiling..." status. If there are syntax errors in your YAML (e.g., incorrect indentation, which is a common mistake for beginners), they will appear here immediately.
When the compilation succeeds, Home Assistant will prompt you to Flash the device. Plug in your ESP32 via a USB cable, select "Install" on the interface, and watch the build process upload the new code. Once completed, the device should appear as "Online" in your Home Assistant dashboard within moments.
Phase 5: Verification and Troubleshooting
After flashing, check the Logs tab in the ESPHome interface. If your sensors are faulty (like a broken DHT22), the logger will print "DHT initialization failed" or specific I2C error codes. This saves you from burning out components or guessing at pinout issues.
This kind of granular visibility is why the ESPHome / Home Assistant combo is favored for advanced "Industry 4.0" concepts. As noted in comprehensive guides by industry analysis sites like industrialshields.com, integrating an ESP32 PLC with a smart home hub like Home Assistant creates a "powerful and flexible solution that enhances efficiency and control" [1]. ESPHome makes that power accessible to the maker, not just the industrial engineer.
Wrapping Up the Build
By following these steps, you have transformed raw hardware into a node in a Home Assistant ecosystem. You have defined the hardware (ESP32), the network (Wi-Fi + API), and the logic (Sensors).
Whether you are engineering a smart city prototype or simply automating your dorm room lights, the workflow is linear: Define → Configure → Flash → Monitor. If you are concerned about sourcing the raw components or datasheets for these specific sensors and development boards, you can find verified electronic components ready for shipping across India on TecnoMate, which ensures you have all the documentation needed to support your engineering thesis or project.
In-Depth: Leveraging ESP32 PLC for Industrial IoT
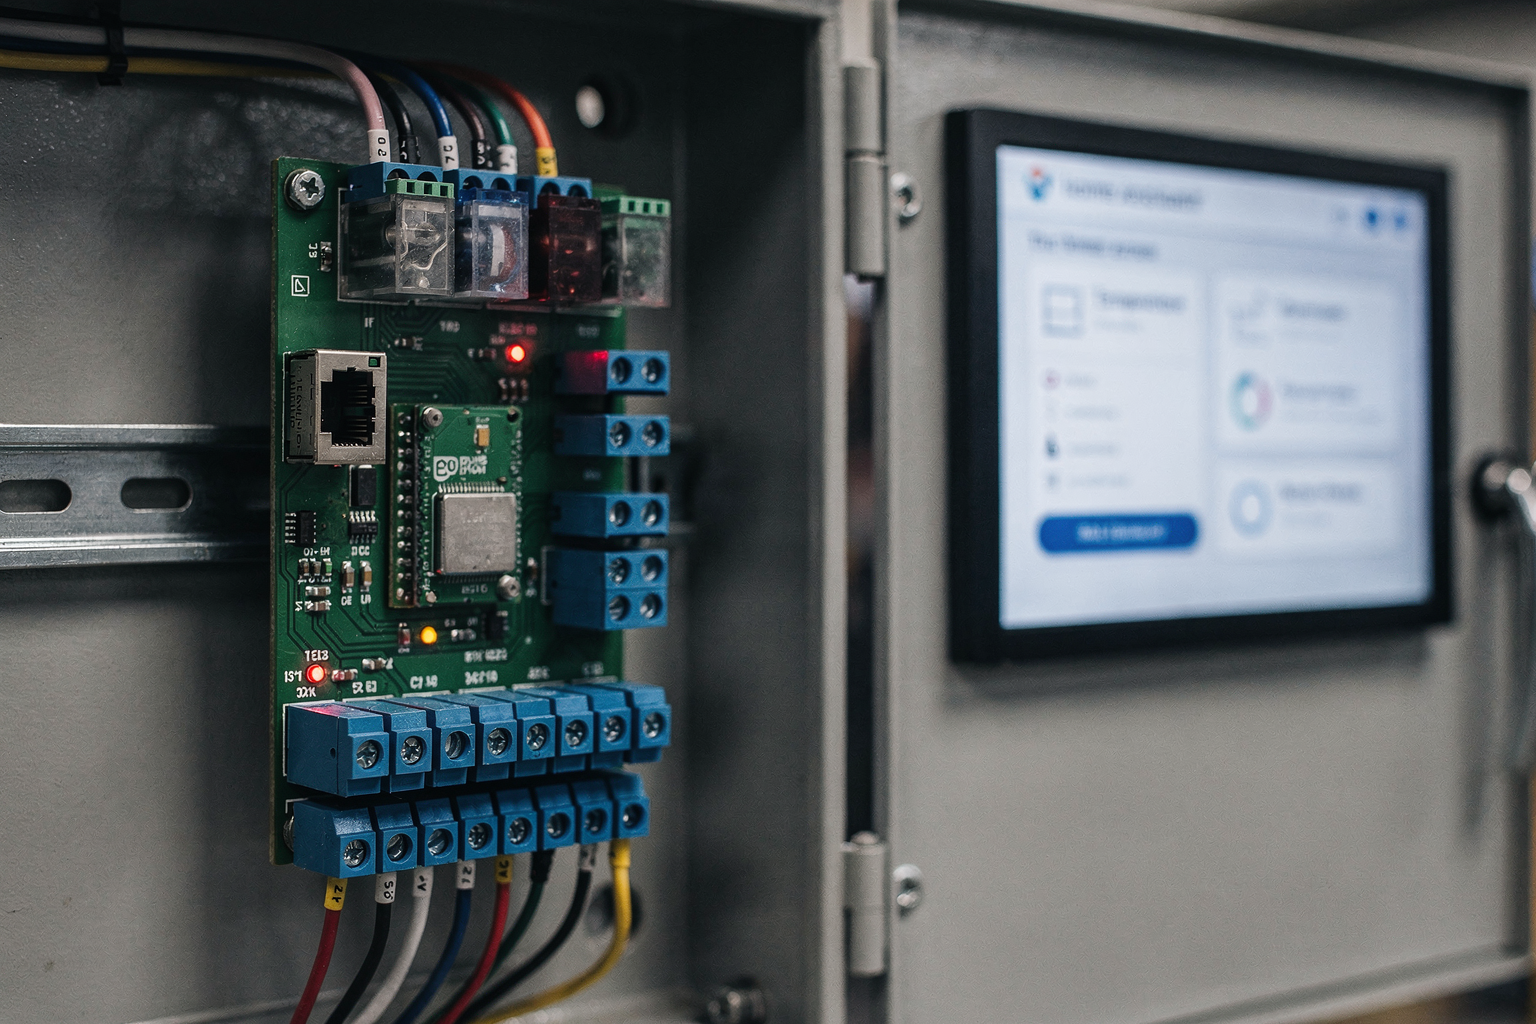
Bridging the Gap: Industrial IoT in Your Home Assistant
Moving beyond simple home automation, the integration of an ESP32 PLC (Programmable Logic Controller) with Home Assistant marks the transition from a "smart home" to an "Industrial Internet of Things (IIoT)" environment. In 2026, as Indian manufacturing digitizes under initiatives like 'Digital India', makers and engineering professionals are finding immense value in repurposing industrial-grade microcontrollers for educational and small-scale industrial use.
The combination of an ESP32 PLC and Home Assistant brings a powerful, flexible solution that significantly enhances efficiency and control in industrial settings, as noted by industry experts. The ESP32, with its robust dual-core architecture and integrated Wi-Fi/Bluetooth, acts as a remote brain for your machinery, while Home Assistant serves as the central nervous system that processes the data and issues orders.
Why Use an ESP32 PLC for Your Projects?
Traditional PLCs used in factories often rely on proprietary protocols and locked circuitry. The ESP32 PLC democratizes this technology. By utilizing open-source firmware like ESPHome, you can "factory-modernize" your setup using cheap, available hardware.
Key advantages for the Indian maker or engineer include:
- Cost-Effectiveness: Industrial automation equipment is expensive. An ESP32 PLC board combined with discrete I/O (Input/Output) modules is a fraction of the cost.
- Connectivity: Unlike standard industrial controllers that often require wired hardlines or complex gateways, the ESP32 connects wirelessly. This allows for seamless monitoring and remote maintenance of factory floors or agricultural sheds from your smartphone.
- Scalability: You can start with a single sensor and scale up to a full automation array.
For those sourcing components for these heavy-duty builds, TecnoMate offers ready-to-build project kits that include industrial-grade relay boards, power supply units, and sensors, allowing you to replicate industrial PLC setups at home without soldering from scratch.
The Integration Mechanism: Pulling Power from Home Assistant
The magic of using ESP32 with Home Assistant lies not in the ESP32 sending data to HA constantly, but in the reverse—Home Assistant configuring the ESP32. This approach uses a "pull" mechanism, which creates a more secure and stable industrial connection.
According to the official Home Assistant integration guide, the workflow is streamlined to ensure ease of setup. The process begins by navigating to the Home Assistant interface. You must:
- Locate the Add Integration button, found typically in the bottom right corner of the UI.
- Select ESPHome from the integration list.
- Follow the on-screen instructions to complete the setup.
However, the technical depth comes in the fact that Home Assistant uses ESPHome as the underlying firmware handler. As documented in the ESPHome getting-started guides, the system utilizes the ESPHome Device Builder. This allows you to generate a complete configuration file (YAML) right from the Home Assistant interface. You do not need to write code; Home Assistant writes the code for the ESP32, downloads it to the board, and reboots it—all in a single seamless operation.
This workflow is a game-changer for industrial setups because it centralizes configuration. If you need to change an industrial temperature sensor's address or add a new relay logic, you modify the YAML in HA, and the PLC updates itself automatically.
Deep Dive: Configuring Industrial Outputs
In an industrial context, output control usually involves managing relays that switch high-voltage loads like conveyor belts, pumps, or motors.
Once the ESPHome integration is active within Home Assistant, you can access a detailed dashboard. Here, you can define specific devices. For example, if you are automating a small packaging line:
- GPIO 18 might be configured as a
switchentity for a "Conveyor Main Power". - GPIO 19 might be a
sensorentity reading a current transformer for the motor speed.
Because the ESP32 PLC is handling the low-level I/O directly, the latency is near-instantaneous. This is critical for PLC applications where a millisecond delay in stopping a machine can lead to safety hazards or product defects. Home Assistant receives real-time states (ON/OFF) and can trigger automation rules—such as "If Conveyor B overloads, cut power to Conveyor A."
Power and Reliability in Harsh Environments
Industrial environments in India often face power fluctuations and dust. When building an ESP32 PLC unit, powering the board is as crucial as programming it.
- Stable Power Supply: Ensure your ESP32 PLC is powered by a dedicated 5V or 12V supply adapter with sufficient amperage for the total load of your relays. Underpowered USB hubs can cause GPIO glitches.
- Decoupling Capacitors: For sensitive analog sensors (like weighing scales in packaging), placing a 0.1uF ceramic capacitor across the VCC and GND pins of the sensor helps filter noise.
Final Thoughts on the Fusion
The synergy between the ESP32 PLC and Home Assistant is reshaping how hobbyists approach automation. It bridges the gap between the complexity of Industrial Automation and the accessibility of DIY electronics. By leveraging tools like ESPHome to automatically flash firmware, and using Home Assistant to manage the logic, you create a robust and maintainable Industrial IoT solution.
Whether you are automating a college lab or a small manufacturing unit in Pune, having a platform that can source genuine components and provide step-by-step build guides is vital. TecnoMate serves as your partner in this journey, ensuring that when you are building sophisticated Industrial IoT controllers, you have access to the genuine components and project kits required for a successful implementation.
Impact & Implications: Transforming Home Automation
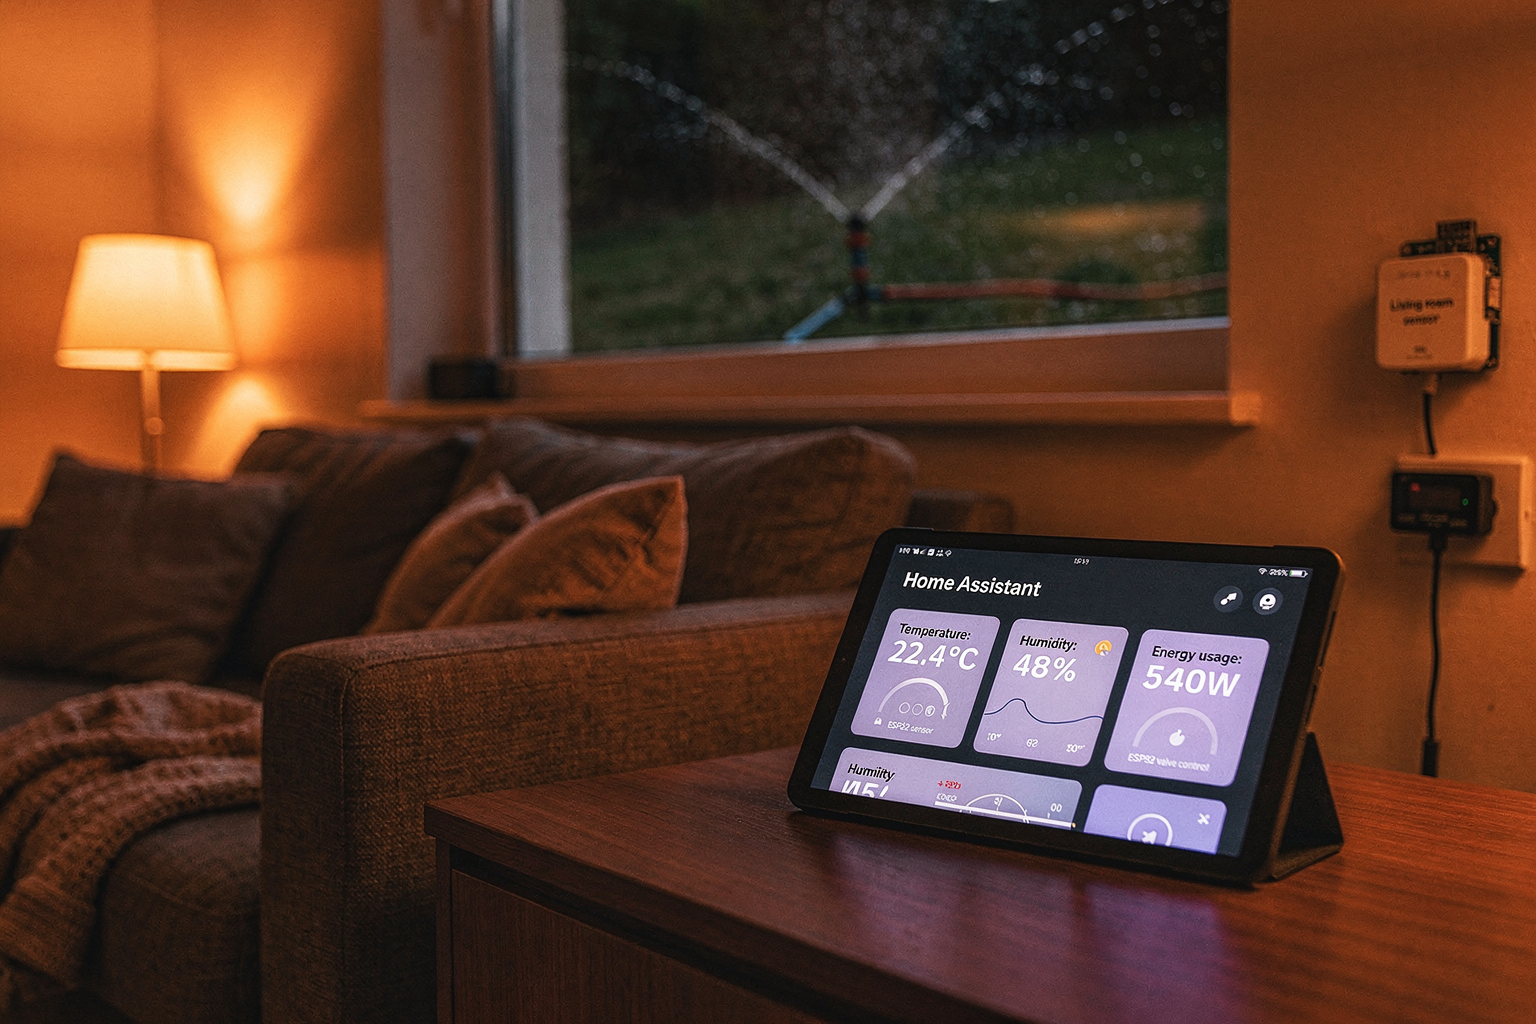
Redefining Home Automation: The Shift to Decentralized Control
The integration of the ESP32 microcontroller with the Home Assistant ecosystem represents more than just a technical upgrade; it signifies a fundamental paradigm shift in how we approach home automation. Historically, smart homes have often been tethered to proprietary ecosystems (like Google Home or Amazon Alexa), where data privacy takes a backseat to vendor convenience. The implication of moving to a decentralized, on-premises solution like Home Assistant is profound: it restores user sovereignty. Instead of a single corporation dictating what a smart bulb can do or where your usage data is stored, the user holds the keys to the entire internal architecture.
This shift is driven by the flexibility of the ESP32 platform. Unlike traditional Arduino boards that might require extensive external hardware to handle connectivity, the ESP32 is a self-contained unit with integrated Wi-Fi and Bluetooth capabilities. According to industry analysis, the combination of an ESP32 PLC with Home Assistant "brings a powerful and flexible solution that enhances efficiency and control in industrial settings". (Source [1]) This flexibility extends directly to residential applications. In an Indian context, where power stability and connectivity can vary, the ESP32’s capability to act as both a sensor node and a local controller means that your smart home can function reliably even during intermittent internet outages, relying on local control loops rather than centralized cloud services.
Democratizing DIY: The Role of ESPHome
A critical impact of this integration is the lowering of the barrier to entry for advanced electronics projects. For years, building custom IoT devices required deep knowledge of embedded C++, network protocols, and complex firmware coding. However, the introduction of ESPHome has democratized this process. ESPHome acts as a software development kit that allows developers to configure their ESP32 devices using YAML (YAML Ain't Markup Language), a readable data serialization language.
This approach is validated by the widespread adoption of beginner-focused tutorials. As indicated in recent YouTube content, creators are now producing what are described as "ESPHome Basics: The Ultimate Beginner's Guide". (Source [2]) Furthermore, the official documentation from Esphome.io highlights the ESPHome Device Builder, which simplifies the process for users by allowing them to install the software onto a device/microcontroller through an intuitive interface rather than raw code. (Source [8]) This means a student in Delhi or a hobbyist in Chennai can now build complex monitoring systems—like humidity sensors or temperature stations—that talk seamlessly with their home dashboard without needing to be a software engineer.
Practical Implications for the Indian Maker Community
For the DIY electronics enthusiast in India, this technology transforms hardware from a static object into a dynamic tool for customization. Practical implications include cost savings and theft deterrents; because Home Assistant operates locally, you can build custom energy monitors that keep track of individual appliance usage, a feature often missing in consumer smart plugs.
A specific case study highlighted by local tech contributors describes integrating an "ESP32 sensor with Home Assistant using ESPHome" specifically tailored for the Indian climate. (Source [4]) By building custom sensors that track temperature and humidity, users can optimize their home cooling systems, saving significant electricity in the long run. The implications here are two-fold: financial savings and the ability to create localized solutions for specific environmental challenges, such as monsoon-induced dampness in homes.
Streamlining the User Experience
From a user experience standpoint, the integration process itself has become streamlined to encourage widespread adoption. The official integration guide from Home Assistant simplifies the setup narrative to a few distinct steps: "In the bottom right corner, select the Add Integration button. From the list, select ESPHome. Follow the instructions on screen to complete the setup." (Source [3]) This User Experience (UX) design is crucial for the longevity of the project. If the setup were overly complex, adoption would remain niche. By making the integration straightforward, the ecosystem encourages users to expand their projects incrementally—adding a sensor today, a light controller tomorrow, and eventually a whole garage PLC setup.
Empowering Through Community and Resources
The impact of ESP32 and Home Assistant is also visible in the collaborative learning environment. A quick search reveals a vibrant community asking questions like, "What's the best ESP32 project for Home Assistant in your opinion?" (Source [7]) This suggests a high level of engagement and curiosity. The community provides a safety net for beginners, offering troubleshooting advice and inspiration.
However, access to the right hardware and documentation remains the bridge between curiosity and capability. This is where the support ecosystem becomes vital. For an aspiring engineer in India, the journey from a schematic to a running device can sometimes be hindered by unreliable component sourcing or a lack of comprehensive documentation. To ensure your builds are successful, you can source a tested kit for this build from platforms like TecnoMate, which ships components with datasheets across India, ensuring that you have the physical foundation to support your software ambitions.
Conclusion: Looking Ahead
Ultimately, the integration of ESP32 with Home Assistant is the hallmark of the "Maker Movement"—a trend that prioritizes education, customization, and tangible results over passive consumption. Whether one is replicating industrial-grade control logic for a home server room or building a simple weather station, the tools are now accessible. As we look toward Industry 4.0, where everything from toasters to factories is connected, the skills developed through these ESP32 projects will only become more valuable. By leveraging the power of open-source software and hardware, users are not just automating their homes; they are actively participating in the evolution of the digital world.
For those looking to automate their homes effectively, having the right raw materials and guides is essential. TecnoMate offers ready-to-build project kits and genuine components for projects like this, empowering makers across the country to bring these sophisticated ideas to life.
Expert Opinions from the Community
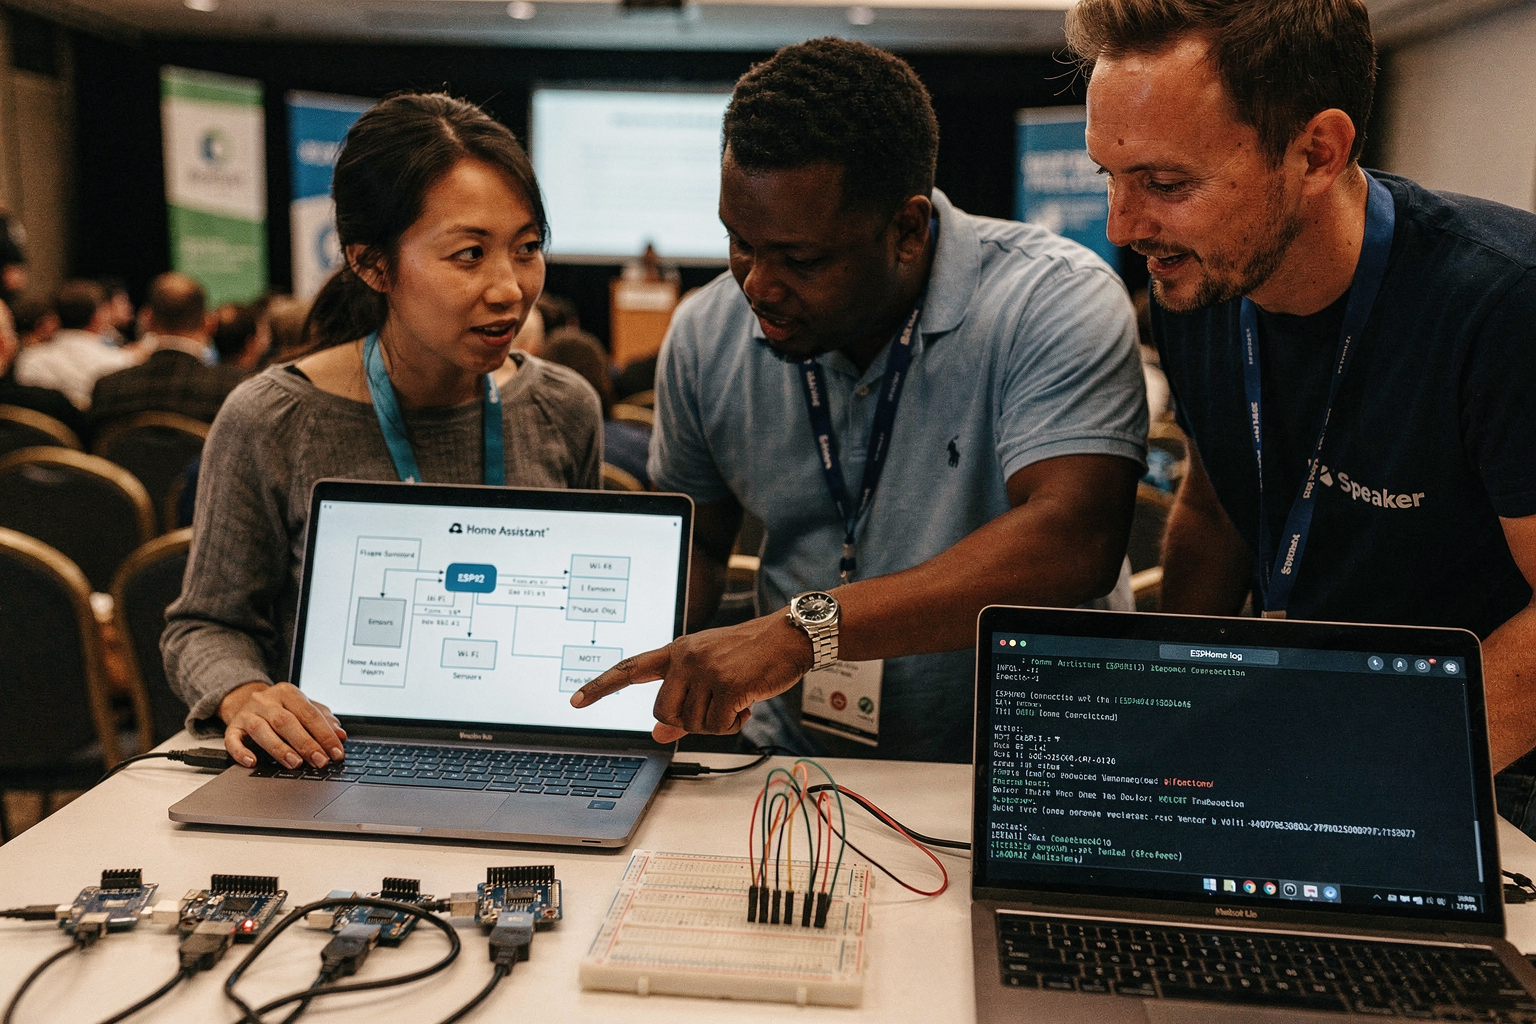
What the Reddit Community Says
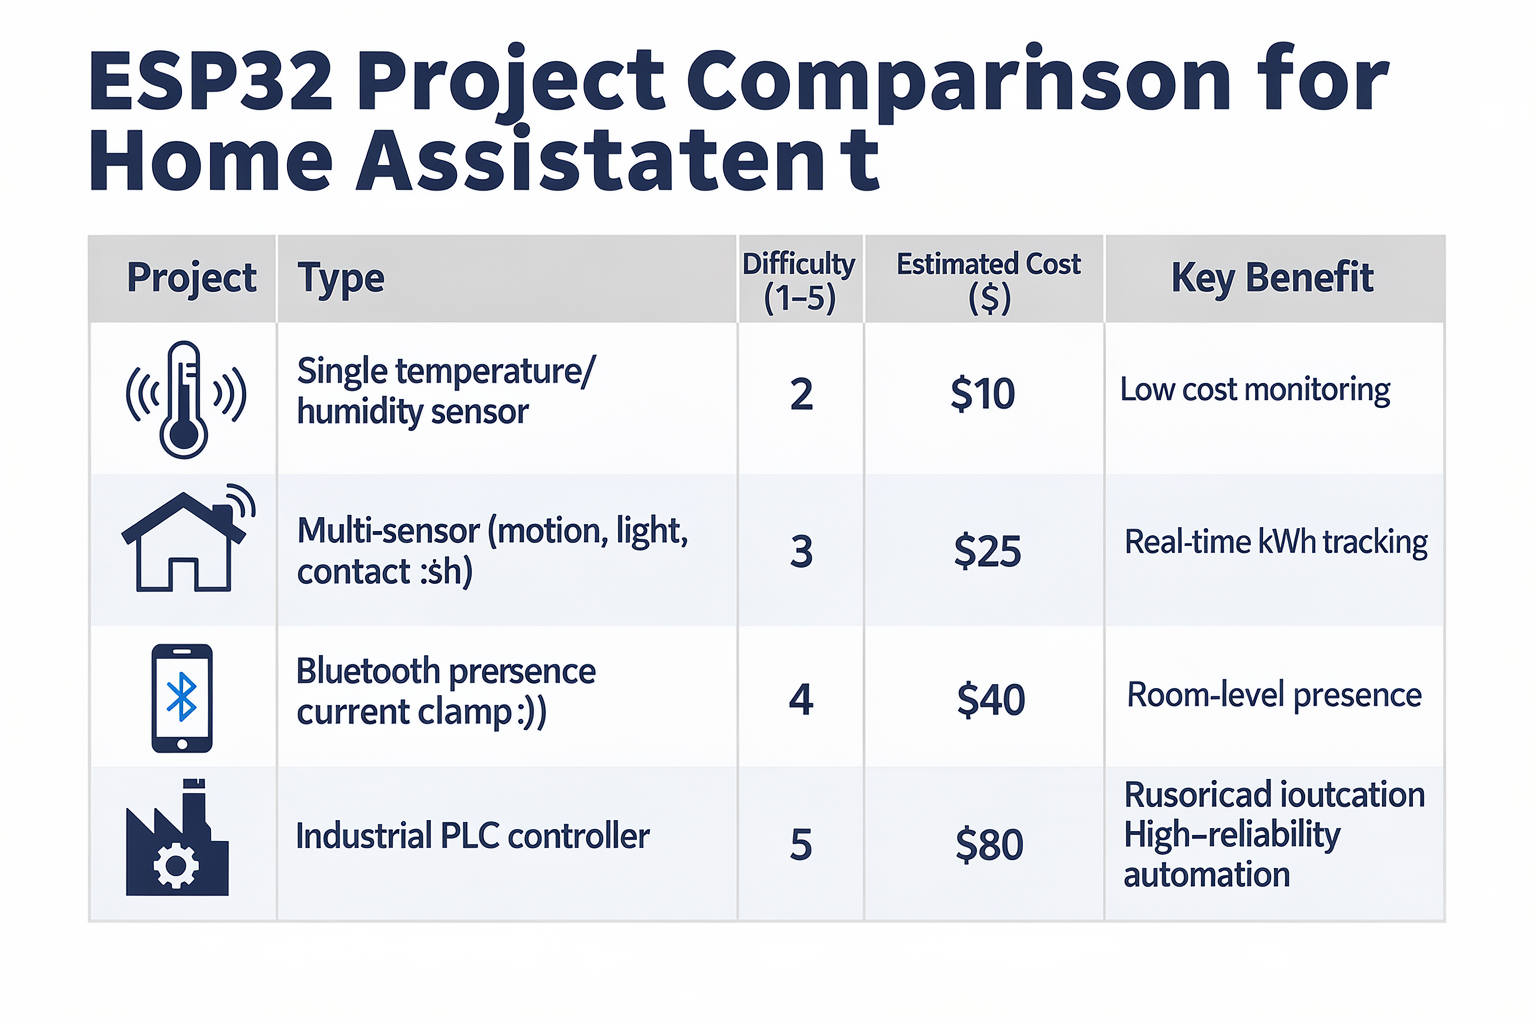
The r/homeassistant subreddit is a goldmine of real-world experience. In a recent thread titled "What's the best ESP32 project for Home Assistant in your opinion?" [7], dozens of community members shared their favourite builds. The overwhelming consensus? Start with a sensor. Whether it’s a DHT22 temperature/humidity sensor or a PIR motion detector, beginners find immediate value in seeing live data appear on their Home Assistant dashboard without complexity.
- Temperature/Humidity Sensor: Many users called this the “gateway drug” of ESP32 projects. It’s simple, requires minimal wiring, and teaches the core flow — flashing ESPHome firmware, defining the sensor in YAML, and watching the state appear in Home Assistant.
- Presence Detection Using Bluetooth: Several comments highlighted using the ESP32’s built-in Bluetooth to track room occupancy. By scanning for BLE advertisements from a smartphone, the ESP32 feeds presence data into Home Assistant for automations like turning lights on/off.
- DIY Smart Switches: More advanced users shared their relay-based builds, controlling 230V appliances. Important safety notes were always included — use optocouplers, proper enclosure, and never skip a fuse.
One top comment noted: “My first ESP32 project was a simple temperature sensor. Seeing the dashboard update in real time gave me the confidence to tackle lighting control. If I had tried something too complex first, I might have given up.” This echoes a common theme: start small, iterate fast. The Reddit community also unanimously recommends using ESPHome as the integration method — not MQTT or raw HTTP — because of its tight native integration with Home Assistant and automatic discovery.
Insights from YouTube Creators
YouTube remains the go-to learning platform for visual builders. Tutorials like “ESPHome Basics: The Ultimate Beginner’s Guide” [2] and “Setting up ESPHome for Home Assistant” [5] have accumulated hundreds of thousands of views. These expert creators break down the process step-by-step, often highlighting pitfalls new users face.
- Using the ESPHome Add-On: Nearly every creator recommends installing ESPHome as a Home Assistant add-on if you are running Home Assistant OS. This keeps everything in one environment and simplifies firmware management.
- ESP32 Board Selection: Creators stress that you should buy official ESP32 dev boards (like the ESP32-DevKitC) or well-known clones from reputable sellers. Poor-quality boards can cause random disconnections and make debugging impossible.
- OTA Updates: A recurring tip is to enable Over-the-Air (OTA) updates from the first flash. This saves you from having to plug the board into USB every time you change the configuration.
In the video “Top 3 Free ESP32 Simulators for 2026” [2], creators also explored software simulation tools that let beginners test sensor logic before buying hardware. While simulators can’t replace real-world wiring, they help conceptualise the YAML configurations. One creator commented: “Simulators are great for learning the code side, but nothing beats holding a real ESP32 and seeing the LED blink.” This aligns with the community’s hands-on ethos — build, break, and rebuild.
Industrial Expert Perspectives
The convergence of ESP32 PLCs and Home Assistant is gaining traction in industrial automation. A comprehensive guide from Industrial Shields [1] notes: “The combination of ESP32 PLC and Home Assistant brings a powerful and flexible solution that enhances efficiency and control in industrial settings.”
Industrial experts highlight several advantages of using the ESP32 in a PLC form factor:
| Feature | Benefit for Industrial Users |
|---|---|
| Wide Input Voltage (12–24V) | Compatible with existing industrial power supplies |
| Opto-isolated I/O | Protects the microcontroller from electrical noise and transients |
| Industrial Temperature Range | Reliable operation from -40°C to +85°C |
| PLC-Style DIN-Rail Mounting | Easy integration into control cabinets |
These experts emphasise that Home Assistant, when paired with an ESP32 PLC, can bridge the gap between consumer smart home tech and industrial monitoring. For example, a factory manager can use Home Assistant to visualise temperature and vibration data from multiple ESP32 PLCs deployed across the floor, and trigger alarms if parameters go out of spec. The guide also recommends using Modbus RTU over RS485 with the ESP32 for reliable communication with legacy machinery. This perspective shows that the ESP32+Home Assistant duo is not just for hobbyists — it’s increasingly a viable tool for small-scale industrial automation in India, where cost-effective solutions are in high demand.
The Indian Maker Community’s Take
The Indian maker ecosystem is vibrant, with platforms like Zbotic producing tutorials specifically for the local audience. Their step-by-step guide “Home Assistant Integration: ESP32 Sensor with ESPHome” [4] focuses on using easily available components — DHT22 sensors and ESP32 development boards — sold at affordable prices through Indian distributors.
Indian experts reinforce the importance of local sourcing and language-friendly documentation. Many tutorials now include Hindi or mixed-language explanations to reach a broader audience. Key takeaways from this community include:
- Use standard breadboard layouts that mirror what is taught in engineering colleges — this helps students quickly build prototypes for final-year projects.
- Power the ESP32 via a 5V phone charger rather than USB from a laptop, as it provides stable current for Wi-Fi transmissions without brownouts.
- Always check component compatibility — some cheap DHT22 clones from local markets give erratic readings; genuine sensors from verified sellers are worth the extra ₹50.
Platforms like TecnoMate cater directly to this movement by offering ready-to-build project kits and genuine components with datasheets and step-by-step build guides. When you are replicating a community-vetted project — say, a multi-sensor weather station — you can source a tested kit from TecnoMate that includes the correct resistor values and pre-written YAML templates, eliminating the guesswork. This alignment between community wisdom and curated supply chains makes the ESP32+Home Assistant journey smoother for students and hobbyists across India.
Key Community Resources to Follow
- Reddit: r/homeassistant – daily discussions, troubleshooting, and project showcases.
- YouTube: “ESPHome Basics” by [Dr. Zzs] or “Setting up ESPHome” by [Everything Smart Home] – high-quality, step-by-step visuals.
- Industrial Guides: Industrial Shields blog for PLC-specific integration tips.
- Indian Platforms: Zbotic and TecnoMate for region-optimised tutorials and component bundles.
The community is unanimous: ESP32 + Home Assistant is the most accessible and powerful DIY smart home combo available today. Start with a simple sensor, join the forums when you get stuck, and before long you’ll be automating your entire home with confidence.
What This Means For You (TABLE)
Integrating an ESP32 into Home Assistant (HA) is more than just connecting sensors; it represents a fundamental shift in how you manage your technology—away from walled gardens and toward a transparent, locally controlled, and highly flexible ecosystem. For the engineering enthusiast or the practical homeowner in India, this combination solves the common pain points of proprietary smart home systems: siloed data, expensive recurring subscription models, and brittle cloud connections that fail during internet outages or throttling.
When we look at the architectural benefits, the integration essentially "freezes" the evolution of your smart home's core. Unlike buying a cheap Amazon Echo that buzzes with advertisements and proprietary data collection, an ESP32 running Home Assistant or ESPHome belongs entirely to you. You process the data on your own hardware (local), ensuring zero latency and maximum privacy. For example, Home Assistant’s official integration documentation suggests a streamlined "Add Integration" flow where users select ESPHome directly from the bottom right corner to link devices, simplifying the often-dreaded setup process compared to binary vendors.
The real-world impact of this setup, however, is best understood through practical application and long-term viability. Below is a breakdown of what this specific integration means for your project's development, cost, and functionality.
| Integration Aspect | Technical Implementation | Immediate Benefit | Long-term Value | Recommended For |
|---|---|---|---|---|
| ESPHome Ecosystem | Uses YAML-based configuration via the ESPHome Device Builder (no C++ compilation needed) | Drastic reduction in coding complexity; immediate setup | Easy OTA updates and version control across dozens of sensors | Beginners transitioning from dashboards to coding |
| Data Structure | ESP32 exposes sensors (temp, humidity, pressure) directly to Home Assistant | Real-time, granular metrics | Robust data retention and historical analysis for alarm systems | Precision environments, homebrew brewing, industrial monitoring |
| Control Architecture | Local API (bypassing cloud APIs) | Zero latency; works without active internet | Costs only electricity; immune to vendor lock-in | Power-sensitive setups in India |
| DIY Flexibility | Custom sensors (e.g., PCA9685) and actuators | Unique features not found in store-bought Hubs | Ability to replace broken parts within hours | Serious hobbyists and final-year engineering students |
The Power of ESPHome and Device Builders
One of the most significant hurdles for hobbyists is learning complex embedded C++ to interact with Home Assistant. This is where the modern workflow changes drastically. By utilizing ESPHome, you bypass the boilerplate code entirely.
The integration uses a "Device Builder" environment installed within Home Assistant. This tools allow you to define your interface—buttons, sliders, and sensors—visually or via YAML. Unlike older, more rigid methods where you had to manually discover devices via IP addresses, the modern ESPHome flow allows you to select the device from the vast library and begin configuration instantly. This lowers the barrier to entry significantly, encouraging more makers in India to build custom solutions rather than buying mass-market plastic devices.
Why This Matters in a Data-Privacy Context
Using a local-first approach changes the relationship between the homeowner and the hardware. When you integrate an ESP32 using the "ESPHome - Home Assistant" integration, the data path is simplified: Sensor -> ESP32 -> YAML Config -> Home Assistant Dashboard. Google, Amazon, or Apple never see the data.
For India, where data privacy concerns are growing, this offers peace of mind. An industrial PLC combined with Home Assistant, as noted in some advanced guides, enhances efficiency in industrial settings—principles that apply to home automation as well. You aren't just controlling lights; you are building a personal data center that understands your environment better than any consumer AI platform.
Cost Efficiency and Scalability
From a financial standpoint, the ESP32 is a fraction of the cost of proprietary Zigbee or Z-Wave hubs. You can build a sensor node for ₹300-₹400 that connects seamlessly. As your project grows from a simple bedroom temperature monitor to a complex multi-sensor environment, the scaling is linear and financially sustainable. You can source a tested kit for this build from platforms like TecnoMate, which ships components with datasheets across India, ensuring you don't get stuck with mismatched electronic components that break the project.
Conclusion
Ultimately, moving to an ESP32 and Home Assistant integration means embracing a "maker's mindset." You are no longer a consumer of technology; you are the vendor of your own utility. While the initial learning curve involving YAML and network setup exists, the reward is a system that grows with you, costs very little to expand, and keeps your data strictly within your four walls. As the community around ESPHome continues to expand (with active forums and YouTube tutorials), you will rarely feel stuck on a build, ensuring your projects remain functional and up to date for years to come.
Frequently Asked Questions
The simplest method is to use the ESPHome add-on within Home Assistant. First, install the ESPHome add-on from the Supervisor panel, then use its web interface to flash a ready-made firmware to your ESP32. Home Assistant will automatically discover the device once it’s connected. For a complete beginner-friendly walkthrough, platforms like TecnoMate provide starter kits that include ESP32 boards and pre-tested sensor modules, along with step-by-step guides tailored for Indian makers.
Ready to start building?
Explore our collection of DIY kits and components. All project components mentioned in this blog are available in our store.
Browse All Projects