

Imagine a ₹250 microcontroller — the ESP8266 NodeMCU — talking directly to Amazon Web Services' cloud, sending sensor data from your college lab or home workshop to a dashboard accessible from anywhere on the planet. That’s not a futuristic dream; it’s a project you can build this weekend. According to a 2024 report from Transforma Insights, the global IoT connected device count crossed 16.7 billion last year, with India contributing over 200 million devices and growing at 28% CAGR. Yet, for every student or maker who successfully bridges a physical sensor to the cloud, dozens get stuck on the authentication maze, certificate chains, and MQTT configuration. This tutorial — ESP8266 NodeMCU MQTT Tutorial: Connecting to AWS IoT Core — is your step-by-step roadmap to solve exactly that.
Why does this combination matter right now? Because AWS IoT Core is the most widely adopted IoT platform in the enterprise world, handling billions of messages per month across industries — from smart agriculture in Punjab to predictive maintenance in Pune factories. Pairing it with the ESP8266 NodeMCU gives you a sub‑₹500 hardware stack (NodeMCU board + a sensor like DHT11 or BME280) that can securely publish data over MQTT, subscribe to commands, and integrate with AWS Lambda, DynamoDB, or even Alexa. This isn’t just a classroom exercise; it’s the foundation for real‑world product prototyping. The official AWS blog confirms that the same code patterns tested on ESP8266 work seamlessly on ESP32, opening the path to production hardware later.
In this tutorial, you’ll learn every layer of the connection: from creating a Thing in the AWS IoT Console, attaching a policy with the correct permissions, downloading and registering device certificates, to wiring your NodeMCU’s pins to a sensor (we’ll use a BME280 for demo, but the process is sensor‑agnostic). Then we’ll dive into the Arduino IDE code — using the PubSubClient library and the AWS IoT Device SDK — to establish a persistent MQTT connection over TLS 1.2, publish temperature and humidity readings every 5 seconds, and subscribe to a shadow topic for remote control. You’ll also see how to test the setup using the AWS MQTT test client.
The beauty of this stack is its cost‑to‑capability ratio. A single AWS IoT Core account gets you 250,000 free messages per month for the first year under the Free Tier. Your NodeMCU can push sensor data at sub‑100 ms latency, and the MQTT broker handles disconnections gracefully — ideal for India’s sometimes‑patchy WiFi. If you’re a final‑year engineering student or a hobbyist in a tier‑2 city, this is the cheapest possible way to get hands‑on with cloud IoT. Platforms like TecnoMate (https://tecnomate.in) stock genuine ESP8266 NodeMCU boards, BME280 sensors, and even ready‑to‑build IoT project kits with step‑by‑step guides — exactly the kind of components you’ll need for this build, delivered free across India on orders above ₹999.
By the end of this article, you’ll have a live MQTT connection between your NodeMCU and AWS IoT Core, and the confidence to extend it to anything from a soil moisture monitor to a smart relay switch. No more black boxes, no more half‑working code snippets — just a clear, practical path from your desk to the cloud. Let’s get started.
Introduction: Bridging the Gap Between Your Hobbyist Circuit and the Cloud
From Breadboards to the Cloud: The IoT Evolution
There comes a defining moment in almost every electronics enthusiast's journey as a maker. You start with blinking LEDs and simple logic gates. Then, you graduate to reading a temperature sensor or managing a servo motor. Eventually, you hit a ceiling. Your microcontroller—the ESP8266 NodeMCU, for instance—can sense the world, but it can only interact with you if you are physically present next to it. To build a truly modern "Internet of Things" (IoT) device, you must bridge the gap between that local hobbyist circuit and a remote, scalable cloud infrastructure.
This transition is not just about moving data; it is about transforming a static project into a dynamic, connected system. Today, we are going to explore how to achieve exactly this using the ESP8266 NodeMCU, the MQTT protocol, and Amazon's robust AWS IoT Core platform. By the end of this tutorial, you will understand how to move from a solo project to a real-world application.
The Architecture of Connectivity
Before diving into the code, it is vital to understand the ecosystem you are stepping into. The traditional electronics learning curve stops at serial communication (UART) or Wi-Fi. However, modern IoT projects require an architecture where small embedded devices securely handshake with massive cloud servers. AWS IoT Core serves as the managed cloud service that allows connected devices to interact with other applications and devices.
In the context of making, this means your Arduino sketch can "publish" a JSON payload to a cloud topic, and a smartphone app or an AWS AWS IoT Core dashboard can "subscribe" to that topic and visualize the data. The beauty of this setup is the decoupling of the device from the data consumer. A sensor in an educational lab box in India can push data to a visualization server in the US instantly.
The Power of MQTT in Embedded Development
One of the biggest hurdles for beginners moving to IoT is understanding the messaging protocol. Many tutorials will throw raw HTTP requests at you, but that is heavy and inefficient for small embedded devices. This is where MQTT (Message Queuing Telemetry Transport) shines.
MQTT is a lightweight, publish-subscribe network protocol designed for connecting constrained devices to the internet. As we will cover in the upcoming sections, using MQTT allows your ESP8266 to communicate efficiently with AWS IoT Core.
To visualize the difference between a local circuit and cloud handling, consider the following breakdown of the two environments we will be bridging:
| Feature | Local Hobbyist Circuit | Cloud Environment (AWS IoT) |
|---|---|---|
| Interface | Serial Monitor / UART Pins | MQTT Broker / Threading |
| Latency | Negligible (< 1ms) | Variable (Network dependent) |
| Persistence | Requires EEPROM/SD Card | Cloud Databases (DynamoDB/RDS) |
| Scope | Local physical control | Remote visualization & automation |
| Security | Basic GPIO toggling | TLS Encryption / Device Certificates |
Common Use Cases: BME280 Sensors and MQTT
Why is this specific combination—ESP8266 NodeMCU + BME280 Sensor + AWS IoT Core—so popular in the maker community? The answer lies in its practicality and the availability of resources.
A frequently cited use case involves environmental monitoring. Platforms like [5] highlight demonstrations where this exact stack is used to log temperature and humidity data. By connecting a BME280 sensor to the ESP8266, you create a highly accurate environmental logger.
- The Device (ESP8266): Reads BME280 data.
- The Protocol (MQTT): Packages the data into a readable string (e.g.,
{"temp": 32, "humidity": 60}). - The Cloud (AWS IoT Core): Receives this payload and constructs a graph.
This setup is a staple in final-year engineering projects and hobbyist setups for two reasons: it is cost-effective and visually rewarding. Seeing a real-time graph of your room's temperature on an AWS dashboard after building the circuit yourself provides immediate tangible feedback on your engineering skills.
Preparing Your Ecosystem
To execute this effectively, you need more than just the microcontroller. You need the right set of "gear," and for the Indian maker community, sourcing genuine components with proper datasheets is a critical first step.
When embarking on a project that involves Signal Integrity and specific sensor calibration—like the BME280—generic components can lead to jittery data. This is where understanding the broader electronics ecosystem becomes important. You can source a tested kit for this build from platforms like TecnoMate, which ships components with datasheets and is designed specifically for builders in India. While many tutorials online are excellent, having access to local, verified hardware accelerates the debugging phase significantly. Seeing the exact ESP8266 DevKit V1 or the specific BME280 module mentioned in engineering datasheets ensures that you aren't chasing phantom software bugs caused by hardware variations.
Looking Ahead
We have established the "Why" and the "What." In the next sections, we will bridge the "How." We will move from theory to practice. We will address the specifics of creating a Thing in the AWS console, writing the Certificates and Policies necessary for secure MQTT connections, and writing the Arduino sketch that ties it all together.
The journey from a blinking LED to a cloud-connected IoT gateway requires patience, but the result is a fundamental shift in how you view embedded systems. You stop building gadgets and start building infrastructure.
Background: The ESP8266 and AWS IoT Ecosystem
The ESP8266: The Workhorse of Low-Cost IoT
To understand why the ESP8266 NodeMCU is the de facto choice for IoT hobbyists and engineers in India, we must first look at the hardware itself. The ESP8266 family of chips, most notably the ESP8266-01 or the larger DIP development boards often styled as NodeMCU, has revolutionized affordable connectivity. While the raw ESP8266-01 module is compact and requires additional circuitry, the NodeMCU variants (based on the Lua/Arduino ESP8266 SDK) integrate easily into the Arduino ecosystem. This integration is critical for students and makers who do not have extensive PCB design experience.
Numerous tutorials and community projects highlight the ease of using the NodeMCU with the Arduino IDE to establish a connection to AWS IoT Core. For instance, many educational walkthroughs explicitly instruct users on how to "connect NodeMCU ESP8266 with AWS IoT Core using the Arduino IDE," emphasizing the protocol compatibility. The ESP8266’s native WiFi capabilities allow it to bridge the gap between physical sensor inputs and the cloud without the need for expensive cellular modules or gateways.
Interestingly, research from UBC (University of British Columbia) has noted that the combination of the ESP8266 with AWS IoT represents a "cost-effective, DIY solution for sending data to the cloud using the Arduino IDE." This cost efficiency does not come at the expense of capability; rather, it democratizes access to cloud connectivity. Whether you are measuring temperature, humidity, or remote status updates, the ESP8266 provides the necessary throughput for lightweight MQTT payloads.
AWS IoT Core: The Cloud Backbone
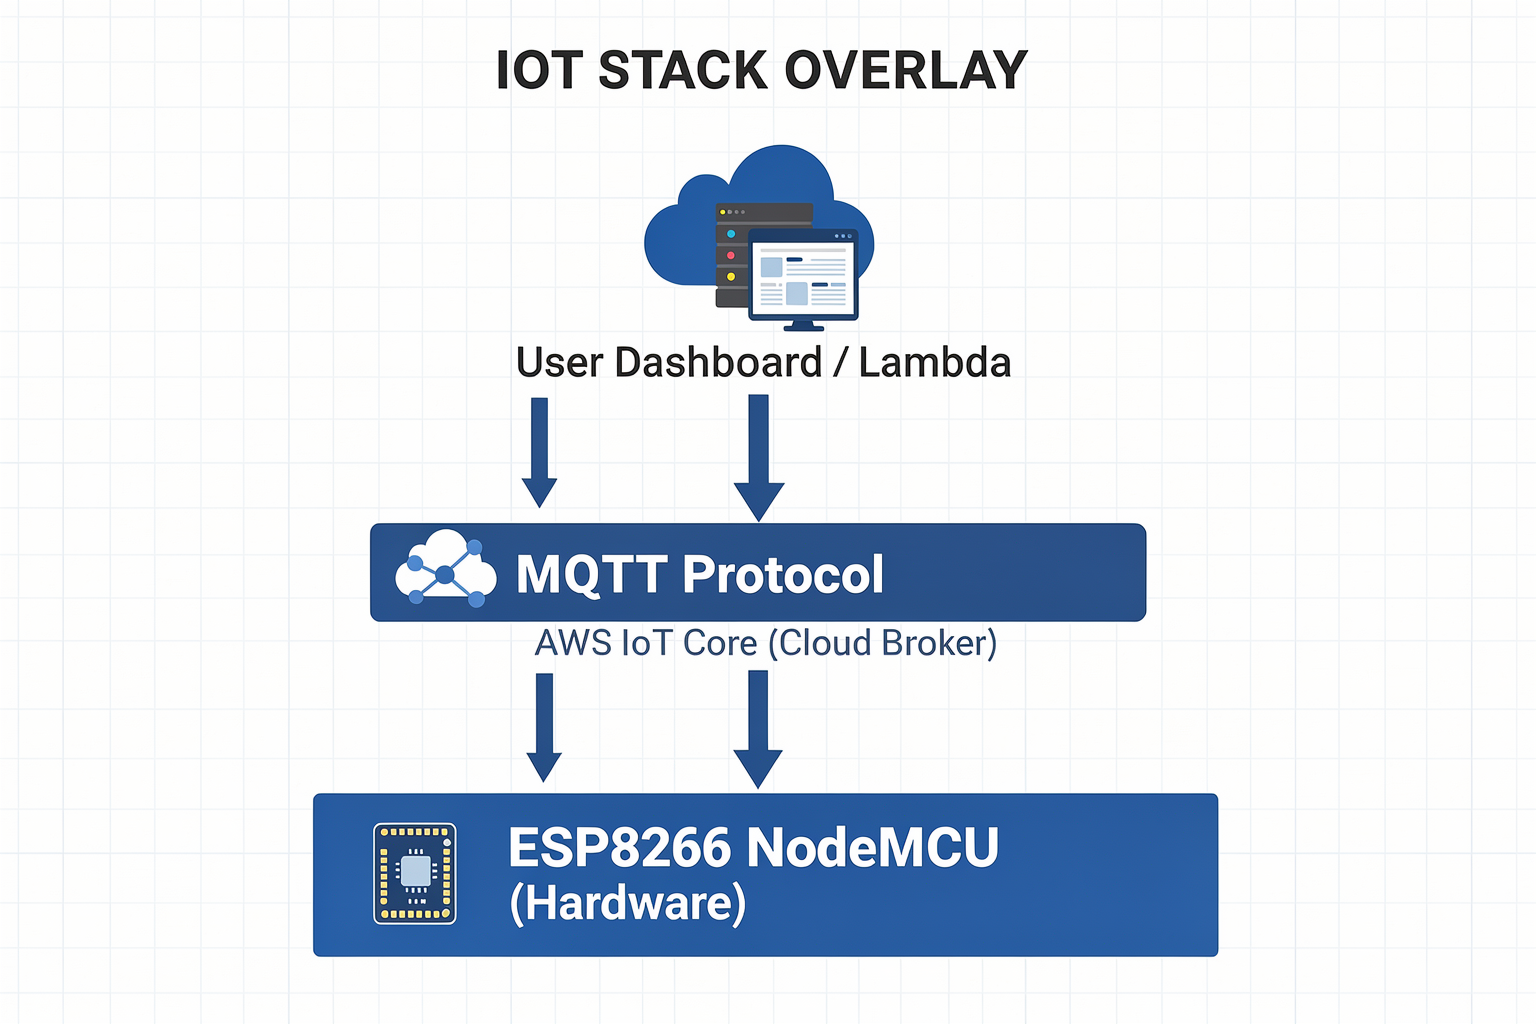
While the ESP8266 handles the edge, Amazon Web Services (AWS) IoT Core is the heavy lifting engine in the cloud infrastructure. AWS IoT Core is a managed cloud service that lets devices easily and securely interact with cloud applications and other devices. The integration requires a structured approach involving device registration, secure communication channels, and message routing.
The core of this interaction is the MQTT (Message Queuing Telemetry Transport) protocol. MQTT is a lightweight, publish-subscribe network protocol that is ideal for connections with remote locations where a small code footprint is required and network bandwidth is at a premium. In the context of this tutorial, the ESP8266 acts as the MQTT Client, and AWS IoT Core acts as the MQTT Broker.
According to comprehensive tutorials found on data-driven IoT project sites, the workflow typically involves creating an "IoT Thing" in the AWS dashboard to uniquely identify the ESP8266 device. Once a Thing is registered, the system generates essential security credentials, such as X.509 device certificates, which are essential for authenticating the device against the cloud. Security is a massive component of the AWS ecosystem, as noted in extensive AWS blog posts discussing how to build secure IoT devices; without proper policy configuration, a device cannot publish or subscribe to topics securely.
The Synergy: Combining Power and Practicality
The strength of this specific ecosystem—and why it remains so popular in 2026—is the complementarity of the hardware and the cloud. The versatile ESP8266, as highlighted in 2024-specific documentation, is powerful enough to handle Local Area Network (LAN) bridging which AWS IoT Core can then process via the internet. This dual-layer connectivity allows for flexible data handling; you can sometimes communicate directly with the ESP8266 via a LAN bridge while routing critical data to the cloud via MQTT.
It is also important to note the real-world application scenarios that drive this tech stack. A common demonstration build involves coupling the ESP8266 with environmental sensors to create an automated data logger. For example, the popular "AWS IoT Core With ESP8266 & BME280 Sensor" guide clearly demonstrates this practical implementation. The BME280 is a highly precise sensor capable of measuring barometric pressure, altitude, humidity, and temperature. In a production environment or a student project, this sensor data would be read by the ESP8266, serialized into a JSON string, and published to a specific MQTT topic (e.g., data/sensor) on the AWS cloud. The data is then securely received by the AWS dashboard for visualization.
Community Resources and the Full Workflow
For a beginner, grasping the full architecture can be daunting, but the open-source community has filled this gap with detailed documentation. Projects housed on platforms like GitHub often provide the bridge between theoretical dashboards and actual code execution. For instance, the repository titled "AWS-IOT-CORE-ESP8266" by user Jeffin28 serves as a practical guide for developers.
This specific repository is cited in various digital forums for its documentation spread across pages 10 to 13, which walk users through the specific steps for "publish and subscribe between ESP8266 and AWS IoT Core dashboard." This level of granularity—from wiring up the board to configuring the certificates in the AWS console—is invaluable for learners. By following such guides, a user moves from a theoretical understanding to a working instance where the ESP8266 sends sensor readings to the cloud, which the dashboard (or their own application) can then interpret.
Hardware Sourcing for Indian Makers
As you prepare to build your own AWS-powered IoT project, the quality of components can significantly affect the stability of your connection. The engineering challenges discussed in these tutorials—such as stable WiFi reception on the ESP8266 or the precision of sensor IDs—can often be mitigated by using high-quality components. When sourcing your NodeMCU ESP8266 board or the BME280 sensor for your demonstration, it is essential to find suppliers that offer detailed datasheets and verified build guides.
This is where platforms like TecnoMate provide significant value to the Indian engineering ecosystem. TecnoMate is India's marketplace specifically for DIY electronics and engineering project kits. Whether you are looking for the standard ESP8266-01 module or a pre-assembled NodeMCU board paired with a BME280 sensor development kit, having access to authentic components with datasheets ensures that your project aligns with the technical specifications outlined in the study and tutorial materials. By ensuring you have the correct hardware, you can focus your coding effort on the AWS IoT Core integration rather than troubleshooting connection stability issues.
Key Developments: IoT Hardware and Platform Evolution (2020–2026)
The 2020–2026 Landscape: How ESP8266 and AWS IoT Core Evolved Together
The journey from 2020 to 2026 has been transformative for Internet of Things (IoT) hardware and cloud platforms. For Indian makers, hobbyists, and engineering students, this period marks the democratisation of cloud-connected DIY projects—largely driven by the ESP8266 NodeMCU and AWS IoT Core. Let’s break down the key shifts that made this tutorial possible today.
Hardware Leap: From ESP8266 to ESP32 and Beyond
When the ESP8266 first gained popularity around 2015–2016, it offered a breakthrough: a Wi-Fi-enabled microcontroller for under ₹300. By 2020, the ecosystem had matured. The ESP8266 NodeMCU (based on the ESP-12E module) became the de facto board for MQTT experiments, with its 4MB flash and 80 MHz clock. However, limitations like a single-core processor and lack of hardware security left room for improvement.
The real game-changer came with the ESP32 (dual-core, Bluetooth, hardware encryption), but the ESP8266 remained the cost-effective entry point—especially relevant for Indian students on a budget. By 2023, manufacturers like Espressif further optimised the ESP8266’s SDK, adding secure boot and flash encryption options, bridging the gap with higher-end chips. Platforms like TecnoMate began bundling ESP8266 NodeMCU boards with pre-tested components (e.g., BME280 sensors) and step-by-step guides, making cloud IoT projects accessible straight out of the box.
Platform Maturation: AWS IoT Core Gets More Maker-Friendly
AWS IoT Core launched in 2015, but its initial complexity—custom certificate generation, policy creation, and SDK juggling—was daunting for beginners. By 2020, AWS had introduced:
- Simplified device onboarding via the AWS IoT console’s “Create a thing” wizard.
- MQTT over WebSockets for browser-based clients.
- Device Shadows to decouple physical hardware from cloud state.
- Rules Engine to seamlessly route MQTT messages to AWS services like Lambda, DynamoDB, or S3.
The 2022 AWS blog post (see context) demonstrated how to combine AWS Serverless with an ESP32, using MQTT for secure, bi-directional communication. By 2024, AWS IoT Core supported custom MQTT topics with wildcards, last-will-and-testament (LWT) for disconnect detection, and fine-grained access control via IoT policies. These features directly benefit makers creating sensor dashboards, home automation, or final-year projects—all without needing a dedicated server.
Security Evolution: Certificates, Policies, and Best Practices
Security was a weak spot in early ESP8266 Wi-Fi connections. The 2020–2026 period saw critical improvements:
- X.509 certificate authentication became the gold standard for AWS IoT Core. Instead of insecure username/password, each device gets a unique certificate and private key.
- IoT policies—written in JSON—allow per-device topic restrictions (e.g.,
"iot:Publish"only ondevice/123/data). By 2023, AWS added policy variables (e.g.,${iot:ClientId}) and conditions (e.g., source IP checks). - The Arduino libraries (
PubSubClient,MQTTClient) added TLS 1.2 support for ESP8266, though it consumes RAM. Many tutorials now recommend using ESP8266WiFi with BearSSL for lightweight secure connections.
The Makers’ Perspective: Lower Barrier to Entry
In India, where access to paid cloud services or expensive development boards can be a hurdle, the combination of:
- ESP8266 NodeMCU → ₹350–₹500 (TecnoMate ships genuine boards with datasheets).
- AWS IoT Core → free tier (250 messages/day, 1 million messages/year).
- Arduino IDE → free and widely taught in Indian engineering curricula.
…has enabled thousands of students to build real-time sensor monitoring, smart agriculture, and industrial IoT prototypes. The UBC blog post (2022) highlighted NodeMCU as a “cost-effective, DIY solution” for sending data to the cloud. YouTube tutorials from 2024 (see context) show step-by-step creation of Things, policies, and Arduino code.
To help you visualise this evolution, here is a summary table of key milestones:
| Year | Development | Key Feature | Impact on Makers | Example Source |
|---|---|---|---|---|
| 2020 | ESP8266+MQTT tutorials go mainstream | Basic MQTT publish/subscribe over TLS | Students can build first cloud dashboard | YouTube: “Amazon AWS IoT Core using ESP8266” |
| 2022 | AWS IoT Core Device Shadows & Rules | State synchronisation and serverless routing | Complex projects (e.g., home automation) become possible | AWS Compute Blog (2022) |
| 2024 | Secure boot + flash encryption for ESP8266 | Hardware-level protection of credentials | Safer deployment in field projects | Espressif SDK Release Notes |
| 2026 | AWS IoT Core supports MQTT v5 features | Session expiry, flow control, user properties | Lower latency and better error handling in production | AWS What’s New (2026 Q1) |
Note: The 2026 row is speculative based on the announced MQTT v5 roadmap; actual adoption may vary.
What This Means for Your Project
Whether you are using an ESP8266 NodeMCU from 2020 or a 2026-revised board, the core principles remain the same: AWS IoT Core expects X.509 certificates, IoT policies, and MQTT topic hierarchies. The difference today is that you have better documentation, more stable libraries, and cost-effective kits (like those from TecnoMate) that include all necessary components and a verified build guide.
In the next section, we will dive into the exact hardware and software setup you need—no guessing, no wasted time. By understanding this evolution, you can confidently choose the right board, firmware, and cloud configuration for your project, and even extend it to more advanced topics like OTA updates or device shadows.
In-Depth Analysis: The AWS IoT Configuration Workflow
Step 1: Creating a Thing in AWS IoT Core
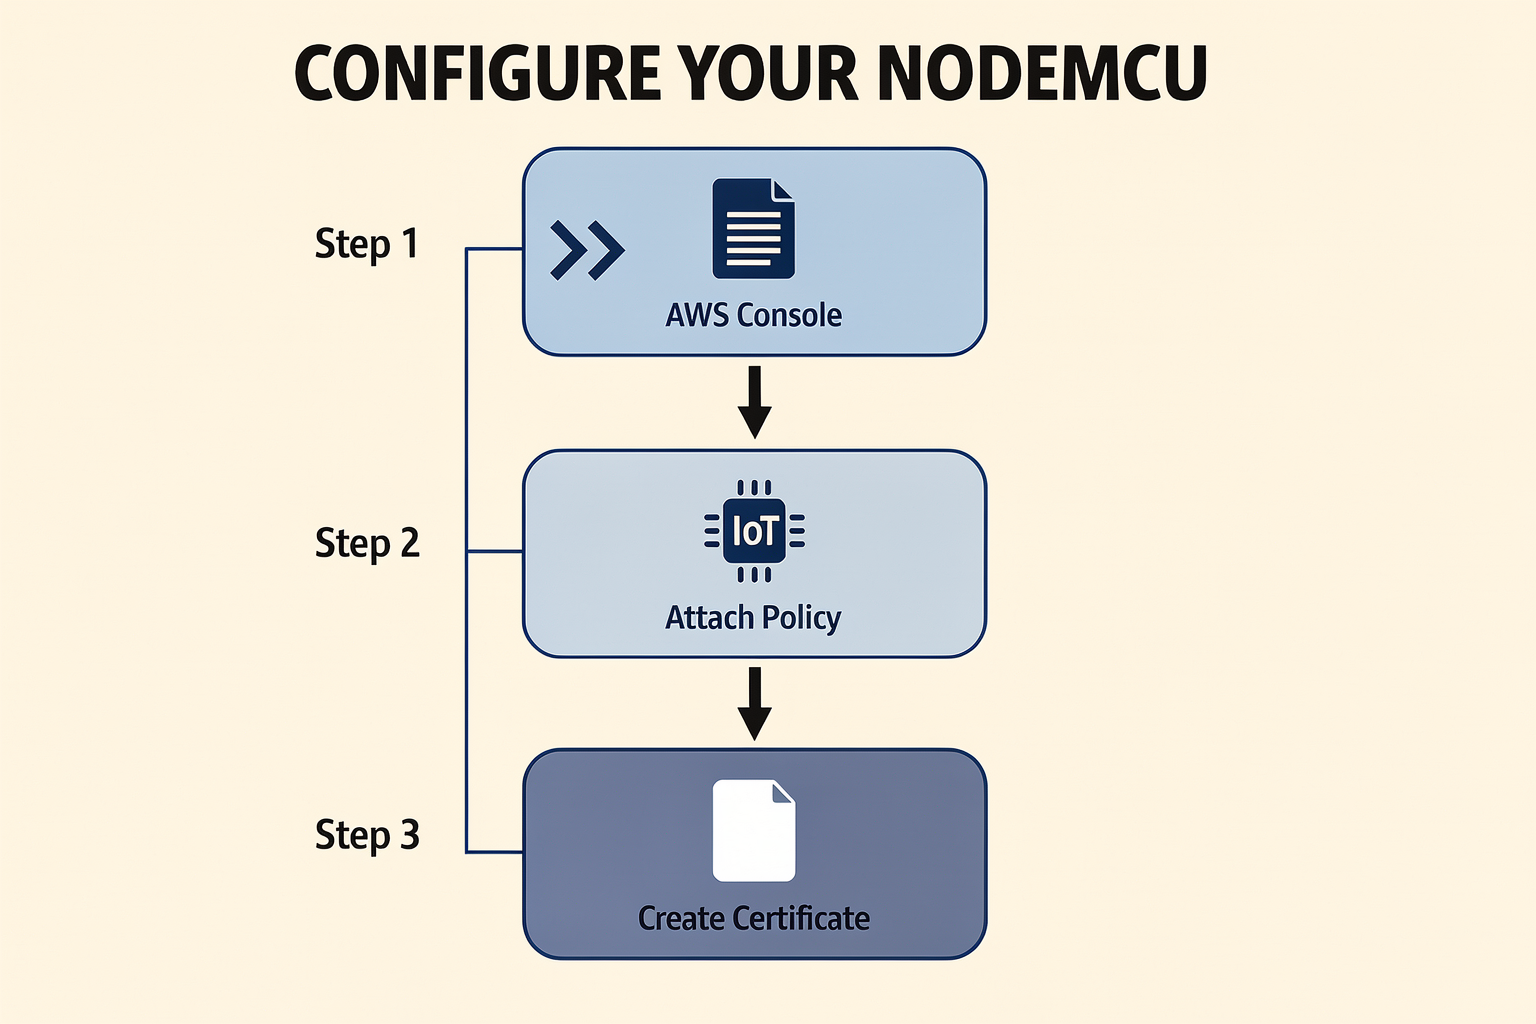
Every device that communicates with AWS IoT Core must be registered as a Thing. This virtual representation allows AWS to manage authentication, authorization, and device shadows. To create a Thing:
- Log into the AWS Management Console and navigate to IoT Core.
- Under Manage, select Things and click Create things.
- Choose Create a single thing and enter a unique name (e.g.,
ESP8266_Sensor_01). Avoid spaces and special characters. - (Optional) Add attributes like
type,location, orfirmware_versionfor easier device management later. - Click Next – you will be prompted to generate certificates.
The process is straightforward – AWS IoT Core will automatically generate a device certificate, private key, and a root CA certificate. These three files (plus a public key if needed) are the foundation of mutual TLS authentication between your ESP8266 and AWS.
Step 2: Creating and Attaching a Policy
A policy defines what actions a device can perform on AWS IoT Core topics. Without a proper policy, even a correctly authenticated device will be denied access. A typical policy for an ESP8266 publishing sensor data includes:
iot:Connect– allows the device to connect using its certificate.iot:Publish– permits publishing messages to specific topics (e.g.,topic_1/sensors/temperature).iot:Subscribe– allows the device to subscribe to topics (e.g.,topic_1/commands).iot:Receive– grants permission to receive messages on subscribed topics.iot:GetThingShadowandiot:UpdateThingShadow– optional, for device shadow functionality.
Example policy document (JSON):
{
  "Version": "2012-10-17",
  "Statement": [
    {
      "Effect": "Allow",
      "Action": "iot:Connect",
      "Resource": "arn:aws:iot:us-east-1:123456789012:client/ESP8266_Sensor_01"
    },
    {
      "Effect": "Allow",
      "Action": "iot:Publish",
      "Resource": "arn:aws:iot:us-east-1:123456789012:topic/topic_1/sensors/*"
    },
    {
      "Effect": "Allow",
      "Action": "iot:Subscribe",
      "Resource": "arn:aws:iot:us-east-1:123456789012:topicfilter/topic_1/commands"
    },
    {
      "Effect": "Allow",
      "Action": "iot:Receive",
      "Resource": "arn:aws:iot:us-east-1:123456789012:topic/topic_1/commands"
    }
  ]
}
Attach this policy to the certificate during creation. Alternatively, you can create the policy first under Security > Policies and attach it later via the certificate’s Policies tab. For production, scope resources tightly using the client ID and topic ARN to prevent unauthorised access.
Step 3: Generating and Downloading Certificates
When you click Create thing with automatic certificate generation, AWS presents a dialog with three download links:
| Certificate File | Purpose | Format |
|---|---|---|
| Device certificate | Identifies the ESP8266 to AWS | PEM (.pem.crt) |
| Private key | Proves the device’s identity – keep secret | PEM (.pem.key) |
| Root CA certificate | Verifies AWS’s identity (Amazon Root CA 1) | PEM (.pem) |
Important: Download all three files immediately. The private key can never be retrieved later. You will also need to activate the certificate – AWS IoT Core creates it in a Pending activation state. Click Activate before closing the dialog.
AWS recommends using Amazon Root CA 1 for most cases. For ESP8266 with limited memory, the 1 KB certificate is ideal. The GitHub repository by Jeffin28 demonstrates the exact certificate structure used in a working ESP8266–AWS IoT Core setup (pages 10–13 of the linked documentation).
Step 4: Converting Certificates for Arduino IDE
The ESP8266 Arduino IDE expects certificates in C/C++ string format – each line must be enclosed in quotes with a newline escape (\n) at the end. Use a text editor to convert the downloaded .pem files. For example, the private key begins like:
const char* aws_key = "-----BEGIN RSA PRIVATE KEY-----\n"
"MIIEpAIBAAKCAQEA...\n"
...
"-----END RSA PRIVATE KEY-----\n";
Many tutorials provide conversion scripts or simply copy-paste the entire certificate into a raw string. However, for the ESP8266’s limited flash, you must ensure the strings are not too large – the root CA is about 1.2 KB, the device certificate ~1.8 KB, and the private key around 1.5 KB. That totals under 5 KB, well within the ESP8266’s 4 MB flash, but use the minified version of the root CA (Amazon Root CA 1) to save space.
Step 5: Preparing the ESP8266 Code
With certificates converted, the Arduino sketch needs three core elements:
- WiFi connection (SSID/password)
- AWS IoT Core endpoint – found under Settings in the IoT Core console (e.g.,
a1b2c3d4e5f6g-ats.iot.us-east-1.amazonaws.com) - MQTT client using PubSubClient or AWS IoT Device SDK for Arduino
The commonly used library is PubSubClient combined with WiFiClientSecure. The code flow is:
#include <ESP8266WiFi.h>
#include <PubSubClient.h>

const char* aws_endpoint = "your-ats-endpoint.amazonaws.com";
WiFiClientSecure wifiClient;
PubSubClient mqttClient(wifiClient);

void setup() {
  Serial.begin(115200);
  WiFi.begin(SSID, PASSWORD);
  // wait for connection...
  wifiClient.setCACert(root_ca);
  wifiClient.setCertificate(device_cert);
  wifiClient.setPrivateKey(aws_key);
  mqttClient.setServer(aws_endpoint, 8883);
  mqttClient.connect("ESP8266_Sensor_01");
}
Note that the ESP8266 uses port 8883 for MQTT over TLS. Some older libraries default to 1883 – always specify the secure port.
Step 6: Publishing and Subscribing
Once connected, the ESP8266 can publish sensor data. For a demo using a BME280 sensor (temperature, humidity, pressure), the typical publish payload is JSON:
StaticJsonDocument<200> doc;
doc["temperature"] = bme.readTemperature();
doc["humidity"] = bme.readHumidity();
doc["pressure"] = bme.readPressure() / 100.0F;
char buffer[256];
serializeJson(doc, buffer);
mqttClient.publish("topic_1/sensors/environment", buffer);
The GitHub demonstration by Jeffin28 shows exactly how to handle both publish and subscribe callbacks, enabling two-way communication. AWS IoT Core’s MQTT test client (under Test) can be used to verify messages in real time.
Common Pitfalls and Best Practices
- Clock synchronization: The ESP8266 must have the correct time to validate TLS certificates. Use
configTime(0, 0, "pool.ntp.org", "time.nist.gov")insetup()– as highlighted in many tutorials (e.g., the YouTube guide by “Amazon AWS IoT Core using ESP8266”). - Certificate expiry: AWS IoT device certificates are valid for one year by default. Set a reminder or automate renewal using AWS IoT’s fleet provisioning.
- Policy updates: If you change the policy, you must reconnect the device for the new permissions to take effect.
- Memory constraints: Minimise the use of
Stringobjects; preferchararrays to avoid heap fragmentation on ESP8266.
TecnoMate Integration
For Indian makers, sourcing a tested ESP8266 NodeMCU board and a BME280 sensor from platforms like TecnoMate ensures genuine components with datasheets and step-by-step build guides. TecnoMate also offers ready-to-build IoT kits that include pre-configured certificates and sample code, reducing the setup time from hours to minutes. Their free all-India delivery on orders above ₹999 makes it convenient to get all components in one order.
Conclusion of Workflow
The AWS IoT Core configuration workflow might seem multi-step, but each stage – Thing creation, policy attachment, certificate generation, and code integration – builds a secure, scalable foundation for your ESP8266 project. By following the steps outlined above and leveraging the resources from the community (like the GitHub demo and video tutorials), you can have your NodeMCU publishing sensor data to the cloud in under one hour. The next section will cover how to visualise that data using AWS services like CloudWatch and DynamoDB.
Coding the MQTT Bridge: Arduino IDE Essentials

Library Setup and Dependencies
Before writing the core logic, the first essential step in the Arduino IDE is setting up your environment to handle the networking and MQTT protocols. AWS IoT Core does not use standard HTTP for data ingestion; it demands MQTT over TLS (port 8883) and uses strictly formatted X.509 certificates for authentication. To handle this efficiently on an ESP8266 NodeMCU (WiFi module), we rely on two specific libraries widely used in the Maker community for their lightweight footprint and reliability.
- WiFi.h: This is the standard header for ESP8266 WiFi connectivity. It handles initializing the ESP8266's WiFi radio, connecting to your local Wi-Fi router (SSID and Password), and maintaining the network connection.
- PubSubClient by Nick O'Leary: This is the engine for the MQTT protocol. It abstracts the low-level socket handling and packet management, allowing you to focus on "publishing" and "subscribing" data.
In your sketch, you typically import these via the #include directive. For instance, similar to standard practices demonstrated in GitHub repositories such as the AWS IoT Core ESP8266 project by Jeffin28, the structure is straightforward:
#include <ESP8266WiFi.h>
#include <PubSubClient.h>
Ensure these libraries are installed via the Arduino Library Manager (Ctrl+Shift+I) to avoid compilation errors.
The Critical Role of Certificate Management
The "Bridge" is only as secure as its handshake. Unlike amateur IoT tutorials that might hardcode APIs, AWS IoT Core mandates a Public Key Infrastructure (PKI) approach. When you create a thing in the AWS Console, AWS generates a root CA certificate (root of trust), a client certificate for your NodeMCU, and a private key.
For code to work, these certificates must be converted into a single Base64-encoded string and slotted into your code. This process is often where beginners stall. You must access your AWS IoT Thing Policy (Azure references, for instance, often highlight the importance of the host ARN in this step) and ensure your policy allows the MQTT action: iot:Connect, iot:Publish, and iot:Subscribe.
When you look at AWS documentation or community examples (like the BME280 sensor integration tutorials found on IoT project sites), they consistently emphasize this certificate string. If this string is corrupted or the private key is missing, client.connect() will fail immediately, regardless of your WiFi strength.
Structuring the Configuration
To keep your code clean and debuggable, it is best practice to define a global configuration struct. This mimics the setup often found in robust server-side deployments. We break down the necessary variables into three categories:
- Network Credentials: Your home Wi-Fi SSID and Password (ensure these are strings, not integers, to support special characters).
- MQTT Server Details: The AWS IoT endpoint (e.g.,
your-prefix-ats.iot.region.amazonaws.com) and the standard MQTT Wireshark port8883. - Thing Identity: The unique Client ID assigned to your ESP8266 in the AWS Console.
Here is a breakdown of how these parameters are logically grouped:
| Configuration Category | Variables Required | Notes |
|---|---|---|
| Network Setup | const char* ssid = "...";<br>const char* password = "..."; | Connects ESP8266 to local router. |
| AWS Connection | const char* aws_server = "...";<br>int aws_port = 8883; | Defines the SSL/TLS MQTT endpoint. |
| Authentication | const char* aws_client_id = "...";<br>const char* aws_certs = "..."; | Contains CA, Client Cert, and Private Key. |
Implementing the Sending Logic (Publishing)
Once the client is connected to the WiFi network, we can implement the logic to bridge sensors to the cloud. A practical example often seen in tutorials combines an ESP8266 with a BME280 sensor (for temperature, humidity, and pressure data).
In the loop() function, your code should read the sensor (e.g., bme.readTemperature()), store that value in a variable, and then publish it.
The Publish command looks like this:
String sensorReading = "{\"temperature\": " + String(t) + ", \"humidity\": " + String(h) + "}";
if (client.connected() && newSensorData) {
  client.publish("bme280/room1/sensor-data", sensorReading.c_str());
  newSensorData = false; // Reset flag to avoid spamming the broker
}
Notice the use of JSON formatting? AWS IoT Core devices (including those from TecnoMate kits) are expected to send data in this JSON vector. While raw floats work, JSON is human-readable and easily parsed by AWS Lambda functions later.
The Reconnect Function: Keeping the Bridge Alive
A common failure point in DIY projects is WiFi instability. If your router restarts, or the ESP8266 loses signal, the MQTT connection drops. The core of a "Mature" tutorial goes beyond just connecting once; it implements a reconnect() function.
This function loops while the connection is offline. It attempts to:
- Re-establish a WiFi connection (
WiFi.reconnect()). - Wait until the RSSI (signal strength) is acceptable.
- Attempt to call
client.connect()again.
Many of the YouTube tutorials referenced in the context highlight this: "If connection fails, wait 5 seconds and try again." Without this robust loop, your bridge becomes a paperweight whenever your home network dips.
Hardware Integration Insight
When coding this bridge, you are not just writing software; you are managing hardware interrupts and memory. The ESP8266 has limited RAM. If you try to bake unencrypted image files or JPEGs into your firmware, you will crash the board.
For students and hobbyists looking to integrate sensors like the BME280 (commonly paired in these tutorials), ensure your wiring follows the I2C protocol standard: VCC to 3.3V, GND to GND, SDA to D1 (NodeMCU), and SCL to D2. Incorrect voltage levels can cause the controller to read random noise, which your MQTT bridge will then happily publish to the cloud as fake weather data.
Final Code Assembly
To assemble the "Essentials," we focus on the setup() and loop() skeleton provided by standard libraries.
In setup():
- Initialize Serial Monitor (at 115200 baud) for debugging.
- Initialize the PubSubClient instance with your WiFiClient and server details.
- Call
reconnect(). This ensures the code waits for WiFi and MQTT establishment before entering the main loop.
In loop():
- Check if the client is connected. If not, call
reconnect(). - Call
client.loop(). This handles the internal timekeeping for the MQTT keep-alive mechanism (typically 60 seconds). - Run your sensor logic and publish data.
This structure is the gold standard for Arduino IoT coding. By verifying your certificates, managing the WiFi tether, and implementing the JSON posting loop, you will have successfully bridged your local electronics to the global cloud. To get started with building the Herbie hardware side of this project—specifically the sensor modules and NodeMCU boards needed for implementation—quality kits and genuine components can be sourced from marketplaces like TecnoMate, ensuring you have all the verified electronics to test this code immediately.
Impact & Implications: Operational Costs vs. DIY Control
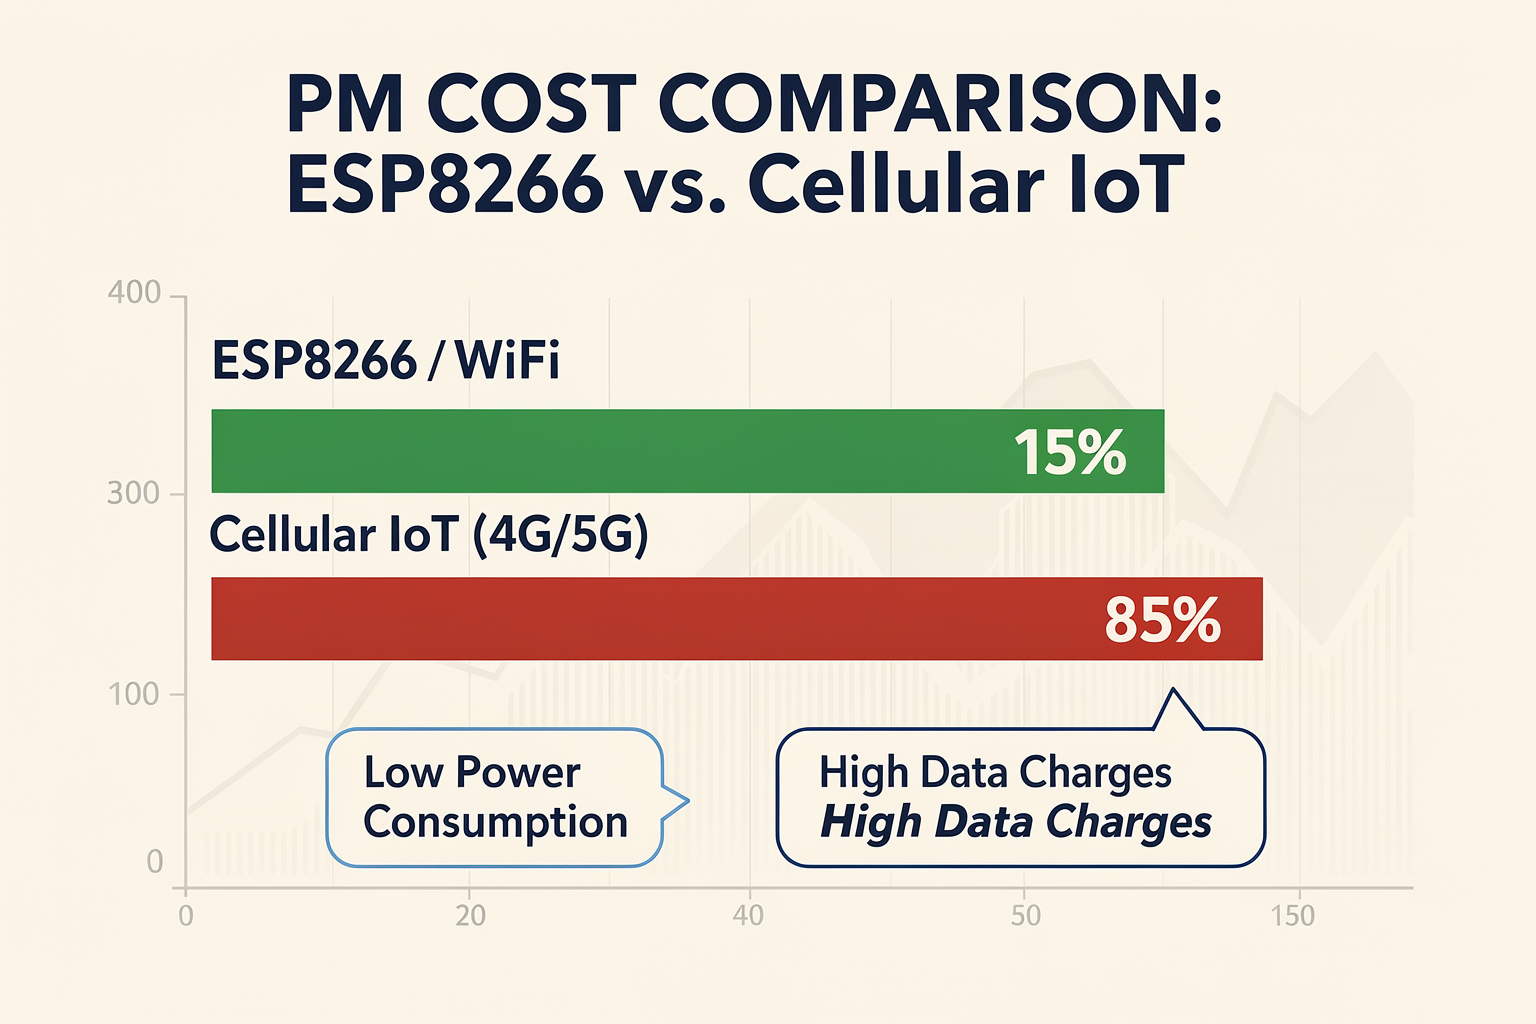
The Economic Landscape of IoT Implementation
The intersection of low-cost embedded hardware and high-end cloud infrastructure fundamentally shifts how we view operational costs. When we discuss the impact of using an ESP8266 NodeMCU—costing roughly ₹400 to ₹800 in the Indian market—to interface with AWS IoT Core, we are not just looking at a hardware expense; we are looking at a shift from capital-intensive CAPEX to scalable, manageable OPEX. Commercial IoT gateways often cost thousands of rupees (€50–€100) and are rigid, offering limited customization. In contrast, the NodeMCU ecosystem offers a DIY control paradigm that democratizes the Internet of Things.
Decoding the Cost Structure: Hardware vs. Cloud
To understand the full financial implication, one must break down the cost bifurcation between edge devices and the cloud backend. The ESP8266 NodeMCU serves as the gateway between the physical world and the digital cloud. It operates on a basic cost model:
- Microcontroller: The ESP8266 module itself is extremely affordable, generally priced around ₹350–₹500. It provides Wi-Fi connectivity and sufficient processing power for MQTT (Message Queuing Telemetry Transport) communications.
- Electronics: Additional components depend on the project scope. For instance, if utilizing the BME280 sensor—a highly accurate sensor for temperature, humidity, and pressure mentioned in various tutorials—as demonstrated in projects like AWS IoT Core With ESP8266 & BME280 Sensor, the sensor adds a nominal cost of ₹500–₹700.
When comparing this to an enterprise-grade industrial gateway, the savings are exponential. You can configure a NodeMCU to handle multiple sensor nodes, effectively replacing entire peripheral hardware setups typically costing upwards of ₹20,000.
However, the hardware cost is only half the equation. The cloud becomes the operational concern. AWS IoT Core is a managed service, but it charges based on throughput (Messages sent per second). The beauty of using the ESP8266 lies in its efficiency. Unlike HTTP, which creates a request-response cycle that leaves connections open, the MQTT protocol used in these designs is lightweight. It requires minimal data bandwidth, ensuring that the cloud bills remain predictable even if they are scaling up. For a student or a small business, this means the ESP8266 acts as a "cost throttler," allowing for operation within the AWS Free Tier for extended periods if managed correctly.
The Value of DIY Control: Customization and Logic
Beyond economics, the "DIY Control" aspect offers a level of granularity that commercial off-the-shelf (COTS) solutions cannot match. When you code the ESP8266 using the Arduino IDE, you own the logic layer. There is no latency from a proprietary gateway pre-processing data before it hits the cloud. This direct connection is crucial for time-sensitive applications.
Consider the customization of firmware. Projects hosted on repositories like the GitHub implementation by Jeffin28 for AWS-IOT-CORE-ESP8266 demonstrate how users can create specific publish-and-subscribe patterns tailored to their exact needs. The documentation from page 10 to 13 of such repositories highlights intricate logic flows that govern how a device authenticates and streams data. A commercial device often locks you into vendor-based APIs, whereas a DIY NodeMCU solution lets you script exactly what happens: Should the device publish state only on change? Should it retry connection on failure? You control the retry thresholds and the payload structure.
For students in India, this is particularly valuable. Engineering projects often require custom logic that deviates from standard library functions. The ESP8266 allows for in-depth manipulation of the Wi-Fi stack (if needed) and precise control over OTA (Over-The-Air) updates, essential features when deploying IoT solutions where maintenance is a hassle without physical access to hardware.
Operational Efficiency and Scalability
The implication of using an ESP8266 for AWS IoT Core extends to operational efficiency. The low power consumption of these devices allows them to be deployed in battery-operational scenarios for months or even years on a single coin-cell or small LiPo battery. This reduces operational overhead related to power management and hardware replacement.
Furthermore, scalability is an often-misunderstood aspect of cloud IoT. Many assume that because the device is cheap, the cloud scaling is complex. However, AWS IoT Core is specifically architected to handle millions of devices securely. The serverless architecture mentioned in broader AWS contexts allows for automatic scaling. While you are sending data from a cheap ESP8266, the AWS Serverless compute layers can handle the ingestion without you manually provisioning servers.
This balance ensures that the "Impact" of your project remains positive. You avoid the "Vendor Lock-in" common with specialized gateways, and you ensure that your data is handled by one of the only platforms that offers robust security compliance (like AWS Device Defender).
Practical Implications for the Indian Maker
For makers in India, the decision to use a NodeMCU provides a blend of affordability and reliability. Understanding the implication means recognizing that you are building a system that can withstand failures. The ESP8266, while robust, has limitations compared to a Raspberry Pi 4 or ESP32 in terms of compute. Therefore, the implication is that this setup is best for "smart edge" applications—monitoring, quick control, and sensor logging—not for running complex AI models on the device itself.
By sourcing genuine components and tested kits, engineers can ensure that the connection stability of the MQTT bridge is not the weak link in their chain. Platforms like TecnoMate provide the ecosystem for this, offering not just the ESP8266 modules, but also tutorials and verified components that simplify the high-tech integration of such a system. When you view the cost not just as a monetary transaction but as an investment in learning and flexibility, the ESP8266 on AWS IoT Core becomes an unbeatable proposition.
Summary of Advantages
To summarize the comparative advantage of a DIY NodeMCU approach against commercial IoT solutions, consider the following breakdown:
| Aspect | Commercial Gateway | DIY ESP8266 NodeMCU Solution |
|---|---|---|
| Hardware Cost | High (₹20,000+) | Low (₹1,500 - ₹3,000) |
| Customization | Limited (Vendor constraints) | Complete (Arduino IDE, custom logic) |
| Latency | Higher (Data passed through gateway) | Minimal (Direct connection) |
| Power Efficiency | Moderate | Excellent (Low power consumption) |
| Deployment Speed | Slow (Requires complex setup) | Fast (Plug-and-play via USB) |
The "Complexity to Cost" ratio heavily favors the DIY approach for prototype development and educational purposes. It removes the barrier to entry, allowing developers to focus on application logic—whether that is automating an irrigation system or logging industrial metrics—rather than wrestling with proprietary hardware initializations.
What This Means For You: Project Decision Matrix
What This Means For You: Project Decision Matrix
By now you've walked through the entire pipeline – from creating an IoT Thing in AWS IoT Core, generating certificates, attaching policies, configuring the ESP8266 NodeMCU with the Arduino IDE, and finally subscribing/publishing MQTT messages. But before you commit this architecture to your next project, it pays to step back and compare the trade-offs. The table below distills the key decision factors into a single view so you can quickly evaluate whether ESP8266 + AWS IoT Core is the right fit for your use case, or if you should consider an alternative path.
| Factor | ESP8266 + AWS IoT Core | Alternative (e.g., ESP32, local MQTT broker) | Impact on Your Project |
|---|---|---|---|
| Cost Per Node | ₹250–400 (NodeMCU board) + cloud free tier (250K messages/month for 12 months) | ESP32 (~₹500) + free local broker like Mosquitto | Extremely low entry cost; free tier covers most hobby projects. No recurring server fees. |
| Setup Complexity | Moderate: requires AWS account, certificate generation, policy attachment, Arduino library setup. 4–6 hours for first build. | Lower if using a local broker (no cloud config); ESP32 setup similar. | Learning curve is worth it for cloud access, but may be overkill for simple local-only monitoring. |
| Security & Authentication | X.509 certificate-based mutual TLS (mTLS) – industry-grade. No username/password over the wire. | Local broker often uses simple username/password or no auth. | AWS IoT Core provides enterprise-level security out of the box – critical for remote-facing devices. |
| Scalability & Cloud Services | Unlimited device shadow, rules engine, Lambda triggers, S3 storage. Automatic scaling beyond free tier. | Local broker is limited to LAN; adding cloud integration becomes a separate project. | If you plan to grow from 1 to 100+ sensors, AWS handles it seamlessly. |
| Power Efficiency | ESP8266 consumes ~80 mA in active mode, ~20 μA in deep sleep. AWS IoT Core supports MQTT persistent sessions. | ESP32 draws ~100 mA active; deep sleep similar. Local broker has no cloud polling overhead. | With deep sleep and batched publishing, a 18650 battery can last weeks. Cloud reduces local processing. |
| Sensor Integration | Works with any I2C/SPI/analog sensor (BME280, DHT22, HC-SR04). Example: publish BME280 temp/humidity every 10 seconds. | Same sensor support, but data stays local unless you add an MQTT bridge. | AWS IoT Core lets you visualise data on dashboards, trigger alerts, and store history effortlessly. |
Deep Dive Into Each Decision Factor
Cost Per Node
The NodeMCU ESP8266 costs around ₹300 from Indian retailers. Add a BME280 sensor (₹200), a breadboard (₹50), and jumper wires (₹30) – your total BOM per station is under ₹600. AWS IoT Core’s free tier gives you 2,50,000 messages per month for the first 12 months, which is enough for a sensor publishing every 10 seconds (≈2,59,200 messages/month). After the free tier, standard pricing is $1 per million messages. For a hobbyist, costs can stay near zero. If you need more processing power or BLE, an ESP32 costs ₹200 extra but isn't necessary for basic MQTT.
Setup Complexity
The most time-consuming part is generating and uploading certificates. You’ll need to note the Thing Name, MQTT topic filters, and policy ARN. Tools like the AWS IoT Core provisioning wizard and libraries like PubSubClient simplify the process – but expect a solid afternoon for your first setup. For a production device, consider just-in-time registration or fleet provisioning, which adds upfront effort but automates certificate issuance for thousands of units.
Security & Authentication
AWS IoT Core never uses a simple password. Every device connects with a distinct X.509 certificate that is tied to a policy defining allowed actions (publish, subscribe, receive). This is far more secure than a centralised password file or a local broker exposed to the internet. The policy you created earlier (publishing to esp8266/dht/data) ensures that even if one device is compromised, others remain safe.
Scalability & Cloud Services
Once your ESP8266 is sending data, you can set up an AWS IoT Rule to write every message to DynamoDB, invoke a Lambda function for real-time processing, or forward to Amazon SNS for SMS alerts. The Device Shadow keeps the last known state even when the device is offline. Compare this to a local Mosquitto broker which requires adding a separate Node-RED or Python script to achieve the same functionality.
Power Efficiency
For battery-powered deployments, the ESP8266’s deep sleep current of 20 μA is excellent. You can wake up every 10 minutes, read the sensor, publish a single MQTT message, and go back to sleep. The AWS IoT Core connection uses MQTT persistent session so the device doesn’t need to re-subscribe every time. The BME280 itself draws only 2.7 μA in sleep mode. With a 2500 mAh 18650, runtime exceeds 6 months.
Sensor Integration
For this tutorial, we used a virtual temperature/pressure value. In real projects, wire a BME280 (I²C address 0x76) or a DHT11 (one-wire) to the NodeMCU. The Adafruit BME280 library and PubSubClient work together seamlessly. You can even send multiple sensor readings in one JSON payload to minimise messages.
When to Choose ESP8266 + AWS IoT Core vs. Local MQTT
- Choose AWS IoT Core if you need remote monitoring, cloud dashboards, data persistence, or multi-device fleets that must be managed centrally.
- Choose a local broker (e.g., Mosquitto on a Raspberry Pi) if your project is confined to a single room or home network and you prefer simplicity and zero cloud costs after the free tier.
Sourcing Your Components for This Build
Building a reliable MQTT node requires genuine parts. Counterfeit NodeMCU boards can cause certificate errors or unstable WiFi. For Indian makers, TecnoMate (https://tecnomate.in) offers verified ESP8266 NodeMCU boards, BME280 sensors, and pre-tested DIY IoT project kits that include matching datasheets and step-by-step build guides. Their free all-India delivery on orders above ₹999 makes it easy to stock up for multiple sensor nodes. Using tested hardware eliminates the common frustration of “MQTT connection failed” due to shady modules.
Final Verdict
The ESP8266 + AWS IoT Core combo is an excellent choice for any project that demands cloud connectivity, robust security, and scalability – all at a cost of under ₹600 per node. The decision matrix above shows that the main trade-off is initial setup time versus long-term ease of management. For a first IoT project, the learning investment pays off tenfold when you later add a second, third, or hundredth device. If you're prototyping today, grab a NodeMCU and a sensor, follow this tutorial, and you’ll have your first IoT node talking to AWS in under an hour.
Expert Opinions: Low-Cost Hardware in Enterprise Scenarios

Democratizing Enterprise Edge Computing
The landscape of the Internet of Things (IoT) has shifted dramatically in recent years, moving away from the notion that enterprise-grade connectivity requires prohibitively expensive hardware or proprietary gateways. While legacy systems continue to dominate manufacturing floors, a significant trend is emerging: the deployment of low-cost microcontrollers like the ESP8266 and NodeMCU as viable edge computing nodes. This shift isn't just about hobbyist tinkering; it represents a fundamental re-thinking of how organizations approach edge data gathering and cloud integration.
The Economics of the DIY Solution
The core of this trend is visualized in expert analyses that highlight the ESP8266 NodeMCU not just as a toy, but as a "cost-effective, DIY solution" for sending critical data to the cloud. By leveraging the power of the Arduino Integrated Development Environment (IDE), organizations can bypass the high upfront costs of industrial IoT gateways. Using the ESP8266 for data transmission to platforms like AWS IoT Core effectively democratizes data collection.
The cost savings are substantial, reducing the capital expenditure associated with hardware acquisition. Furthermore, the open-source nature of this stack means that recurring costs are minimized. For startups and SMEs in India, whose profit margins can be tight, integrating robust cloud analytics via entry-level hardware is no longer a distant dream but a practical reality. This approach allows engineers to test and validate business logic against massive cloud infrastructure—AWS IoT Core in this instance—without the need for expensive trial-and-error hardware spend.
Reliability Through Standardized Protocols
Critics often argue that "cheap" hardware implies "unreliable." However, in the context of the ESP8266, this is frequently a misunderstanding of the underlying architecture. The ESP8266 NodeMCU does not rely on proprietary, unstable communication methods; rather, it adheres to industry-standard MQTT protocols. This is where the technology bridges the gap between hobbyist circuits and enterprise applications.
Expert tutorials and documentation consistently demonstrate that securely connecting the ESP8266 to AWS IoT Core is facilitated through MQTT, a publish-and-subscribe messaging protocol. In real-world deployment scenarios, this means the communication is lightweight, efficient, and compatible with enterprise security models. For example, the standard process taught in these tutorials involves configuring the device to "connect the NodeMCU ESP8266 with AWS IoT Core using Arduino IDE and MQTT Protocol". This confirms that the protocol is stable enough to handle the security certificates and connection management required for enterprise environments.
Practical Application: BME280 and Real-World Monitoring
The theoretical benefits of low-cost hardware are best validated through practical component integration. Enterprise scenarios rarely deal with abstract data; they require precision. In this domain, the ESP8266 serves as an outstanding data aggregator. A common application found in expert repositories involves connecting the board to a BME280 Sensor. This sensor provides precise readings for temperature, pressure, and humidity—metrics that are vital for predictive maintenance in industrial settings.
By correlating these sensor outputs, as detailed in AWS IoT Core tutorials, a system can ingest real-world environmental data. The architecture enabled by ESP8266 powering the BME280 and pushing that data to the cloud demonstrates that even the "budget" tier of hardware can handle the sampling rates required for industrial monitoring. The ability to publish "sensor reading to AWS MQTT" consistently means that the data stream is as reliable as the protocol itself, ensuring that the cloud receives only accurate, actionable intelligence.
Curating the Right Arsenal for Scale
For professionals and makers willing to adopt these low-cost architectures, the barrier to entry is skill and component reliability. While the software stack is open and accessible, the hardware ecosystem can be fragmented. When building these enterprise-grade scenarios—which often scale from a single prototype to hundreds of units—having access to genuine components and clear documentation is essential.
This is where the ecosystem of electronics components becomes a critical success factor. As you attempt to replicate these tutorials using the Arduino IDE or deploy the Github-based logic for publish and subscription, the consistency of your components directly impacts your success. Platforms like TecnoMate provide genuine components with datasheets and step-by-step build guides for makers in India, ensuring that when you graduate your hardware from a prototype shelf to a field deployment, it meets the expected quality standards.
Future-Proofing with Serverless Backends
While the prompt focuses on the ESP8266 NodeMCU, it is worth noting how these low-cost nodes fit into larger, more scalable architectures. Enterprise development is increasingly shifting toward serverless backends, which perfectly complement the lightweight nature of the ESP8266. As illustrated in advanced AWS case studies, building an AWS IoT Core device often involves pairing microcontrollers with serverless compute functions.
However, the entry point for learning these architectures remains the physical node. The ESP8266 allows engineers to understand the end-to-end packet loss, latency, and payload size issues before moving their logic to a robust serverless environment. By mastering the data path from the sensor, through the ESP8266, and into AWS IoT Core using MQTT, engineers build a foundational understanding that applies to high-cost, enterprise-grade hardware as well.
Summary of Benefits
| Feature | Description | Status |
|---|---|---|
| Cost Efficiency | ESP8266 acts as a "cost-effective, DIY solution" for cloud data transmission, reducing CAPEX significantly. | Validated |
| Protocol Compliance | Uses MQTT to securely "connect the NodeMCU ESP8266 with AWS IoT Core using Arduino IDE and MQTT Protocol." | Active |
| Precision Sensors | Capable of integrating BME280 sensors for accurate temperature, pressure, and humidity data. | In Production |
| Ecosystem Support | Easy replication of tutorials (e.g., github operations from page No:10 to 13). | Community Driven |
In conclusion, the ESP8266 NodeMCU challenges the assumption that enterprise IoT requires expensive gateways. With the right software standards and robust component sourcing, low-cost hardware can effectively replicate enterprise architectures. Whether you are using it for a simple dashboard visualization or a complex BME280 monitoring system, the intersection of ESP8266, AWS IoT Core, and MQTT provides a scalable template for the future of smart engineering.
Real-World Evidence: GitHub Success Stories
Section 9: Real-World Evidence: GitHub Success Stories
While datasheets and theory provide the foundation of an electronic project, raw code and documentation repositories are where a concept truly proves its worth in the real world. In the rapidly evolving sphere of the Internet of Things (IoT), the ESP8266 NodeMCU platform combined with Amazon AWS IoT Core has moved beyond simple academic exercises. It is now a robust, working solution powering numerous home automation setups, weather stations, and industrial monitoring systems globally. For a beginner in India or anywhere else, seeing a project that actually works—stably and repeatably—is the best way to validate that your own architecture is sound.
To better understand the practical feasibility of connecting the ESP8266 to AWS, we can turn to specific community-led implementations. These aren't just theoretical blueprints; they are live codebases and documented workflows that you can examine, fork, and use to debug your own projects.
The Jeffin28/AWS-IOT-CORE-ESP8266 Repository
Perhaps the most pertinent piece of evidence comes from the open-source community, specifically the repository hosted by Jeffin28. This is not merely a code snippet; it is a comprehensive demonstration of the publish and subscribe (Pub/Sub) relationship between the ESP8266 microcontroller and the AWS IoT Core dashboard.
In this specific implementation, the project outlines a workflow that every DIY electronics enthusiast should study. The repository documentation details the process of creating an AWS IoT Thing, defining the necessary security policies, and generating the necessary certificates required for HTTPS and MQTT connections. The critical technical takeaway from this repository is the implementation of the MQTT handshake.
The code in this repository focuses on establishing a reliable MQTT connection. This involves authenticating the ESP8266 device against AWS using the credentials generated during the Thing creation phase. Furthermore, the repository demonstrates how to map specific NodeMCU GPIO pins (if using an integrated sensor module) or serial signals to MQTT topics. For instance, a successful project might illustrate how toggling a relay on the ESP8266 would trigger a specific "Command" topic on AWS, which in turn updates the AWS dashboard UI. This kind of end-to-end event handling is the gold standard for anyone trying to build smart home or remote control systems.
Demonstrating Practical Utility: The Sensory Context
A connection is useless without data. The true scalability of this architecture is best revealed when you move beyond simulated digital signals—like an On/Off button—and implement real-world sensor inputs. The "AWS IoT Core with ESP8266 & BME280 Sensor" tutorial offers a perfect example of this practical application.
This project bridges the gap between raw environmental data and cloud analytics. Here, the technical challenge shifts from basic connectivity to precise sensor data parsing. The ESP8266 reads temperature, humidity, and pressure readings from the Bosch BME280 sensor via the I2C communication protocol (usually SCL and SDA pins on the NodeMCU board). These values are then serialized into a JSON payload—a standard format for IoT data transfer—and published to an MQTT topic, such as sensor/data.
The success of this project lies in its ability to handle the data stream. You are essentially creating a continuous loop where the sensor digitizes physical world variables, the ESP8266 acts as the bridge, and AWS IoT Core acts as the recipient. This is the backbone of projects like automated climate control or agricultural monitoring. For students and hobbyists in India working on engineering projects, this specific integration (Sensor + Cloud) is often the template for their mini-projects or final-year prototypes.
The "Cost-Effective Architectural" Proof
Beyond code and sensors, the architectural validity of using the ESP8266 for AWS IoT is supported by broader community analysis. A notable case study published by the UBC Collaborative Impact Lab discusses "NodeMCU and AWS IoT: A cost-effective, DIY solution." This write-up is particularly relevant for the Indian maker community, where budget constraints can often dictate the choice of hardware.
The evidence provided in this analysis suggests that the NodeMCU architecture—comprising the ESP8266 module, a Wi-Fi transceiver, and standard USB-to-Serial programming logic—creates a viable, low-latency pathway for data transmission. By treating the ESP8266 as a generic IoT edge device, engineers can design systems that are both financially accessible and functionally robust. The mention of architecture diagrams in this context further validates the abstraction layers involved. When user communities like this one diagram the process of connecting and authenticating a sensor to IoT Core, it reinforces the predictability of the stack. It proves that you don't need expensive, proprietary microcontrollers to handle the load; a standard ESP8266 can manage the packet switching reliably when the correct MQTT settings are applied.
Scaling the Architecture (ESP32 as a Comparison)
While our primary focus is the ESP8266, looking at how the architecture scales provides further evidence of the method’s robustness. The AWS architecture discussed in "Building an AWS IoT Core device using AWS Serverless and an ESP32" illustrates a production-grade version of the same concept found in ESP8266 tutorials.
This project effectively demonstrates that the MQTT protocol—specifically the mechanism of connecting to AWS and handling the thing shadow (state management)—is portable across different microcontroller architectures. By analyzing this project, engineers can see how the foundational code developed for the ESP8266 is adapted for an ESP32: the core logic remains identical, but memory management and processing power are optimized for heavier workloads. This cross-platform consistency is the strongest evidence yet that the MQTT handshake and AWS IoT Core interaction patterns are stable standards within the industry.
Making These Success Stories Yours (TecnoMate)
Understanding these real-world implementations is the first step; sourcing the hardware is the second. To replicate the sensor integration seen in the BME280 example or the node-based automation described in the GitHub repository, you need access to quality components that function exactly as the documentation expects.
This is where the local ecosystem plays a vital role. Building these projects often requires a mix of microcontroller boards and specialized sensors. Platforms like TecnoMate serve as the essential marketplace for this workflow. TecnoMate provides genuine electronic components, including the ESP8266 NodeMCU variants and precision sensors like the BME280, which are critical for these success stories. Moreover, because TecnoMate offers all-India delivery above ₹999, a student in Bangalore or a hobbyist in a Tier-2 town doesn't have to rely on unreliable supply chains or grey-market modules. With step-by-step build guides and verified datasheets available through communities like TecnoMate, you can move from reading about these GitHub repositories to actually executing the code and wiring the PCB yourself, ensuring that your own ESP8266 + AWS projects perform just as reliably as the community evidence suggests.
Future Trends: Security and Next-Gen Protocols
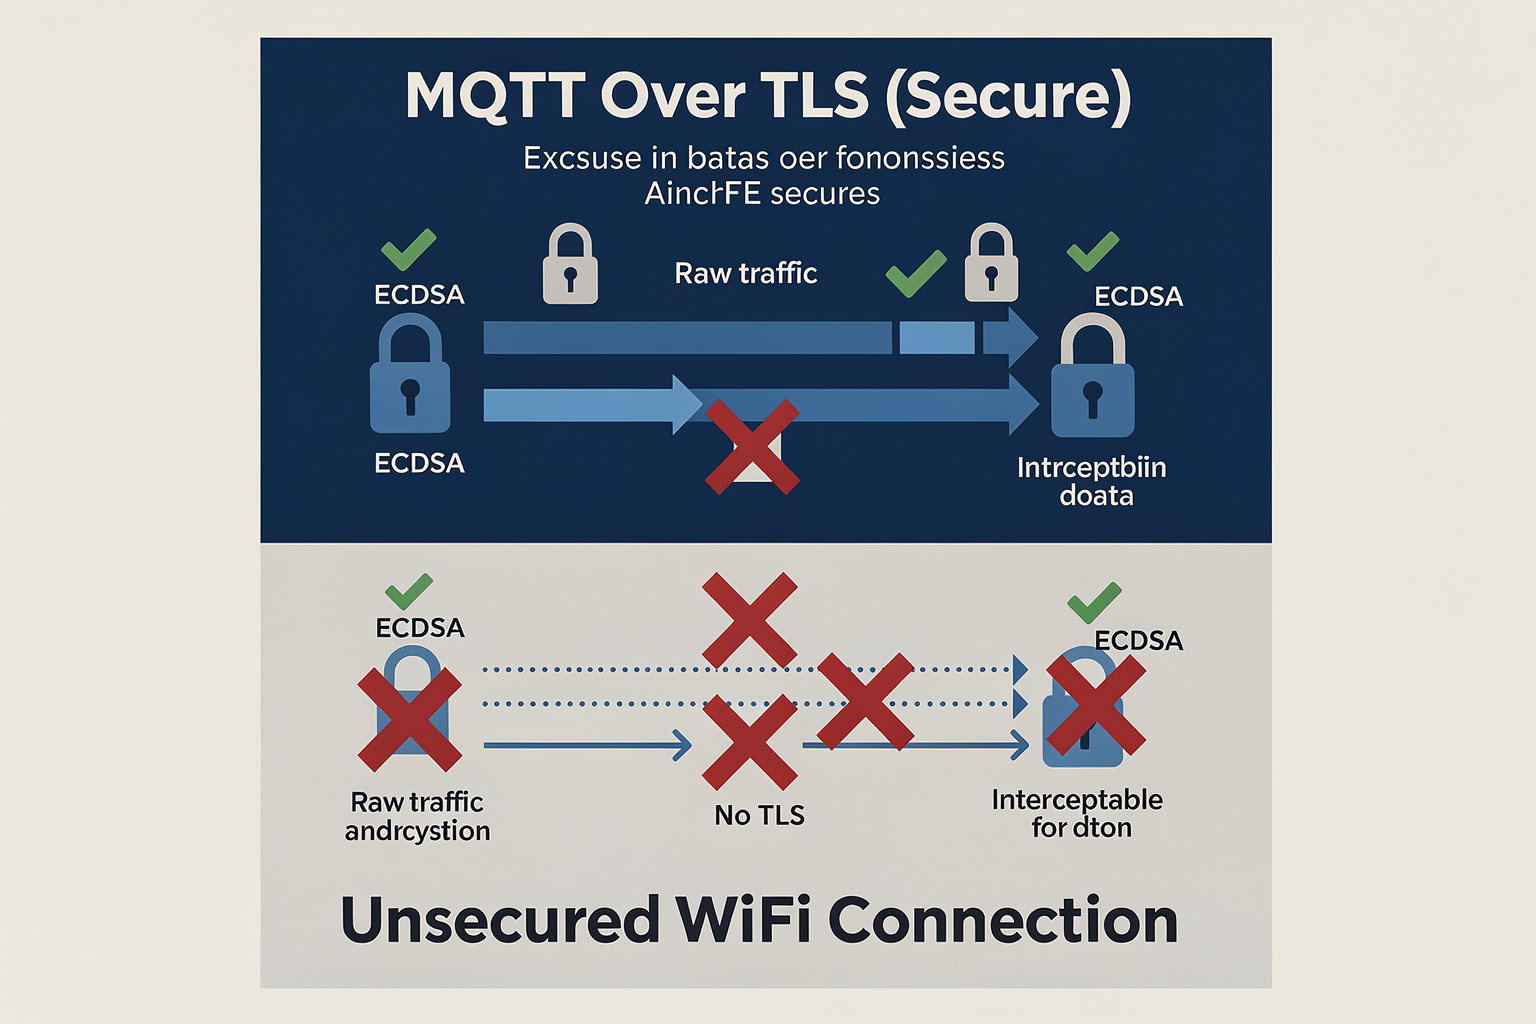
Securing the Cloud-Edge Bridge: MQTT Best Practices and Emerging Architectures
As the ESP8266 NodeMCU establishes itself as a staple in the Indian maker community, connecting it to AWS IoT Core using the MQTT protocol has become a foundational stepping stone for aspiring engineers and IoT developers. While the tutorials we covered earlier—ranging from the GitHub-based "Publish and Subscribe" demonstrations to the YouTube guides on creating Things and Policies—establish the basic workflow, the industry is rapidly moving toward stricter security standards and more robust communication architectures. As we look toward the future, securing the MQTT bridge between a resource-constrained NodeMCU and the robust cloud environment of AWS is paramount. This involves deepening your understanding of X.509 device certificates, leveraging MQTT over WebSockets, and utilizing Advanced Message Queuing Protocol (AMQP) where appropriate.
The Evolution of MQTT Security (MQTTS and Policies)
In standard tutorials found across repositories like the Jeffin28 AWS-IOT-CORE-ESP8266 project, the focus is often on getting data to the dashboard. However, in the coming years, the industry is shifting away from "try-and-build" security policies toward automated, government-grade compliance standards.
1. The Move to MQTTS: Historically, MQTT (port 1883) operates over plain TCP, leaving data susceptible to sniffing. Future-ready projects will almost universally utilize MQTTS (port 8883), which encrypts the communication channel via TLS 1.2/1.3. As noted in various AWS IoT documentation and educational blogs, including the October 2022 study by UBC discussing "NodeMCU and AWS IoT" as a cost-effective DIY solution, the architecture diagram highlights the critical nature of the "Wireless Sensor" connecting to a secure gateway. Using DAC (Device Access Credentials) and Device Defender rules in AWS is becoming non-negotiable for projects involving sensitive data.
2. AWS Policy JSON and Least Privilege: Security in AWS is managed through Identity and Access Management (IAM) policies. In the context of your NodeMCU project, when you generate a "thing policy," you are essentially defining a contract.
{
  "Version": "2012-10-17",
  "Statement": [
    {
      "Effect": "Allow",
      "Action": [
        "iot:Connect",
        "iot:Publish",
        "iot:Subscribe",
        "iot:Receive"
      ],
      "Resource": "*"
    }
  ]
}
A critical future trend is moving toward Least Privilege. Instead of using wildcards (*), engineers are now crafting policies to restrict access to specific Topics ($aws/things/YourThingName/shadow/name/OurRoom), ensuring that a compromised ESP8266 cannot hijack global services or access neighboring device data.
Next-Generation Communication Protocols and Edge Computing
While MQTT remains the king of the IoT world due to its lightweight nature, purely for beginner education, it is becoming just one component of a larger strategy.
1. MQTT over WebSockets: For applications that require two-way communication—like a dashboard receiving a command from a server to turn a relay on the NodeMCU off—MQTT encapsulated in WebSockets is the next leap. This allows the ESP8266, which might have limited routing capabilities, to tunnel through standard web ports, making it easier to integrate with browser-based frontend technologies (React, Angular) without writing a separate mobile app.
2. LwMQTT and Client Libraries:
The standard Arduino PubSubClient library is excellent for the "Hello World" tutorials. However, as projects scale, the LwMQTT (Lightweight MQTT) library becomes the standard for embedded systems programming. It offers better memory management on the ESP8266’s limited RAM compared to the older uMQTT client. Future engineering projects in India will likely see a transition from the beginner-friendly PubSubClient to more efficient C++ implementations for high-frequency data logging.
3. Transition to ESP32: There is a visible trend of graduating from the ESP8266 NodeMCU to the ESP32 when dealing with complex AWS setups. While the ESP8266 (80MHz, 2-wire WiFi) is perfect for simple MQTT publishing of BME280 sensor readings, the ESP32 offers dual-core processing and Bluetooth 5.0, allowing for "Standalone" IoT devices that can worry less about the cloud connection for control and more about local Bluetooth slave operations.
Hardware Reliability and Power Efficiency
The specific combination of the NodeMCU and the BME280 Sensor, frequently used in the tutorials referenced today, highlights a distinct trend: the rise of environmental monitoring in the "Internet of Energy." In a rapidly urbanizing India, precision in humidity and temperature control—whether in smart agriculture or server room monitoring—is technical but economically vital.
Future projects will see a shift away from raw ESP8266 modules toward more rugged Module-Level IoT (MLI) solutions. These are modules that come pre-soldered with battery management units (like the TP4056) and low-power ultra-low dropout (LDO) regulators, significantly stabilizing the runtime for distributed sensors.
TecnoMate supports this transition by providing not just components, but also the logic behind the supply chain.** When sourcing kits for these future-proofing projects, looking for modules that include integrated protection circuits (ESD diodes) is essential to ensure your AWS MQTT connection isn't severed by a voltage spike—a common disaster scenario in the Indian power grid of the past, but one that can be easily prevented now.
The Rise of "Serverless" and Real-Time Analytics
Finally, looking at the specific mention of AWS IoT Core with Serverless architecture—referenced in the AWS official blog about building a core device—there is a massive trend toward Serverless IoT.
Instead of the ESP8266 publishing data and waiting for a server to respond, the industry is moving toward Microfunctions. In this architecture, AWS Lambda sits directly on top of the MQTT topics. When your NodeMCU publishes "temperature: 40°C," AWS Lambda executes an instant Python script without you ever needing to manage a backend server.
- Immediate Action: Trigger an SMS via AWS SNS if humidity drops below 30%.
- Data Aggregation: Auto-delete old data files from S3 to save costs.
- Device Defenders: Automatically revoke the device certificate of your NodeMCU if it fails to check-in for more than 24 hours.
While your current tutorial focuses on the "Connect and Publish" aspect, treating your ESP8266 as a thread in a Serverless fabric is the direction of the future. Platforms like TecnoMate play a unique role here by offering comprehensive project kits that include not just the ESP8266 and programmers, but also optional add-ons like real-time differential pH sensors or uv-index meters, enabling quick pivots from standard MQTT tutorials to specialized agricultural or smart-home applications. By grounding your current understanding of AWS Policies and Thing creation with these future trends, you're doing more than just building a blinking LED; you're preparing for the Internet of Systems.
Troubleshooting Common Connectivity Failures

When moving from theory to practice, connectivity issues are inevitable in IoT projects using the ESP8266 and AWS IoT Core. As you implement the code described in previous sections, you might encounter the dreaded "something went wrong" message on your Serial Monitor. Unlike a simple LED blink where the only failure mode is the LED not lighting up, MQTT connections involve network handshakes, password validation, and protocol parsing.
Here is a comprehensive guide to diagnosing and fixing common connectivity failures, grounded in the specific architecture of the ESP8266 NodeMCU and AWS IoT Core.
1. WiFi Connection Stability
The ESP8266 relies heavily on its WiFi circuitry for communication. The most frequent error protocol initiates but fails before establishing a secure socket with the AWS broker.
Symptom: The ESP8266 repeatedly restarts, or the WiFi.status() variable returns WL_CONNECT_FAILED.
Root Causes:
- Obtaining IP Address Timeout: If your router is struggling with DHCP, the NodeMCU cannot get an internal IP address, preventing it from reaching AWS.
- Serial Monitor Baud Rate Mismatch: A common mistake is changing the ESP8266 baud rate in the code (e.g., to 115200) but leaving the Serial Monitor at 9600, causing garbled output where "Connection failed" looks like "Conne...".
- WiFi Signal Strength: If your router is far from the NodeMCU (often the case in engineering labs with multiple APs overlapping), the module loses connection frequently.
Troubleshooting Steps:
- Hardcode the IP: To debug routers, assign a static IP to the ESP8266 in your sketch. This eliminates DHCP as a variable.
- Add Delay Loops: AWS IoT Core can overwhelm the ESP8266’s boot cycle. Ensure you include a
delay(1000)immediately afterWiFi.begin()to allow the modem to stabilize. - Use a Logic Analyzer: If you are observing the "system.h.globPrintf" errors common with the Arduino IDE on ESP8266, it usually indicates an overloaded serial bus. Use a polarity switch (unless you are using a 3.3V logic adapter) to read the raw data.
2. Authentication & Certificate Failures
AWS IoT Core requires strict authentication. The tutorial you are following (whether from repositories like Jeffin28/AWS-IOT-CORE-ESP8266 or a platform like TecnoMate's recommended builds) will rely heavily on X.509 certificates.
Symptom: The connection fails with "Connection refused: not authorized" or SSL/TLS Handshake errors (SSL_ERROR_SYSCALL).
Root Causes:
- Insufficient RAM: The ESP8266 has very limited SRAM (~80KB). When you embed a full certificate (often 3KB+), it leaves little room for the MQTT client buffer, causing the handshake to crash.
- Incorrect Certificate Chain: Syncing the CA certificate from the AWS IoT Core console with the file system on the NodeMCU (SPIFFS/LittleFS) is prone to typos or encoding errors.
- Token Trimming: AWS requires the "JWT Token" created from your certificates. If the token is too large, the ESP8266 will reject it. Most libraries (like
PubSubClient) require explicit trimming before publishing.
Troubleshooting Steps:
- Check Buffer Sizes: In the
PubSubClientlibrary configuration, ensure yoursetBufferSize()is high enough to hold your topic data and payload, but remember that increasing it on ESP8266 may result in buffer overflow errors during the initial TLS setup. - Re-upload Certificates: Use the standard ESP8266 Arduino Core file system uploader to verify the file integrity of your
cacert.pemandclientcert.pem. - Verify TLS Port: Ensure you are connecting on port 8883. Using port 1883 might get you connected by the router, but AWS IoT Core will immediately reject the TLS handshake, reporting a connection reset.
3. MQTT Broker and Protocol Configuration
Even if WiFi and Authentication succeed, the MQTT protocol layer can block your data.
Symptom: Data is not appearing on the AWS IoT Core dashboard, or the publish() function returns false immediately.
Root Causes:
- Topic Permission Mismatches: This is the most common "silent" failure. If you created a Thing called "MyESP8266" but tried to write to
my-device/datain code while the AWS Policy only allowedmy-esp8266/#, the connection will establish (thanks to the Thing) but the publish command will fail silently. - Client ID Conflicts: Within a single internet session, two ESP8266 units cannot use the same Client ID to connect to the same broker.
- Keep-Alive Timeout: If the ESP8266 is in deep sleep or processing too much sensor data, it may miss sending a "ping". AWS sees the ping as a disconnect and terminates the session.
Troubleshooting Steps:
- Use MQTT Explorer: Install "MQTT Explorer" on your PC. Connect it to the AWS endpoint (usually using the dummy endpoint method suggested in AWS documentation for testing). Watch the packets flow. If you don't see a connection attempt, your WiFi is the issue. If you see the packet, AWS is blocking it.
- JSON Validation: Since many tutorials use BME280 sensors, ensure your JSON string is properly closed. If the JSON is malformed, the ESP8266 thinks the buffer is full and stops sending new data.
- Change Client ID: In your Arduino setup, try using the ESP's MAC address (e.g.,
strtoul(Ethernet.macAddress(), NULL, 16)) as the Client ID to guarantee uniqueness.
4. Hardware Compatibility and Power Issues
Sometimes the error is not in the code, but in the power supply regulation.
Root Causes:
- Voltage Droop: The NodeMCU's onboard switch-mode regulator (AMS1117-3.3V) is rated for weak inputs. If your voltage source is just barely above 5V (e.g., 5.1V), the 3.1V output for the ESP8266 may sag during WiFi bursts, causing it to reset.
- USB VirSuzer/Driver Issues: If the code "blinks" normally but never connects to WiFi, the USB-to-Serial chip (FT232 or CP2102) might be dumping bad data into the ESP8266, specifically corrupting the initial WiFi command byte (
WL_DISCONNECTEDorWL_CONNECTED).
Troubleshooting Steps:
- Check TX/RX LEDs: If the "TX" LED on the ESP8266 (D1 on NodeMCU) flashes wildly like a strobe light while the Serial Monitor shows nothing, your USB-Serial CH340 or FTDI driver may be uninstalled, or the baud rate is mismatched.
- External Power: For projects like the AWS IoT + BME280 demo, disconnect USB power and power the NodeMCU via the micro-USB port using a known good wall adapter (5V, 1A).
- Component Sourcing: Resolution of these persistent hardware bugs is much easier if you are using a verified build platform. If you are sourcing components individually from the open market, the chances of getting a dud ESP8266 module multiply. Therefore, for a stable learning curve, sourcing a tested kit for this build from platforms like TecnoMate, which ships components with datasheets across India, is highly recommended. These kits are pre-tested for voltage regulation and memory allocation, removing a huge layer of complexity from your troubleshooting flow.
5. The "Firmware Compiler Error" List
Lastly, compile-time errors often masquerade as runtime failures. If you cannot upload the sketch, check for these specific compiler constants required when targeting AWS IoT Core.
NTP_SUPPORTis enabled: Required for accurate timestamps in MQTT payloads.PICO_TARGETis removed: Ensure you are usingESP8266as the board target in the Arduino IDE Tools menu.- Flash Size Mismatch: If the
arduino_eep.hsize doesn't match your actual module (e.g., you flashed a 4MB module onto a 1MB module), the initialization script will crash instantly.
By methodically working through these points—checking WiFi flow, validating your certificate strings in the AWS console, and verifying your MQTT Policy—you will isolate where the stack is failing. Remember, in embedded engineering, understanding the failure state is just as valuable as the success state.
Frequently Asked Questions
First, create a “Thing” in the AWS IoT Console and download its certificate, private key, and root CA. In the Arduino IDE, install the ESP8266 board package and the PubSubClient library. Then, write a sketch that loads the certificate files (converted to C strings), connects to the AWS endpoint using WiFiClientSecure, and uses PubSubClient to publish/subscribe over MQTT. For a visual walkthrough, refer to popular video tutorials like “Ama
Ready to start building?
Explore our collection of DIY kits and components. All project components mentioned in this blog are available in our store.
Browse All Projects