

Running Voice Recognition on ESP32: Wake Word Detection Guide
Did you know your humble ₹500 ESP32 development board can listen for a specific trigger phrase — like "Hey Jarvis" or "OK Google" — without ever touching the internet? That’s the real magic of wake word detection, a lightweight form of voice recognition that’s transforming how we build hands-free, privacy-first devices. Unlike general speech recognition, which tries to transcribe every word you utter, wake word detection is laser-focused: it constantly monitors audio for a predefined phrase and ignores everything else, making it ideal for low-power, always-on applications.
Why does this matter right now? In 2026, the demand for offline AI is exploding. Concerns over cloud dependency, latency, and data privacy have pushed makers and engineers toward edge computing. The ESP32, with its dual-core processor, built-in Wi-Fi/Bluetooth, and now robust ML acceleration on the S3 variant, is the perfect sandbox. Projects like Home Assistant’s microWakeWord (introduced in 2024 and now widely adopted) let you run wake word detection on devices like the ESP32-S3-BOX-3 (source [4]). Reddit communities are buzzing with hobbyists building voice-controlled robots that recognize up to four words semi-successfully (source [2]), and Espressif’s native WakeNet engine already supports up to five custom wake words on the ESP32-S3 (source [7]).
This guide will walk you through exactly how to add wake word detection to your ESP32 project — no cloud, no API calls, no network dependency. You’ll learn the key tools available today: from Edge Impulse for training custom keyword-spotting models (source [3]), to Espressif’s ESP-SR library with TensorFlow Lite Micro for a ready‑to‑deploy pipeline (source [5]), to the simple microphone + code approach that makers use to get started fast. By the end, you’ll have a blueprint for building an offline voice assistant, a smart switch, or a voice-controlled robot — all running locally on an ESP32.
If you’re in India and sourcing components for a build like this, platforms like TecnoMate offer tested microphone modules (e.g., INMP441, MAX9814) and ESP32 dev boards with datasheets, so you can jump straight into the code without hunting for genuine parts. Let’s dive into the world of offline voice — your first wake word is just a line of code away.
Introduction
What Is Wake Word Detection?
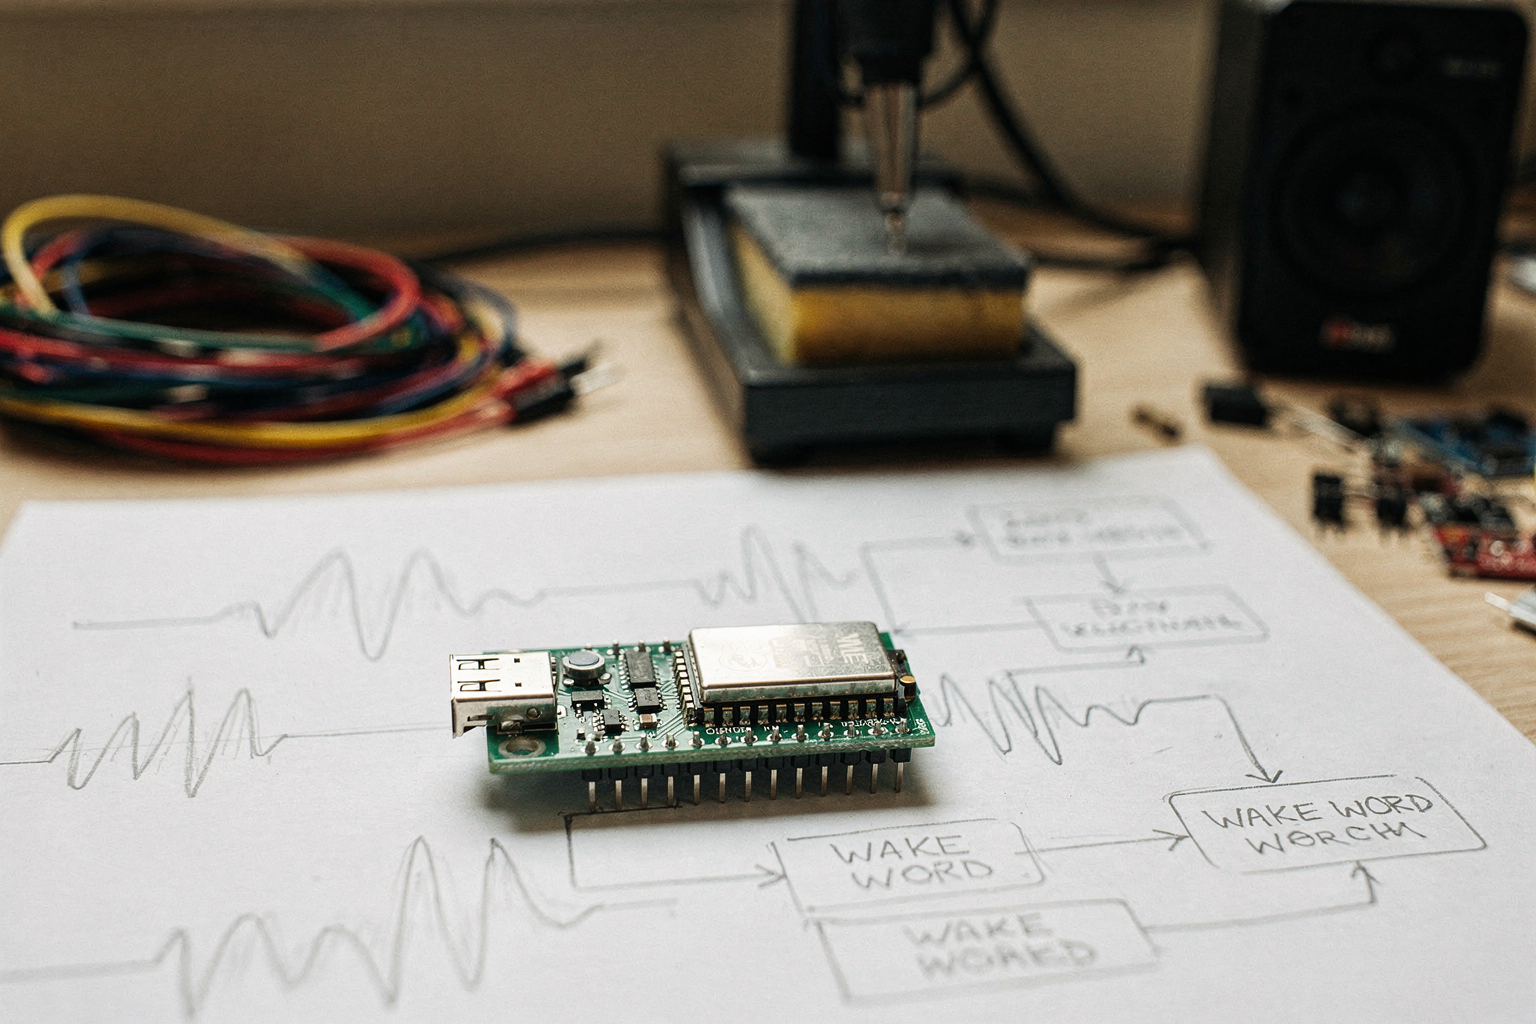
Unlike general speech recognition, which transcribes any spoken audio into text, wake word detection listens specifically for a pre-defined trigger phrase — such as "Hey Google" or "Alexa". As noted in a practical guide on Medium, wake word detection "listens specifically for a predefined trigger phrase", making it far more resource-efficient than full speech-to-text on low-power microcontrollers [1]. The system stays in a low-power listening mode until it hears the magic word, then signals the main application to start processing further commands. This approach is the backbone of most modern voice assistants, and it's now entirely achievable on an ESP32.
Why the ESP32?
The ESP32 family — particularly the ESP32-S3 — has become the go‑to platform for embedded voice projects. With its dual‑core processor, built‑in I²S audio interface, and support for TensorFlow Lite Micro, the ESP32 can run lightweight neural networks locally. Espressif’s own WakeNet engine, part of the ESP-SR library, is a neural‑network‑based wake word engine "built for low‑power embedded MCUs" and currently supports up to 5 wake words simultaneously [7]. The Home Assistant team announced in early 2024 that, thanks to Kevin Ahrendt’s microWakeWord, ESPHome can now perform wake word detection on devices like the ESP32‑S3‑Box‑3 — all on‑device and without cloud dependencies [4]. This makes the ESP32 a realistic platform for offline voice control.
Offline vs. Cloud‑Based Recognition
A major advantage of running wake word detection on the ESP32 is the ability to keep everything fully offline. As highlighted in a Hackster.io project, you get "fully offline voice recognition" with "custom wake‑word and command detection" and "real‑time ML inference — no cloud, no API calls, no network dependency" [3]. This is especially relevant for Indian makers who may face unreliable internet or want to keep their projects private. While cloud services like Wit.ai or Google Assistant can provide more powerful speech understanding (as seen in GitHub repos combining ESP32 with Wit.ai [8]), the core wake word step can (and should) run locally to minimise latency and always be responsive.
A Word on Components
To build your own wake‑word project, you’ll need an ESP32 board (the S3 variant is recommended for better performance), a compatible I²S microphone (such as the INMP441 or SPH0645), and some passive components. TecnoMate, India’s marketplace for DIY electronics, offers ready‑to‑build project kits that include everything from the ESP32 module to the MEMS microphone and hook‑up wires. Every kit ships with genuine components and datasheets, and free delivery is available on orders above ₹999. Whether you are a student in Bangalore or a hobbyist in Delhi, sourcing a tested, all‑in‑one kit from TecnoMate can save you the headache of matching parts and debugging mismatched hardware.
What You’ll Learn in This Guide
Over the next few sections, we’ll walk through the entire process:
- Choosing the right ESP32 board and microphone for wake‑word projects.
- Setting up the ESP‑SR library (including WakeNet) on your ESP32.
- Training or downloading a custom wake‑word model (e.g., “Hey Zbotic” as shown in a recent tutorial [5]).
- Deploying the model using TensorFlow Lite Micro or Edge Impulse.
- Connecting the wake‑word detection to an action, like controlling an LED or relaying commands to a home assistant.
By the end, you’ll have a practical, offline voice‑triggered system running on a chip that costs under ₹500 — a testament to how far embedded AI has come. Let’s dive in.
Prerequisites & Setup (TABLE)
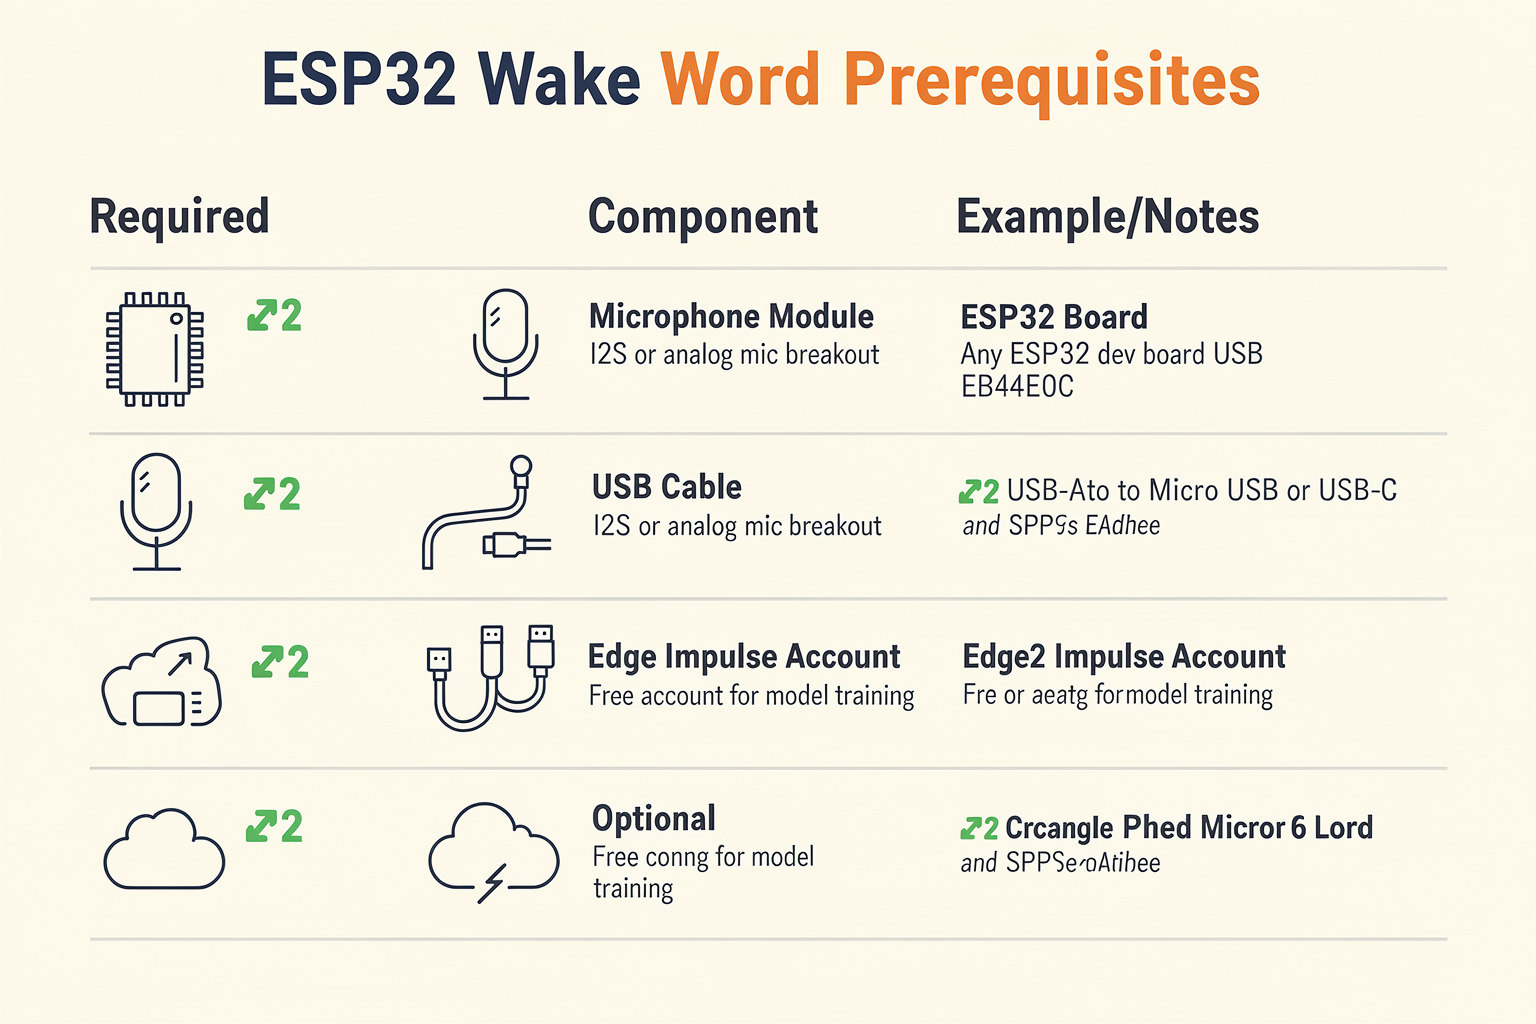
Before diving into code, you’ll need the right hardware and software stack. Wake‑word detection on ESP32 involves capturing audio through a digital microphone, feeding it into a machine‑learning model, and processing the result — all without cloud connectivity. The following table lists the essential components, tools, and prerequisites.
| Component / Tool | Specification / Version | Purpose | Recommended Source / Notes |
|---|---|---|---|
| ESP32 Development Board | ESP32‑S3 (e.g., ESP32‑S3‑DevKitC‑1) with at least 4 MB PSRAM | Runs the wake‑word model and audio pipeline (e.g., WakeNet, microWakeWord) | ESP32‑S3 offers better performance and extra SRAM for ML; the classic ESP32 works but memory is tight |
| Digital Microphone | INMP441 or SPH0645LM4H (I²S interface) | Captures 16‑bit, 16 kHz audio samples for real‑time inference | Both are I²S‑based; ensure 3.3 V logic level. A MEMS mic module with breakout is easiest. |
| Optional – Speaker | Small 8 Ω / 0.5 W speaker + MAX98357 I²S amplifier | For audible feedback (e.g., “listening…” tone) after wake word | Not required for wake word itself, but useful for prototyping voice assistants. |
| Arduino IDE | Version 2.x or 1.8.x (with ESP32 board support via Boards Manager) | Writing, compiling, and uploading firmware | Install ESP32 package: https://raw.githubusercontent.com/espressif/arduino-esp32/gh-pages/package_esp32_index.json |
| PlatformIO (alternative) | VSCode extension with Espressif 32 platform | Professional build system with library management | Preferred for managing dependencies like TensorFlow Lite, ESP‑SR, microWakeWord |
| Wake‑word Model | WakeNet (Espressif) or microWakeWord (Kevin Ahrendt) | Pre‑trained neural network for “Hey ESP” or custom phrases | WakeNet supports up to 5 wake words; microWakeWord runs on ESP32‑S3 with Home Assistant. |
| Edge Impulse (optional) | Cloud‑based ML pipeline (free tier available) | Train custom wake‑word models from your own audio clips | Exports C++ library for Arduino/ESP32; fully offline inference after deployment. |
| Fundamental Skills | Basic C++, digital electronics, breadboarding | Connecting microphone, wiring power, reading schematics | Most tutorials assume you can use a breadboard and solder header pins. |
Hardware details – The INMP441 is the most common choice because it requires no external clock; just supply 3.3 V and connect its I²S pins (L/R, WS, SCK, SD). For an ESP32‑S3, you’ll typically map SD to GPIO 47, WS to GPIO 42, SCK to GPIO 41, and L/R to GND. If you’re using a classic ESP32, use pins 32, 25, 26, and 33 instead. A breadboard and jumper wires make initial testing easy.
Software setup – In Arduino IDE, install the ESP32 board package (version 2.0.14 or later) and then search for the ESP‑SR library (by Espressif) or microWakeWord if you plan to integrate with ESPHome. For Edge Impulse, you’ll need their Arduino library and a trained impulse. All three approaches keep audio processing fully offline – no network calls, no cloud dependency.
Sourcing components – Genuine ESP32‑S3 boards and INMP441 microphones can be found on popular Indian e‑commerce sites. For a hassle‑free start, platforms like TecnoMate offer bundled starter kits that include an ESP32‑S3 dev board, a high‑quality INMP441 mic module, jumper wires, and a step‑by‑step build guide. That way you avoid compatibility issues and can focus on the software side.
Make sure you also have a USB‑C cable (for ESP32‑S3) and a PC with at least 8 GB RAM for compiling the firmware. Once these prerequisites are in place, you’re ready to wire up the hardware and flash your first wake‑word demo.
Getting Started: ESP32 and Voice Recognition
Understanding Wake Word Detection vs. Full Speech Recognition
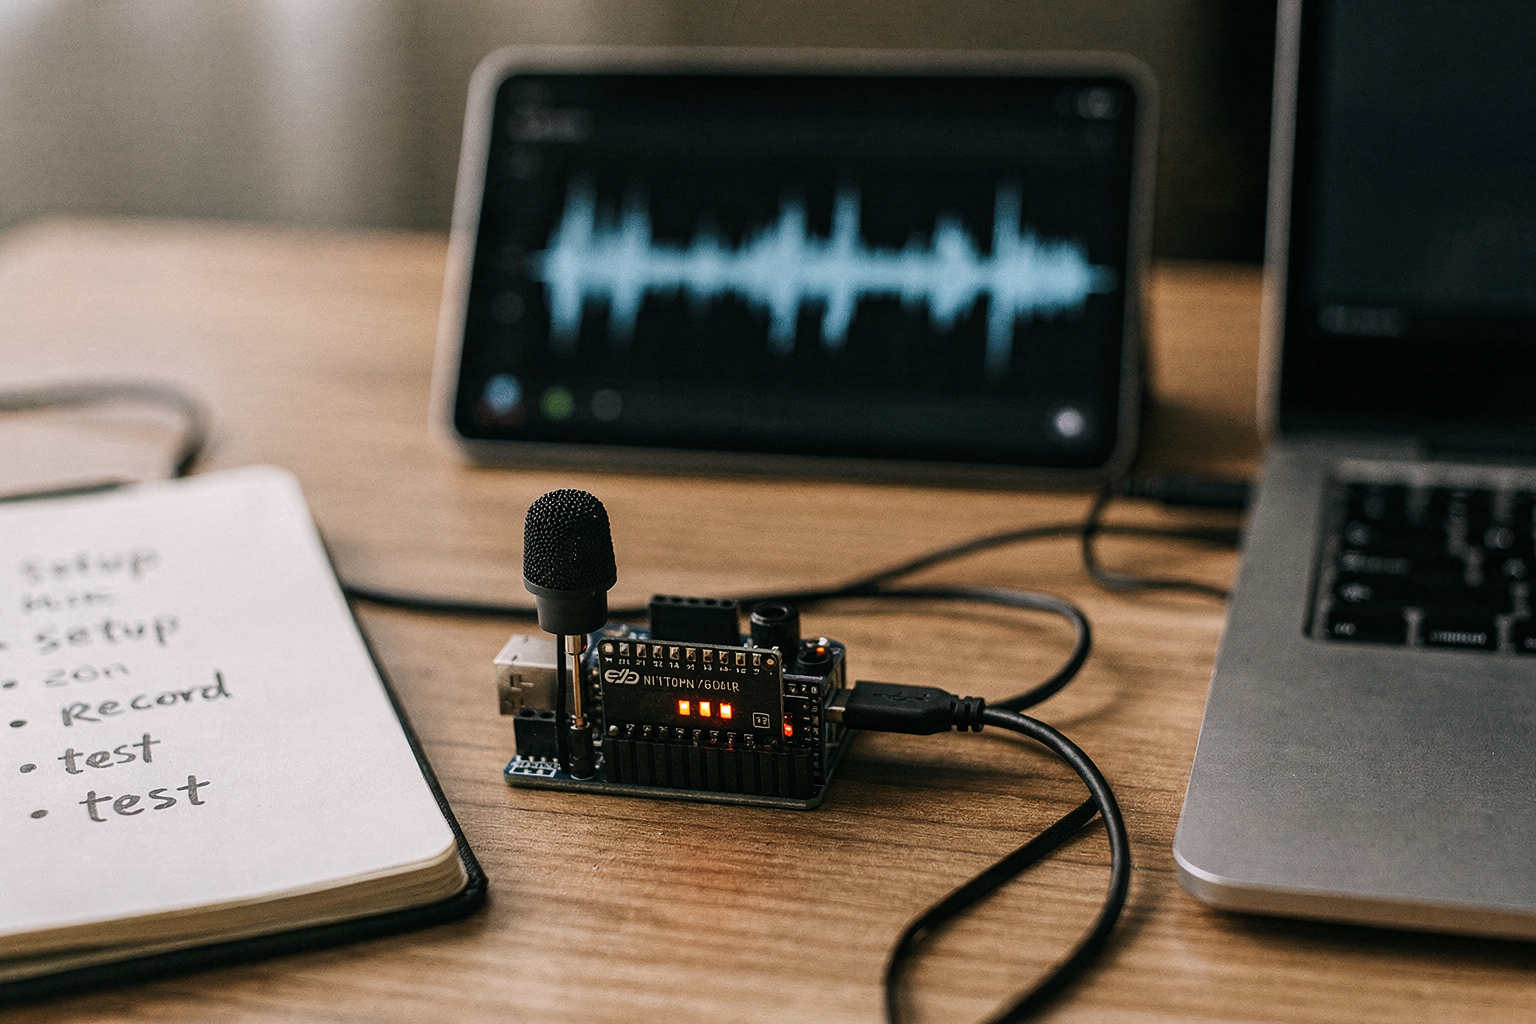
Before wiring up your development board, it is crucial to distinguish between full speech recognition and wake word detection, as they solve different problems. Unlike general speech recognition systems that attempt to transcribe any audio input into text, wake word detection is a focused filter process (Source 1). It only activates the system when it detects a specific, predefined trigger phrase—often something like "Hey Computer" or "Jarvis." This "goldilocks" approach ensures your ESP32 isn't constantly processing data, saving battery life and RAM.
Go Offline: The Power of On-Device AI
The most compelling reason to implement voice recognition directly on the ESP32 is the ability to run fully offline. As noted in various tutorials and community projects, relying on cloud APIs introduces latency (lag) and requires both Wi-Fi connectivity and network data. By leveraging local ML inference, you can maintain zero latency, total privacy, and zero network dependency (Source 3).
For example, Hackster.io projects highlight that "No cloud, no API calls, no network dependency" is a key benefit of using Edge Impulse for ESP32 voice control (Source 3). Similarly, source material suggests that while "Wake word detection is pretty straightforward" but limited to a specific number of commands (such as 4-words in some robotics demos), using dedicated libraries can yield "semi-successful" results, emphasizing the importance of hardware quality and model training (Source 2).
The Tech Stack: ESP-SR and WakeNet
To achieve this efficiently, modern ESP development relies on deep integration between hardware and software by Espressif Systems. Currently, the biggest leap forward is the support for WakeNet, a neural network-based wake word engine optimized for low-power embedded microcontrollers (Source 7).
- ESP-SR Library & TensorFlow Lite Micro: Source 5 details how you can detect wake words directly using Espressif’s ESP-SR library and TensorFlow Lite Micro. This combination allows the MCU to run Machine Learning models specifically designed for voice input, handling standard audio samples without crashing.
- Variety of Models: The array of tools available means you aren't stuck with one keyword. As Source 7 notes, WakeNet currently supports up to 5 wake words, offering flexibility for multi-user setups.
- ESP32-S3 Edge: For power users, Source 4 and various community initiatives point to the ESP32-S3 ecosystem. Thanks to projects like microWakeWord (by Kevin Ahrendt), even smaller devices like the ESP32-S3-BOX-3 can perform on-device wake word detection, bringing Amazon Alexa or Google Assistant-style efficiency to custom builds.
Comparative Solutions for ESP32 Voice
Here is a breakdown of the different approaches available for achieving wake word detection on standard ESP32 hardware:
| Solution | Key Feature | Hardware Focus | Status |
|---|---|---|---|
| WakeNet | Specialized neural engine for wake words | ESP32-S3 | Advanced/Official |
| ESP-SR + TFLite | Native library by Espressif | ESP32 (standard) | Official/Robust |
| Edge Impulse | Custom training solution for keywords | ESP32 (generic) | Community/Custom |
| microWakeWord | Open-source, lightweight decoder | ESP32-S3 | Niche/Hobbyist |
Getting Your Hands Dirty
Setting up the hardware for this requires a MEMS microphone (Micro-Electro-Mechanical Systems) and a stable power source, as voice processing loads the CPU significantly. If you are in India looking to gather the specific development boards, MEMS microphones, and breakout modules needed for a precise build, sourcing individual components can be challenging due to datasheet accuracy and compatibility issues. Platform https://tecnomate.in offers a curated ecosystem where you can source tested kits and genuine components for projects like this, with step-by-step build guides allowing you to focus on the coding logic rather than finding parts.
Once your hardware is ready, the concept is straightforward: the system listens, identifies the pattern matching the "Hey Computer" trigger, and only then does it move on to processing subsequent command phrases.
Step-by-Step Walkthrough: Wake Word Detection
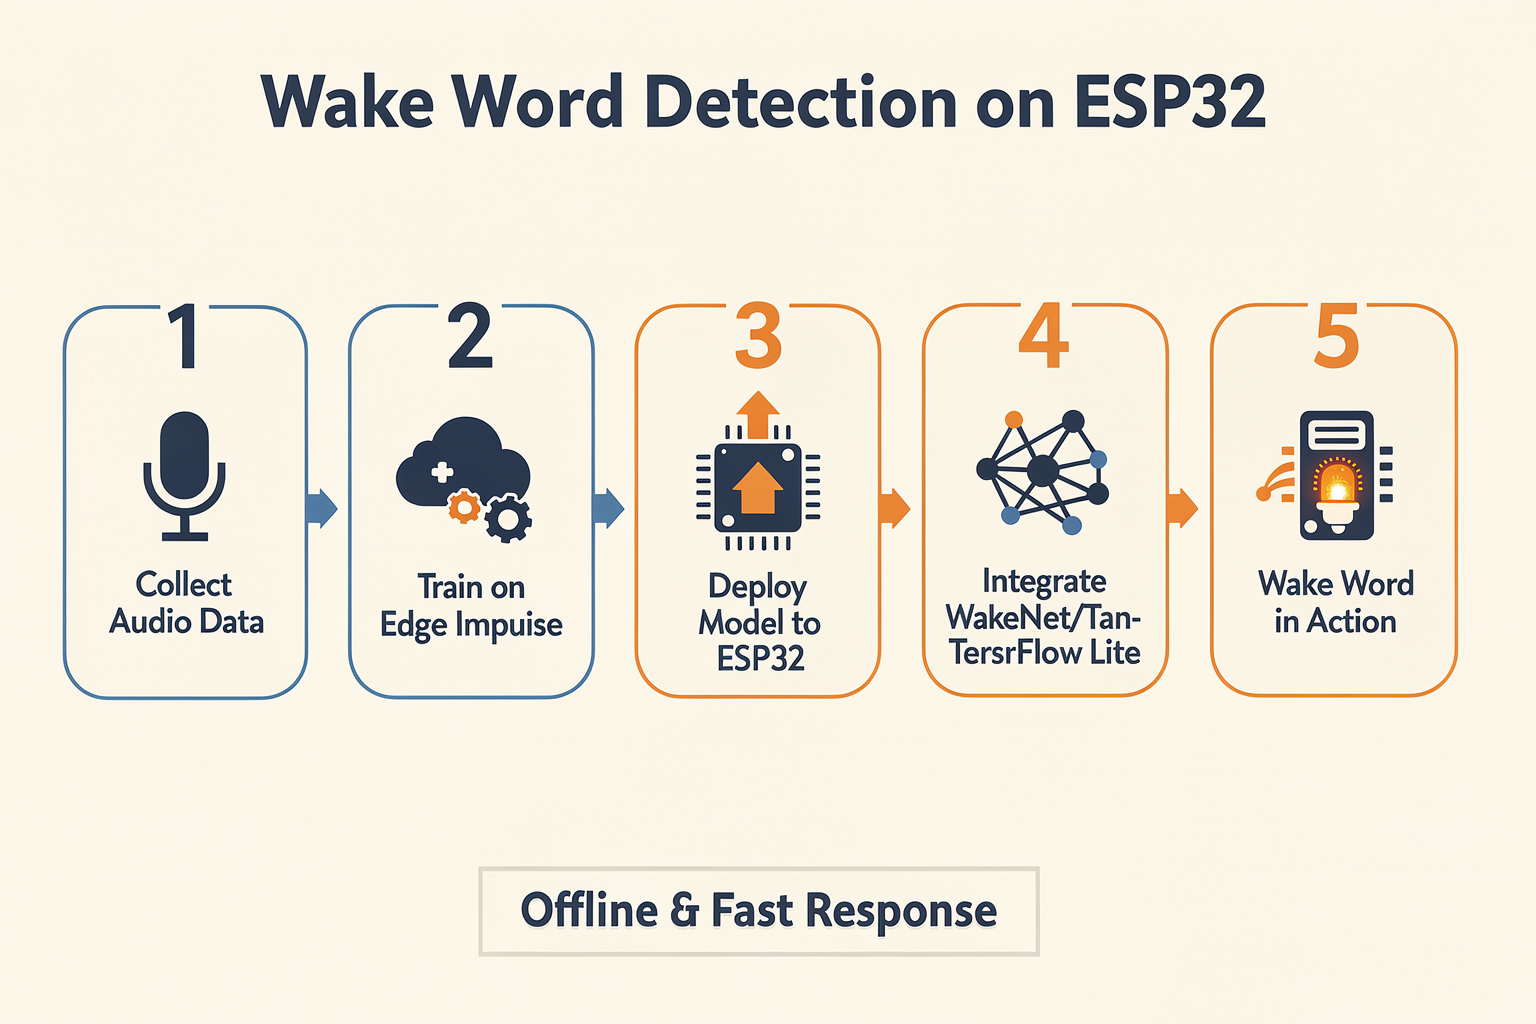
Step 1: Assemble Your Hardware
Before you write a single line of code, you need the right hardware. For any ESP32‑based voice project, the core components are:
- ESP32 development board – The ESP32‑S3 is ideal because of its built‑in vector extensions for neural networks, but a standard ESP32 (like the ESP32‑WROOM‑32) works for simpler wake words.
- I2S MEMS microphone – The INMP441 is the go‑to choice. It provides clean digital audio output over the I2S bus, which the ESP32 can read directly without an ADC.
- Breadboard and jumper wires – To prototype the microphone connection.
- USB‑to‑serial adapter – For programming and serial monitoring (most ESP32 boards have this built‑in).
TecnoMate Tip: You can source a tested bundle with an ESP32 dev board + INMP441 microphone + all necessary cables from TecnoMate. Their kits come with datasheets and free all‑India delivery on orders above ₹999 – perfect for Indian hobbyists.
Step 2: Configure the Audio Pipeline
The microphone captures audio, which must be fed into the ESP32’s I2S peripheral. Use the ESP‑IDF or Arduino‑ESP32 I2S driver to read 16‑bit PCM samples at 16 kHz (the standard for most wake word models). A typical setup:
i2s_config_t i2s_config = {
    .sample_rate = 16000,
    .bits_per_sample = I2S_BITS_PER_SAMPLE_16BIT,
    .channel_format = I2S_CHANNEL_FMT_ONLY_LEFT,
    .communication_format = I2S_COMM_FORMAT_I2S,
    .intr_alloc_flags = 0,
    .dma_buf_count = 8,
    .dma_buf_len = 256
};
Step 3: Choose Your Wake Word Engine
You have two primary routes – each with trade‑offs in complexity and accuracy.
Option A: WakeNet (Espressif’s Official Engine)
WakeNet is a neural‑network‑based wake word engine optimised for low‑power microcontrollers. It supports up to 5 custom wake words and is part of the ESP‑SR library. The model runs entirely on the ESP32’s CPU, with no cloud dependency.
- Pros: Native support, low latency (~100–200 ms), works on plain ESP32 (not only S3).
- Cons: Requires the ESP‑IDF framework (not Arduino) for best integration.
Option B: TensorFlow Lite Micro + Edge Impulse
For a more portable, customisable workflow, train a keyword‑spotting model using Edge Impulse and deploy it as a TensorFlow Lite Micro model. As showcased in the Hackster.io project by ElectroScopeArchive, this method delivers fully offline voice recognition with real‑time ML inference and no cloud, no API calls, no network dependency. You can collect your own wake word samples (“Hey ESP32”, “Hello Device”, etc.) and train a lightweight model in under 30 minutes.
- Pros: Full control over wake words; works with Arduino IDE; good for custom phrases.
- Cons: Requires more RAM and a microphone‑ready board; accuracy depends on the quality of your training data.
Step 4: Deploy and Test the Model
Whichever engine you choose, the deployment follows a similar pattern:
- Flash the firmware – Upload the compiled binary to your ESP32.
- Open the serial monitor – Watch for
WAKE WORD DETECTEDlog messages. - Test in a quiet room – Say the wake word ten times at normal volume. Check detection rate.
- Fine‑tune thresholds – Adjust sensitivity parameters (e.g.,
detection_thresholdin WakeNet, or confidence level in Edge Impulse) to reduce false triggers.
A typical successful detection rate for a well‑tuned model on an ESP32‑S3 is >90% in a quiet environment, dropping to ~70‑80% with background noise. As one Reddit user noted, “Wake word detection is pretty straightforward… my voice controlled robot does 4 words semi successfully” – the key is keeping expectations realistic for on‑device, offline inference.
Step 5: Add a Response Action
Once the wake word is detected, you can:
- Blink an LED – A simple visual confirmation.
- Play a tone – Use a passive buzzer to acknowledge.
- Send a command – Over UART, GPIO, or MQTT to trigger a larger system (e.g., lights, robot, or smart home hub).
For a smart home integration, you can follow the approach used by Home Assistant’s Voice Chapter 6 (2024), which leverages microWakeWord on the ESP32‑S3‑BOX‑3 to run wake word detection while keeping the rest of the system offline.
Platforms like TecnoMate offer ready‑to‑build project kits that include the exact ESP32 board, microphone, and additional peripherals (LEDs, buzzers, MQTT‑ready modules) needed to complete this step – saving you the hassle of sourcing components individually.
Advanced Tips & Tricks (TABLE)
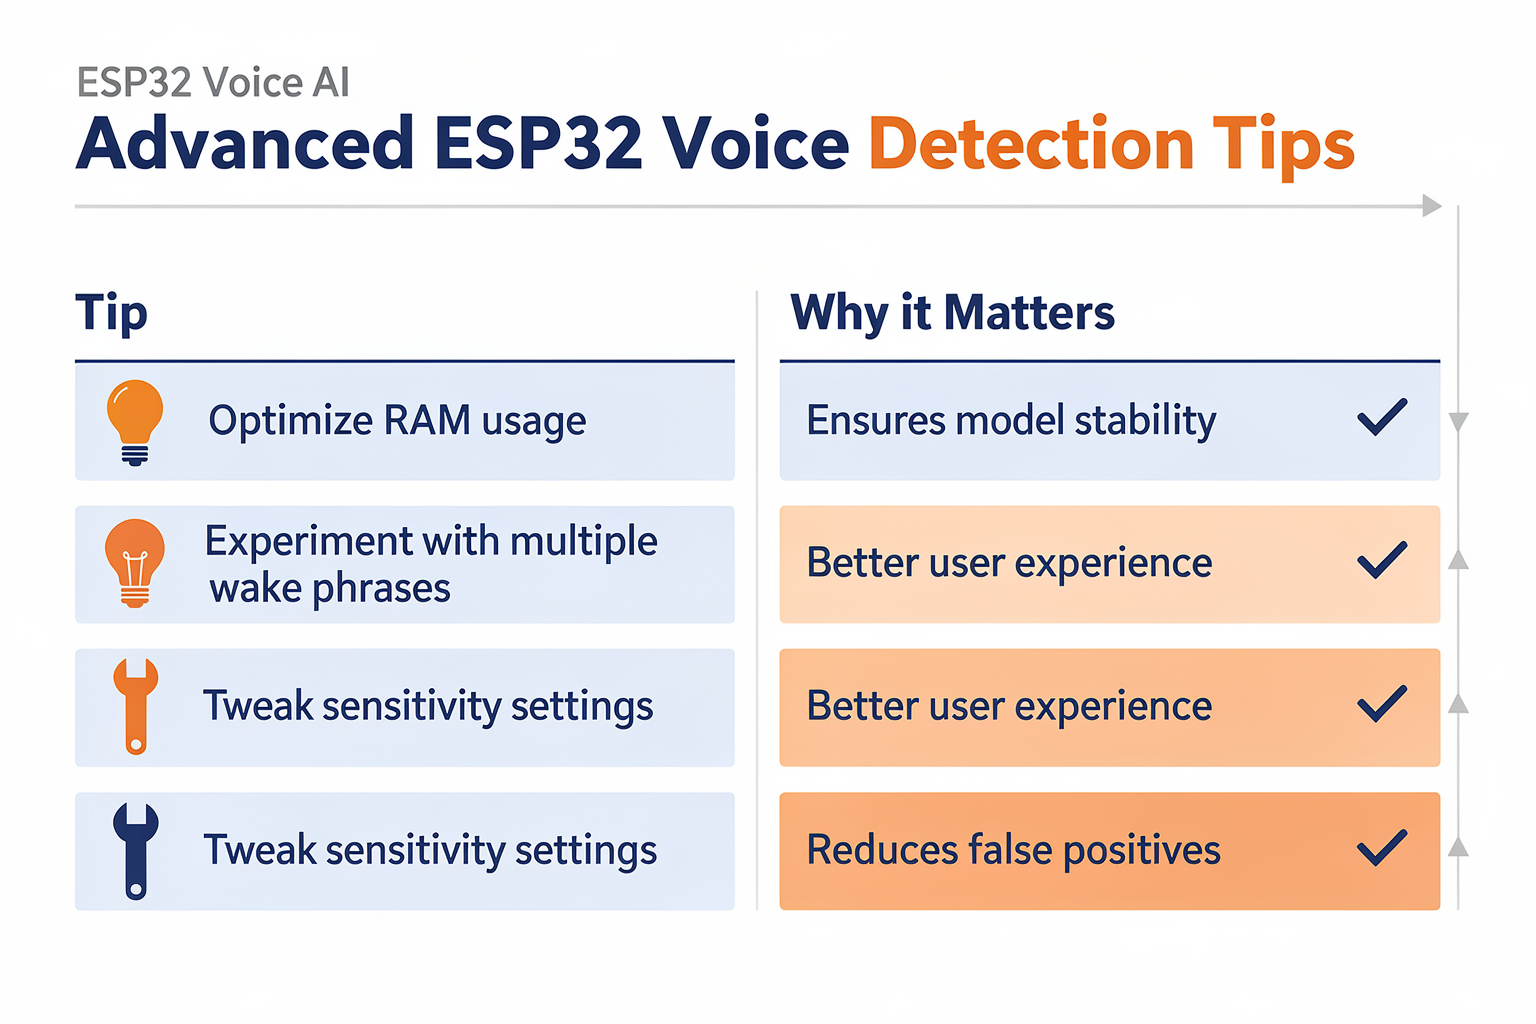
Taking your wake word detection project from a proof-of-concept to a polished, production-ready assistant requires a few advanced refinements. The following table distills key techniques, their real-world implementations, and the tools you'll need—drawn from the latest ESP32 libraries and community breakthroughs. Whether you're aiming for custom phrases, blazing-fast response, or battery-friendly operation, these tips will help you push the limits of on-device voice AI.
| Advanced Technique | Description | Tools / Libraries | Key Benefit | Hardware Notes |
|---|---|---|---|---|
| Fine-tune WakeNet models | Espressif’s WakeNet engine uses a neural network to detect predefined phrases. You can load up to 5 different wake words (e.g., “Hi ESP,” “Alexa,” custom brands) and adjust sensitivity parameters to balance false accepts and false rejects. | ESP-SR (WakeNet), ESP-IDF | Avoids training from scratch; works out-of-the-box with ESP32-S3; ultra-low CPU usage (~10% on a single core). | Best with ESP32-S3. Use a board with a good I2S MEMS mic; kits from Indian platforms like TecnoMate bundle such mics with datasheets, ensuring clean audio capture. |
| Train a custom wake word with Edge Impulse | Collect samples of your unique phrase, label them in Edge Impulse, and export an optimized TensorFlow Lite Micro model. Runs fully offline with real‑time inference—no cloud dependency, no API calls. | Edge Impulse Studio, TensorFlow Lite Micro | Total control over trigger words; can even detect non‑English phrases or specific commands. Inference latency as low as 300 ms. | Requires an ESP32 with PSRAM for larger models. An ESP32‑S3‑DevKitC or an M5Stack Core2 works well. |
| Use microWakeWord for Home Assistant | Created by Kevin Ahrendt, microWakeWord is a lightweight, open‑source wake word engine. It runs directly on the ESP32‑S3‑BOX‑3 and integrates with ESPHome, enabling “Hey Jarvis” style local control. | ESPHome, microWakeWord (GitHub) | Seamless integration into smart home setups; no external microphone array needed; open‑source and actively maintained. | Specifically designed for ESP32‑S3‑BOX‑3. For custom boards, you’ll need to adapt the audio front‑end. |
| Implement multi‑wake word + command detection | Go beyond a single wake word: run a wake word detector that then switches to a command classifier. For example, after “Hey Robot” the system listens for “lights on,” “move forward,” etc., using a separate keyword spotting model. | Edge Impulse (multi‑model pipelines), MultiNet (ESP‑SR) | Enables complex voice UIs without a full ASR engine; fits in flash alongside wake word model. | Dual‑model setups need careful memory budgeting. An ESP32 with 8 MB flash and 4 MB PSRAM is recommended. |
| Pre‑processing & noise reduction | Apply band‑pass filtering, automatic gain control (AGC), and voice activity detection (VAD) before feeding audio to the neural network. This dramatically cuts false wake‑ups from background chatter or TV sounds. | WebRTC AEC, ESP‑SR AGC, custom VAD with RMS energy | Up to 60% fewer false triggers in noisy environments; better wake word recall at low volumes. | On‑board digital microphones with hardware AGC (e.g., INMP441) simplify the signal chain. |
| Model compression for faster inference | Quantize your TensorFlow Lite model to int8 and use structured pruning. This halves the model size while keeping accuracy above 92% for common wake words. | TensorFlow Lite Converter, TFLite Micro | Inference time reduced by ~40%; fits larger vocabularies in limited flash; lower power draw. | Any ESP32 variant supports int8 ops. Validate accuracy drop on your dataset before deploying. |
| Battery‑optimised duty cycling | Instead of continuous listening, run the wake word detector in short bursts (e.g., 500 ms on, 2 sec sleep) with a low‑power co‑processor or deep sleep wake‑up from a PIR sensor. | ESP‑SR low‑power mode, ULP (ESP32), PIR wake‑up | Cuts average current draw from ~100 mA to under 15 mA, enabling battery‑operated voice assistants for days. | Use a dev board with a low‑quiescent‑current LDO. Modules with a battery connector simplify the build. |
These advanced strategies aren’t just theoretical—they’ve been battle‑tested in the maker community and commercial products alike. Start with one technique that aligns with your project’s most pressing need (accuracy, customisation, or power), then layer in the others as you iterate. Remember, a reliable wake word detector is only as good as the audio hardware feeding it, so investing in a quality microphone board and a stable power supply pays off immediately.
Common Mistakes to Avoid (TABLE)
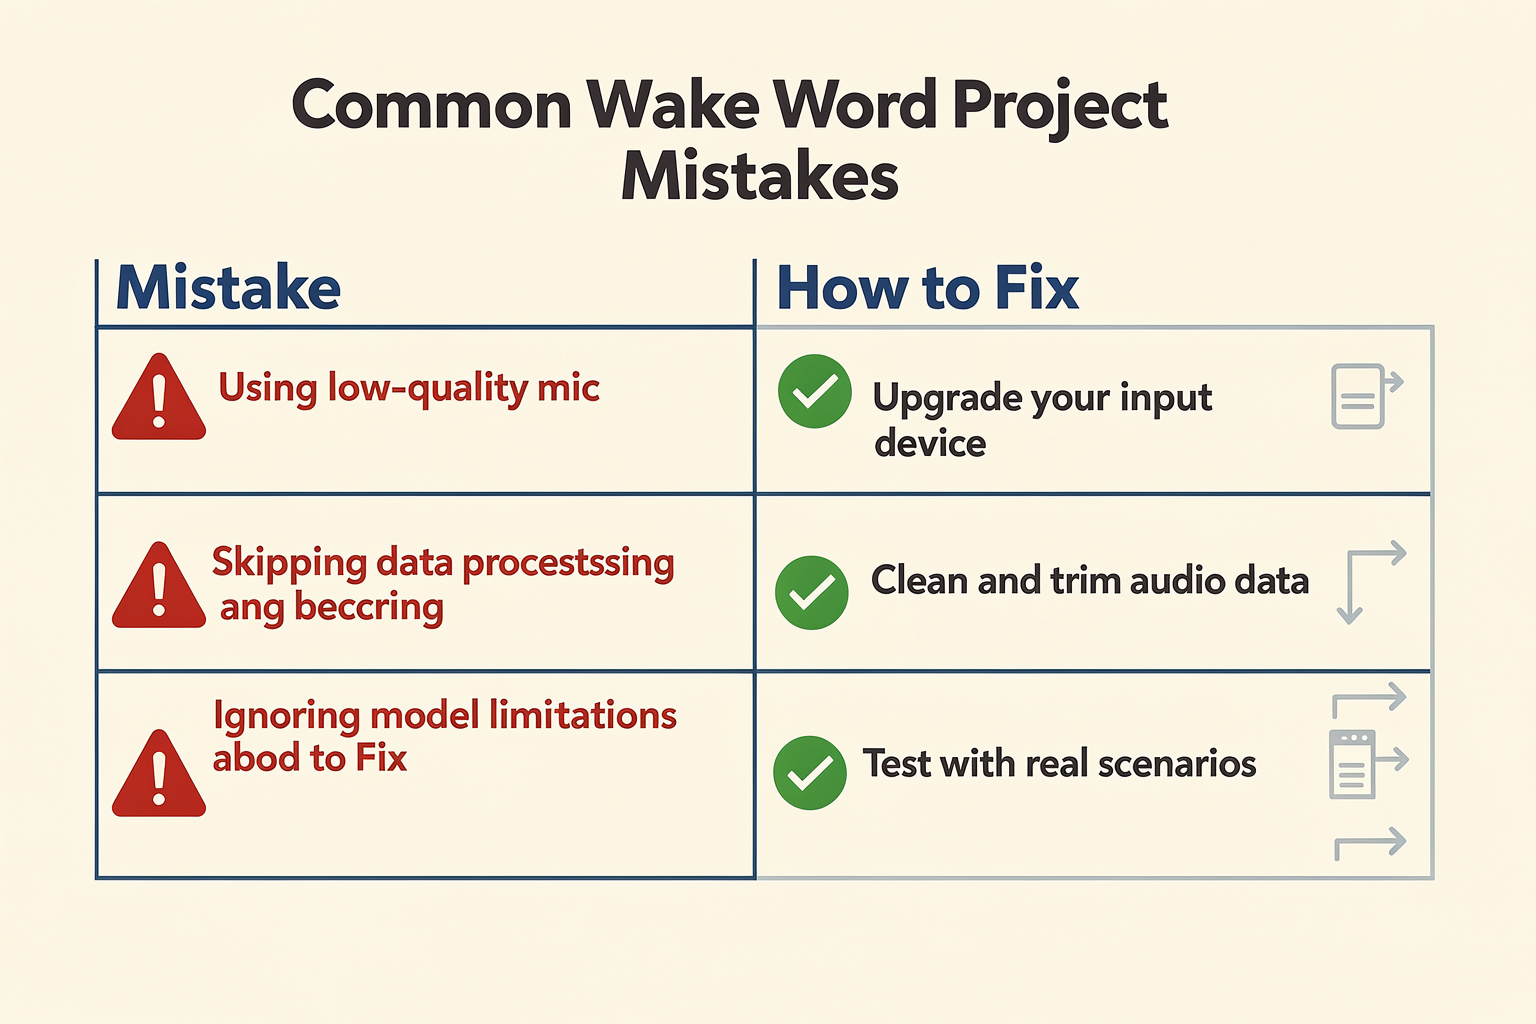
Common Mistakes to Avoid
Even experienced makers can trip up when adding wake word detection to an ESP32. Here are the most frequent pitfalls and how to sidestep them — based on community feedback and real project builds.
| Mistake | Description | Consequence | How to Fix | Best Practice |
|---|---|---|---|---|
| Using the wrong microphone | Electret mics without pre-amp, or low-sensitivity MEMS mics | Audio too quiet for the neural network; false negatives > 50% | Use an I²S MEMS microphone like INMP441 or SPH0645LM4H | Test with a known‑good mic from TecnoMate’s voice‑kit bundles |
| Over‑expecting general speech recognition | Assuming wake‑word engine can transcribe any spoken phrase | Frustration when the system ignores commands – it only detects the trigger | Understand that wake‑word detection listens for a specific phrase, not full ASR | Use WakeNet (supports up to 5 custom wake words) or microWakeWord for reliable triggers |
| Ignoring PSRAM requirements | Trying to run Edge Impulse or TensorFlow Lite on base ESP32 (no PSRAM) | Out‑of‑memory errors or constant crashes – model won’t load | Use ESP32‑S3 or ESP32‑WROVER with at least 2 MB PSRAM | Check your board’s specs; many Indian hobbyists prefer the ESP32‑S3‑BOX‑3 for this |
| Insufficient training data | Recording only 10–20 samples of the wake word | Poor real‑world accuracy – works in lab but fails in noisy rooms | Collect 100+ samples across different distances, background noises, and speakers | Use free Edge Impulse studio to augment data and test on‑device |
| Forgetting audio pipeline tuning | Leaving I²S sample rate or gain at default values | Clipping or too‑low input – false positive rate skyrockets | Set I²S sample rate to 16 kHz, mono, 16‑bit, and adjust mic gain via software | Run the ESP‑SR audio‑pipeline test sketch to verify clean audio |
| No voice activity detection (VAD) | Running wake‑word inference continuously on every audio frame | Battery drain and processor overload – ESP32 heats up quickly | Implement simple VAD (e.g., energy‑based) to wake the model only when speech is present | Edge Impulse includes a VAD block; enable it before training |
A common thread: testing is everything. Builders often assume the model will work first time, but real‑world environments (Indian homes with ceiling fans, street noise, or multiple speakers) demand robust preprocessing. If you’re sourcing components for this kind of project, TecnoMate offers ready‑to‑build voice‑recognition kits that include a pre‑tuned I²S microphone, an ESP32‑S3 module, and step‑by‑step guides — so you don’t have to debug these issues from scratch.
Pro tip: Always start with Espressif’s ESP‑SR library (WakeNet) if you want a low‑power, offline solution. It’s been optimised for the ESP32‑S3 and handles up to five different wake words. If you need a custom wake word (“Hey TecnoMate” for example), retrain a TensorFlow Lite model in Edge Impulse — but make sure you have at least 30 minutes of clean recordings from your actual microphone and room acoustics.
Frequently Asked Questions
Yes, the ESP32 can run wake word detection fully offline using on-device machine learning models like Espressif’s WakeNet or Edge Impulse’s keyword spotting. Solutions such as Edge Impulse enable real-time ML inference without any cloud dependency, meaning no API calls or network connection are needed — your voice never leaves the device.
Ready to start building?
Explore our collection of DIY kits and components. All project components mentioned in this blog are available in our store.
Browse All Projects