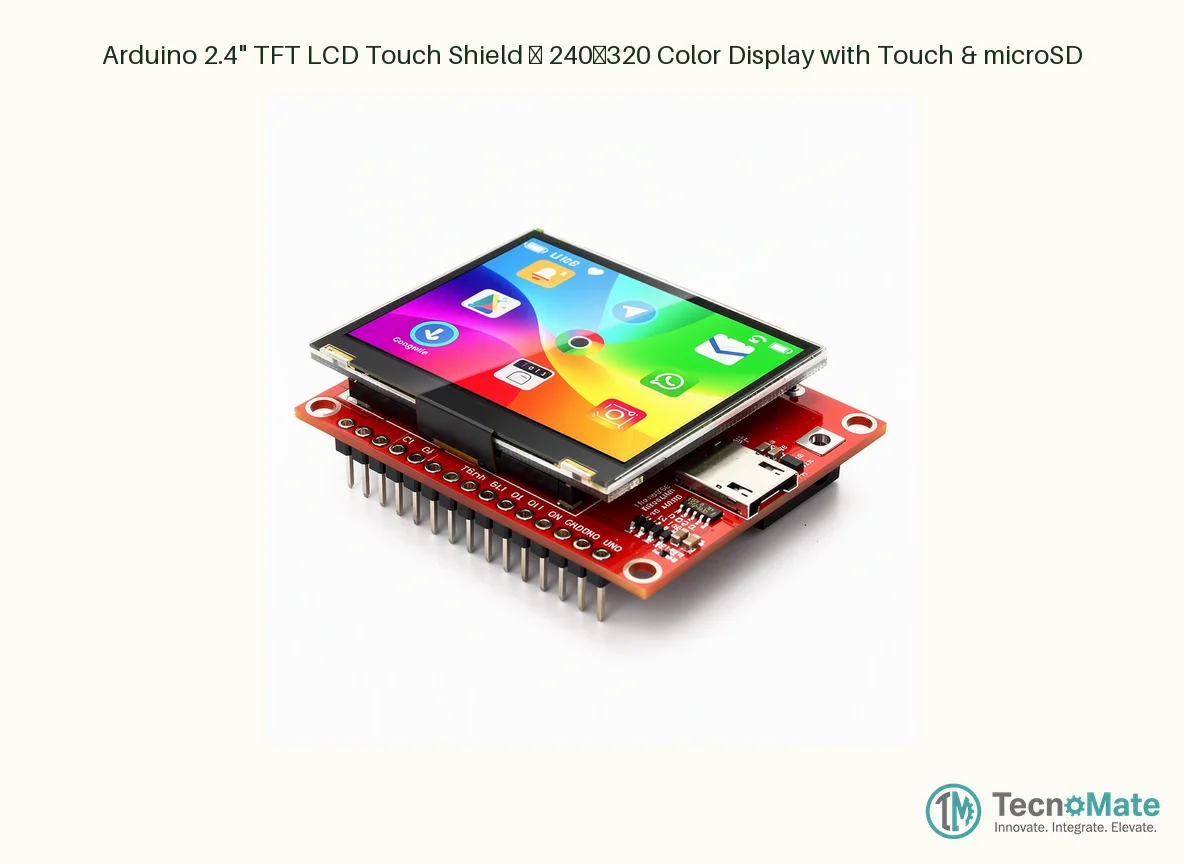
Arduino 2.4" TFT LCD Touch Shield – 240×320 Color Display with Touch & microSD
The Arduino 2.4" TFT LCD Touch Shield is a feature-packed display shield that snaps directly onto your Arduino Uno or Mega2560, instantly giving your project a vibrant, interactive graphical interface. With a 240×320 pixel resolution and 18-bit color depth capable of rendering over 262,000 distinct colors, this shield transforms any Arduino project with full-color menus, gauges, graphs, buttons, and touch-driven user interfaces.
At its core, this shield uses a proven TFT driver IC — either the widely supported ILI9341 or the SPFD5408 controller (depending on the manufacturing batch) — both of which have mature, open-source libraries available in the Arduino IDE (Adafruit_ILI9341, Adafruit_GFX, MCUFRIEND_kbv, and UTFT). You can draw shapes, display bitmap images, render custom fonts, and plot sensor data with just a few lines of code. The resistive touch screen overlay detects finger or stylus input across the entire 2.4-inch active area, allowing you to build touch-controlled menus, on-screen keypads, home-automation dashboards, and interactive games.
One of the shield's standout practical features is the onboard microSD card slot. This lets you store large image files, data logs, configuration files, or even full bitmap UI assets directly on a removable card — freeing up precious Arduino flash memory. The shield is powered directly from the Arduino's 5V rail and includes an onboard 3.3V LDO regulator (300mA) that supplies the TFT panel and SD card. Note that while the shield accepts 5V supply, the TFT logic operates at 3.3V — most shields include resistive voltage dividers or buffer ICs on the data lines for basic level adaptation, though it's wise to verify your specific variant's level-shifting implementation.
Pin usage on a typical Uno-compatible shield: the 8-bit parallel data bus occupies D2 through D9, with control lines on A0 (RD), A1 (WR), A2 (RS), A3 (CS), and typically A4 (RST). The microSD card communicates via the hardware SPI bus on D11 (MOSI), D12 (MISO), D13 (SCK), with chip-select on D10. The resistive touch panel's analog readout uses a subset of the analog pins shared with the control bus. This pin mapping means D0 (RX) and D1 (TX) remain free for serial communication, and A5 (SCL) is usually free for I²C clock — making it possible to add certain external sensors alongside the shield with some planning.
Whether you're building a weather station dashboard, a portable oscilloscope, a home automation control panel, an arcade game, or a data-logger with live graphs, this shield brings professional-grade visual output to your prototype without the cost and complexity of external monitors. It's one of the most popular Arduino display shields in the Indian maker community, widely used in engineering college projects, IoT prototypes, and STEM education kits.
The Arduino 2.4-inch TFT LCD Touch Shield is a plug-and-play graphical display solution that stacks directly onto Arduino Uno and Mega2560 boards. With a crisp 240×320 pixel resolution and the ability to render 262,000 colors (18-bit), this shield instantly upgrades any microcontroller project with a full-colour interactive interface.
Why this shield stands out: Unlike generic SPI TFT breakout modules that require messy breadboard wiring, this shield mates perfectly with the Arduino's female header rows — just align and press down. The 2.4-inch diagonal screen size hits the sweet spot: large enough to build meaningful UIs with touch buttons and readable text, yet compact enough that it doesn't overpower your breadboard setup or enclosure.
The resistive touch panel is a game-changer for student projects and prototypes. It works with any stylus, fingernail, or blunt object — no capacitive-sensing limitations. You can divide the screen into virtual buttons, create sliders, draw on a canvas, or build a full touch-keyboard for text entry. All touch coordinates are read through analog pin polling using libraries like Adafruit_TouchScreen.
Graphics performance is smooth for an 8-bit parallel interface shield. The ILI9341 (or SPFD5408 on some variants) controller handles all the pixel-pushing, so your Arduino only needs to send drawing commands over the 8-bit data bus. The Adafruit_GFX library gives you a rich set of drawing primitives: lines, rectangles, circles, rounded rectangles, triangles, character text in multiple sizes, and even bitmap rendering from PROGMEM or the microSD card. You can rotate the display orientation in software (portrait or landscape) with a single function call.
The built-in microSD card slot is accessible through a separate SPI interface. This means you can load full-colour BMP images from the SD card and display them on the TFT — a killer feature for projects that need a polished, image-rich UI. The same SD slot doubles as a data logger: write sensor readings to a CSV file on the card, then pull it out and open in Excel. For engineering students doing final-year projects, this SD+TFT combo alone can form the entire user interface and data storage subsystem.
From a hardware standpoint, the shield includes a robust 3.3V low-dropout regulator rated at 300mA, which powers both the TFT panel and the SD card from the Arduino's 5V rail. The PCB is a high-quality red or blue solder-masked board with clearly labeled pin headers. All through-hole soldering is factory-done, and the shield ships with male header pins pre-soldered — you can plug it in straight out of the box.
Important pin mapping note for Uno users: the 8-bit parallel data bus uses D2 through D9, control signals use A0 through A4, and SD card SPI uses D10-D13. This leaves D0 (RX) and D1 (TX) free for serial, and A5 (SCL) free for I²C clock. If your project needs both I²C SDA and SCL, check your shield variant — some remap the reset pin and may leave A4 (SDA) available as well. The specific pin freedoms can vary by manufacturer batch, so always verify with the seller or test with a simple pin-scan sketch before designing your full circuit.
Common applications: IoT dashboards displaying real-time sensor data from DHT11/DHT22, BMP280, or soil moisture sensors; portable oscilloscopes using the Arduino's ADC; home-automation touch panels that control relays and read temperature; arcade games with on-screen controls; GPS navigation displays showing maps and coordinates; digital photo frames loading images from SD; and biomedical monitoring displays for heart-rate or SpO2 sensor readouts.
In the Indian context, this shield is incredibly popular among engineering students in ECE, EEE, and CSE streams for mini-projects and final-year capstone projects. It's affordable compared to Nextion or 3.5-inch shields, has abundant tutorial coverage on YouTube and Indian maker forums, and is readily available through Robocraze, KitsGuru, ElectronicsComp, Amazon.in, and local electronics markets like SP Road (Bangalore) and Lamington Road (Mumbai).
One caveat buyers should know: the resistive touch overlay reduces brightness slightly and has a subtle texture. It's not a smartphone-grade capacitive screen — but for the price, it's remarkably functional and reliable. Also, always check which driver IC your specific unit has (ILI9341 vs SPFD5408) because the initialization code differs slightly between them. Most Indian-market shields from 2022 onward ship with ILI9341, but it's good practice to verify with the seller before buying.
Overall, if you need to add a graphical touch interface to your Arduino project without breaking the bank, the 2.4" TFT LCD Touch Shield is the go-to choice in the Indian maker ecosystem — battle-tested, well-documented, and supported by a massive community of developers and hobbyists.


 Arduino Boards & Compatibles